
In 2024, Rootjunky APK To Bypass Google FRP Lock For Nokia C12 Plus

Rootjunky APK To Bypass Google FRP Lock For Nokia C12 Plus
Factory Reset Protection (FRP) is a security feature built into Android devices running Android 5.1 Lollipop and later versions. It prevents someone from using your phone after a factory data reset without Google account login credentials. The FRP makes it much less attractive for thieves to steal Android phones, knowing they will need help to access them.
FRP automatically activates when you add a Google account to your Android phone. It links the Nokia C12 Plus device to your account, making it the “trusted owner.” Once activated, FRP becomes embedded in the phone’s system.
While Google FRP is a valuable security feature, it’s vital to acknowledge that there are legitimate situations where bypassing it might be necessary. These instances include forgotten Google account credentials, buying a second-hand device, and device issues. In these cases, tools like RootJunky can help you bypass FRP Lock. We’ll explore how to use RootJunky APK later, but first, let’s define what it is and its role in FRP bypass.

The RootJunky APK is a free Android application also called RootJunky SDL or RootJunky FRP Bypass tool. This app’s primary function is to bypass the Google Account FRP lock on Samsung devices. Rootjunky uses the weaknesses in Android’s setup process to create a new user account or switch existing ones, letting you bypass the FRP and regain control of your phone.
You can complete this process using the app by connecting your phone to a computer through an OTG cable. RootJunky can be helpfu l if you’ve forgotten your Google account password or bought a second-hand phone locked to someone else’s account. However, only use it if you have legitimate reasons to bypass FRP lock, like accessing your device after forgetting your Google account details.

Downloading the RootJunky FRP bypass tool from unofficial sources can introduce malware risks, so stick to trusted sources like the official website. Additionally, when exploring RootJunky, it is vital to keep the following in mind:
- Not all Android devices are susceptible to the methods used by RootJunky. It is necessary to check compatibility with your specific device model and Android version.
- Using FRP bypass tools like RootJunkycan potentially compromise the security of your device. Be cautious and proceed if you fully understand the risks involved.
- Bypassing FRP may involve data loss.
- Download RootJunky FRP bypass APK from a reliable source to minimize the risk of malware or viruses. You can check the APK file from official websites or trusted forums.
- Google constantly updates its security measures, so these tools may not always work effectively.
Part 2: How To Use RootJunky To Bypass Google FRP?
Here are the general steps to use the FRP Bypass APK RootJunky app to bypass Google FRP lock. But remember that specific steps may vary depending on your device and Android version:
- Step 1: On your computer, download the Rootjunky RealTerm program from the official Rootjunky website.

- Step 2: On your phone, download the Rootjunky APK (com.rootjunky.frpbypass-1.0.apk) file from the official website or other reputable sites.
- Step 3: Go to Settings > Security and tap Install unknown apps. Then, enable unknown sources to allow installation of apps from outside the Play Store. Connect your device to a Wi-Fi network.

- Step 4: On your Android phone, open a file explorer app and install the downloaded RootJunky APK file.
- Step 5: Connect your smartphone to your computer using a USB cable.
- Step 6: Launch the Rootjunky RealTerm program on your computer. Under the Display tab, check the Half Duplex option.
- Step 7: On your computer, go to Device Manager > Modems. Locate your device’s port name (e.g., COM3).
- Step 8: On the RealTerm program, enter the correct port number under the Ports tab, then click Change.

Step 9: Click Send to establish a connection. Enter the two commands:
at + creg? \ r \ n
atd1234; \ r \ n
Step 10: Once connected, the Rootjunky APK on your phone will provide on-screen instructions to bypass FRP.
Step 11: If prompted, perform a factory data reset of your device.
While RootJunky offers a free method for FRP bypass, it can be incompatible with your device’s brand, requiring technical knowledge, tedious, and potentially risky. If you are looking for a simpler, safer, and more user-friendly solution, Wondershare Dr.Fone might be a better fit for you. If you want to learn how to use this tool to bypass FRP lock with minimal technical expertise, then keep reading.
Part 3: Easier Tool Than RootJunky APK To Bypass Google FRP
Google FRP adds an extra layer of security after a device reset. However, regaining access to the smartphone can be challenging if you forget your Google account details, forget your lock screen, or just buy a used device. While methods like the FRP RootJunky app exist, using it can be complex or risky.
Consider exploring third-party options like Dr.Fone for a potentially easier and safer FRP bypass solution. Dr.Fone Screen Unlock tool helps remove the Android FRP lock without requiring a PIN or Google Account.
Why Use Dr.Fone - Screen Unlock?
Here are some of the key features of Dr.Fone - Screen Unlock:
- **User-friendly:**Fone boasts an intuitive interface, eliminating the need for technical expertise. Even beginners can navigate the process with ease.
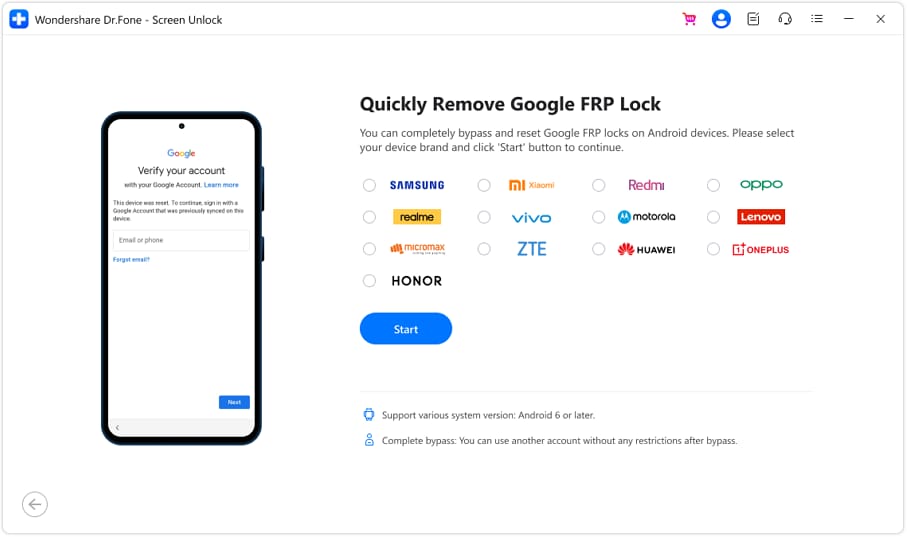
- **Widespread Brand Compatibility:**Fone supports mainstream brands, such as Samsung, Xiaomi, Oppo, Redmi, Realme, and Vivo, catering to a broader user base.
- **Fast and Efficient:**Regain access to your device in minutes without wasting time on tedious procedures.
Step-by-step Guide to Removing FRP Lock With Dr.Fone - Screen Unlock
Ready to leave the hassle of using RootJunky and easily bypass the FRP lock? Download and install Dr.Fone on your computer, then follow these steps to learn how to bypass Google FRP on your device:
- Step 1: Launch Dr.Fone on your computer and connect it to your Android device. Choose Screen Unlock from the Toolbox in the main interface.

- Step 2: Choose Android as your device type. This will take you to the next screen, where you can select Remove Google FRP Lock to proceed.

- Step 3: Select your device’s brand from the list and click Start to continue.
Note:
The next steps may vary depending on the brand you selected.
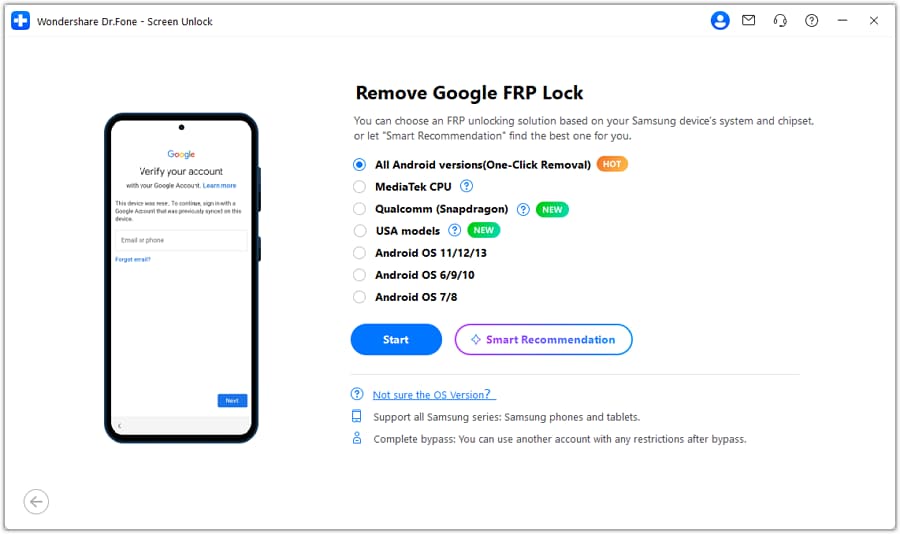
- Step 4: Select the OS version of your device and click Start to continue.
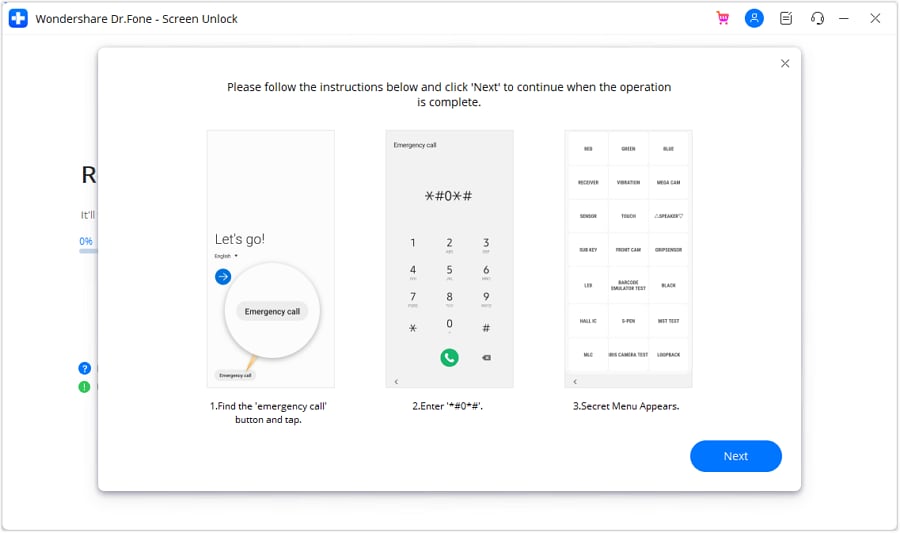
- Step 5: Access the secret menu on your phone using the on-screen instructions, then click Next to proceed to the next step.
- Step 6: When your Samsung prompts you to activate USB debugging, tap Allow. Then, on your computer screen, click Authorized to confirm.

- Step 7: You will see the FRP lock being bypassed on your Android device on the next screen.
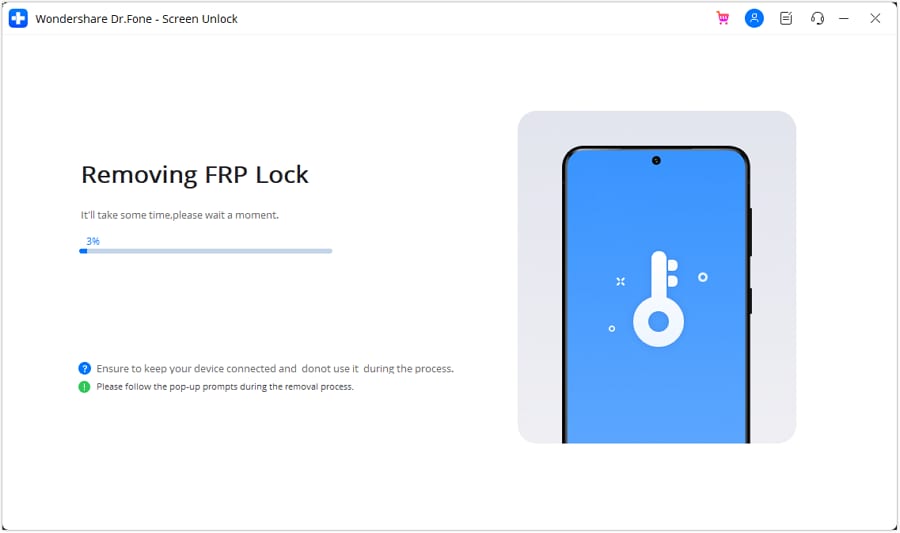
- Step 8: Click Done if the FRP lock removal was successful, otherwise, click Try Again to repeat the process.
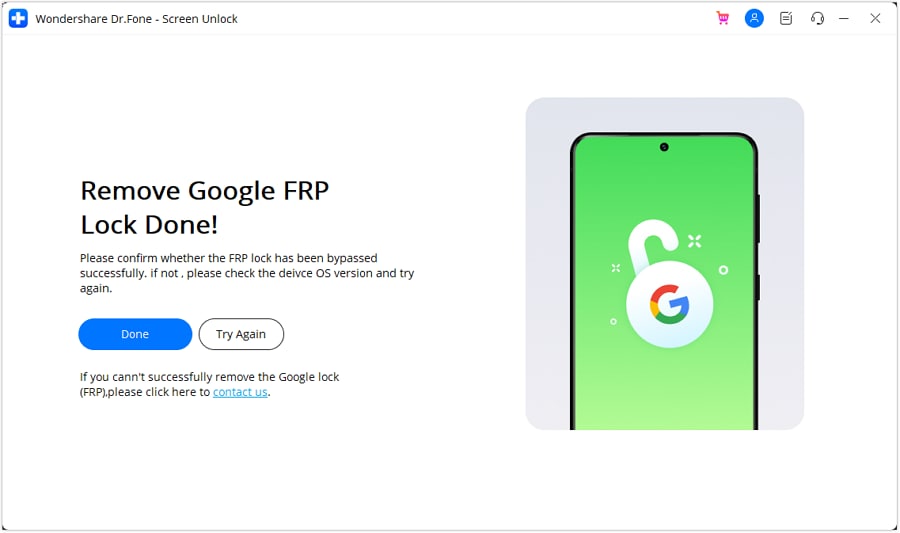
That’s it! With Dr.Fone Screen Unlock, you can easily bypass Google FRP and regain access to your Android device, leaving the complexities of RootJunky behind.
Tips: Are you searching for a powerful FRP bypass tool? No worries as Dr.Fone is here to help you. Download it and start a seamless unlock experience!
Conclusion
Both RootJunky and Dr.Fone offer options for you to regain control of phones with Google FRP lock. FRP Bypass RootJunky tool excels with its free-to-use approach, perfect for tech-savvy users comfortable with APK installations. While requiring a paid subscription, Dr. Fone provides pre-rooted firmware installations and broader device compatibility, which is ideal for those seeking a more streamlined but supported experience.
The best choice boils down to your personal needs and budget. Remember, FRP bypass should only be utilized by rightful owners facing genuine lockouts. When used responsibly, these tools can help you access your phone after a factory reset even without your Google account credentials. Choose the tool that best fits your needs and proceed with caution. Use these tools responsibly and regain access to your device the right way.
How to Unlock Nokia C12 Plus Phone Password Without Factory Reset?
You always set up some sort of lock to secure your smartphone to stop others from checking your phone data, messages, or pictures. More importantly, it is needed to deny admission to your valuable phone data in case it gets stolen. However, many times you come across this situation where your Android phones are stuck as you cannot unlock the password. Either your children have been playing with the lock patterns, and the screen gets locked due to entering the wrong password many times, or you have unexpectedly forgotten your password. Or somebody else has reset your password, or you have broken your mobile screen, and you cannot enter your password. Many similar situations may arise.
You are in the middle of some things, and you want to make some urgent calls. How to unlock Android phone passwords without a factory reset? What do you do then? There are very easy solutions to this that would help unlock your Android phone in no time without going for the factory reset and losing your valuable data.
Part 1: How to unlock Android password without factory reset using Dr.Fone - Screen Unlock?
Whether you have a pattern or PIN or fingerprint as a password, you can remove any type of password by using the Dr.Fone - Screen Unlock. The only defect is that your data will be wiped out after unlocking the phone successfully. It helps in removing the lock screen on Android phones. Now, if you are thinking about how safe it is, let me assure you that the process is very safe and simple, with no risk of data leakage. This process is supported by most Samsung and LG smartphones without data loss, and you just need to connect your handset to let the Dr.Fone - Screen Unlock start the procedure.


Dr.Fone - Screen Unlock (Android)
Get into Locked Android Phones without Factory Reset
- 4 screen lock types are available: pattern, PIN, password, fingerprints, face ID, etc.
- Support 20,000+ mainstream models of Android phones & tablets.
- Save you from ending up with a locked phone after too many wrong attempts.
- Provide specific removal solutions to promise good success rate.
4,008,669 people have downloaded it
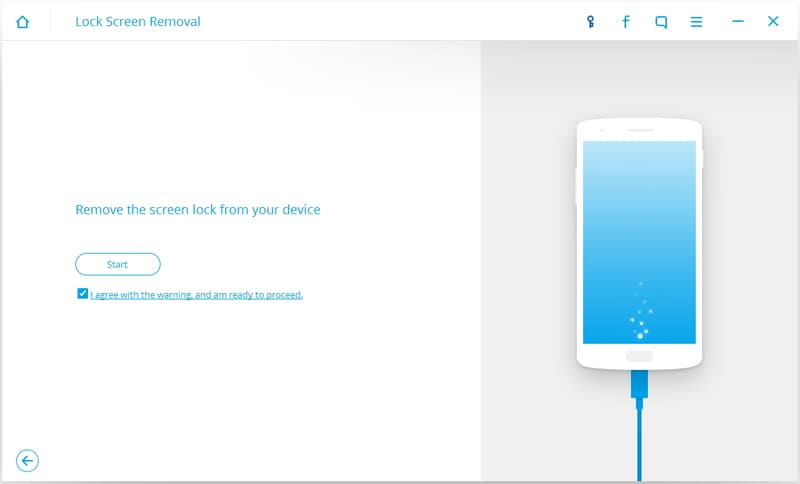
Follow the following steps to unlock your Android password without factory reset using Dr.Fone.
Step 1: Firstly, install and run Download Dr.Fone –Screen Unlock on your computer. And connect your Android phone to your computer with a USB cable > download.

Step 2: After that, select the phone model from the list or choose “I can’t find my device model from the list above” on the next screen.
Step 3: Now, there will be three steps mentioned that you must follow to get your phone into the Download mode. The first is to power off the phone. The second is to press and hold the Volume button along with the Home button and Power button. The third step is to press the volume up the option to get into the download mode.

Step 4: Once your phone is in download mode, the program will start downloading the recovery package and then unlock your Android password without factory reset or data loss.
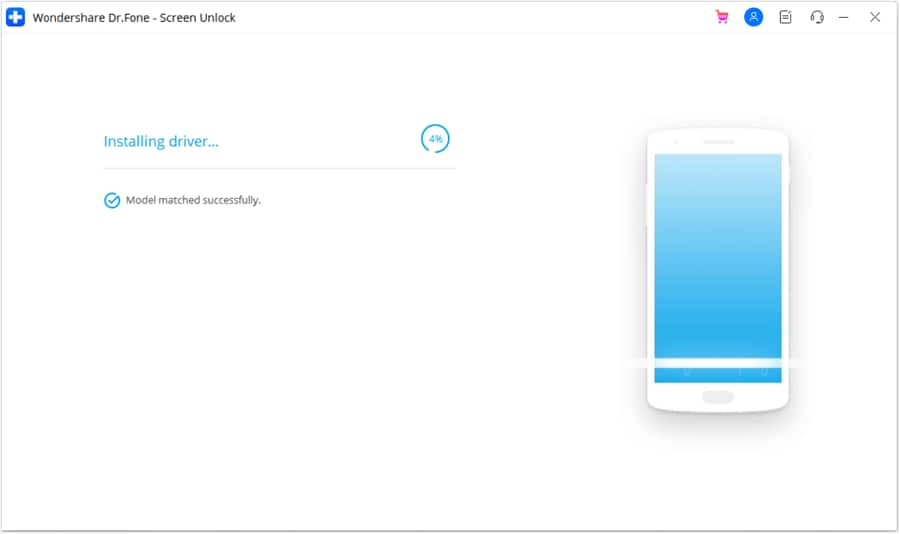
Step 5: You will see that the icon showing “Remove Password Completed” will pop up. This whole process takes only a few minutes to get your work done without any loss of any data.

Part 2: How to unlock Android password without factory reset using Android Device Manager?
With very simple steps and a few minutes at hand, you can get rid of your password using Android Device Manager (ADM). This tool will unlock your password without going for a factory reset and losing data. The main feature of the Android device manager will run through the Google account. The installation of a Google account is very important to run out the Android device manager. The Android device will respond immediately once if the phone is switched on. The connectivity of the internet is a must to find the map on the Nokia C12 Plus device. How to unlock Android phone passwords without factory reset? May it be quite interesting to use device manager visuals? The steps are mentioned below:
Step 1. Your Android phone is always linked to your Google account. So first and foremost, on your computer or on another mobile phone, open the site <www.google.com/Android/devicemanager> .
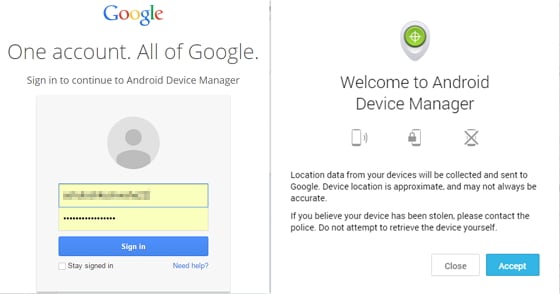
• Now sign in with your Google credentials. Google will start searching for your device. Here you need to choose the Android phone you want to unlock in case it is already not selected.
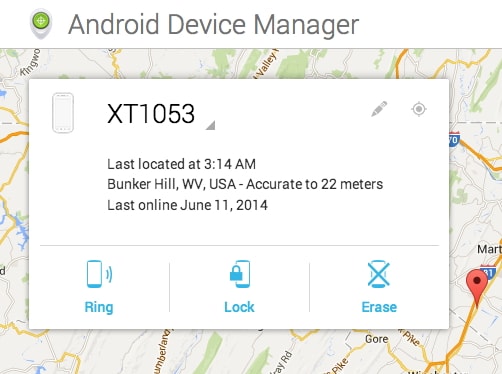
Step 2. Here you will see three options: “Ring,” “Lock,” and “Erase.” Select the “Lock” option
Step 3. A window will appear where you need to type any temporary password. Do not enter your Google password, and you need not enter the recovery message. Click on “Lock ” again.
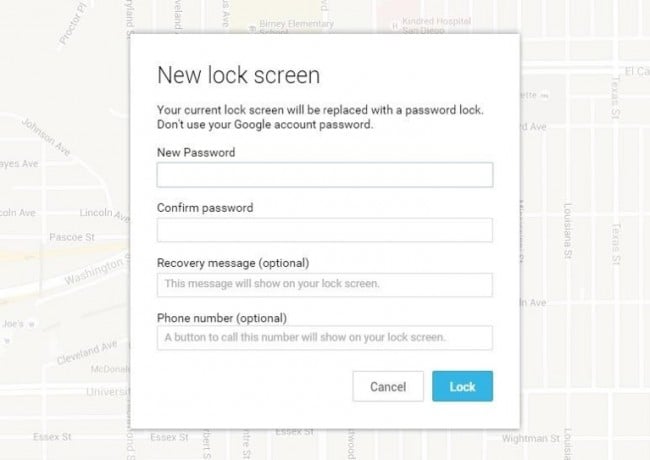
Once successful, you will get a confirmation message below the three buttons: Ring, Lock, and the Erase option.
Step 4. On your locked phone, you will see a field asking for your password. Here you can enter your temporary password. Doing so will unlock your device.
Step 5. Now in your unlocked phone, go to Settings and then to Security. Now click on disable to remove the temporary password, and later you change it with a new one.
You have successfully unlocked your device.
Part 3: Unlock Android password using custom recovery and Pattern Password Disable (SD card needed)?
The third way to unlock an Android phone password without a factory reset it using the “custom recovery” technique. To work out this process, you would have to install the custom recovery process. Also, your phone needs to have an SD card. It will be required to send the zip file to the phone since your device is locked. This technique requires access to the Android System folder and rooting your device if not already rooted.
Custom recovery is a usual mechanism in all smartphones. It predicts the troubleshooting techniques and how to process the main configuration with all sequences. Quite interesting, isn’t it?
Follow the following steps to complete and unlock the Android password without a factory reset.
- Step 1. First of all, download a zip file by the name “Pattern Password Disable” to the computer system and then transfer it to your SD card.
- Step 2. Then you would need to insert the SD card into your locked phone and then restart the Nokia C12 Plus device in recovery mode.
- Step 3. Next, move on to flash on the zip files to the card and restart. After that, your phone will boot and open up without the locked screen.
Note: Sometimes, the Nokia C12 Plus device may ask for a pattern or password. You just need to put in any random pattern/password then it will get unlocked.
Through this easy method, you can now access your Android phone without using a factory reset and losing your valuable data.
The problem of getting your mobile locked and not being able to open it is a common problem on Android phones these days. Many of us tend to panic when such problems arise. However, now that we have given some easy solutions and methods to unlock Android phone passwords without factory reset and losing any data, things would be much easier. Thus, you will solve your problems in no time.
Top Apps and Online Tools To Track Nokia C12 Plus Phone [With/Without IMEI Number]
Losing your smartphone can be distressing, given its importance in daily life. Ensuring the ability to trace the whereabouts of a misplaced device holds great importance. It is due to potential theft, loss, or accidental misplacement.
Fortunately, many ways exist to retrieve a lost mobile phone by utilizing its IMEI number. This article will take you through the anti-theft app & IMEI tracker of all phone location methods. Additionally, we will discuss a unique tool designed to unlock locked devices.
Part 1: An Introduction to IMEI Numbers and Its Utility
Every mobile device has a special identifier that is helpful in the anti-theft app & IMEI tracker activities. It is known as the International Mobile Equipment Identity or IMEI number. While often overlooked, it holds the key to many essential services and functions.
This makes it an indispensable component of modern mobile technology. The IMEI number serves as a digital fingerprint for mobile phones. Its primary purposes are summarized below:
- Device Identification: Each mobile device possesses a distinct IMEI number. This sets it apart from every other phone in existence. This identification is essential for cellular networks and service providers. It helps in recognizing, managing, and connecting devices accurately.
- Traceability and Tracking: In cases of theft, loss, or unauthorized use, the IMEI number becomes a crucial tool for tracking. It provides law enforcement agencies with the means to pinpoint the Nokia C12 Plus device’s location.
- Warranty and Support: Manufacturers use IMEI numbers to manage warranties and provide technical support. These numbers help confirm the Nokia C12 Plus device’s authenticity, purchase date, and warranty coverage. This streamlines the process of repairs and replacements.
- Security Measures: IMEI numbers play a role in security measures such as device blacklisting. If a device is reported stolen, its IMEI number can be added to a global database. This prevents it from being used on any network and renders it useless to thieves.
Part 2: A Dedicated Android Solution To Track Phone Location Using IMEI Number
IMEI numbers are important for more than just working as identifiers. One practical application lies in tracking a lost or stolen phone. It is a scenario that can cause significant distress. To address this concern, a great solution is the “AntiTheft App - IMEI Tracker, All Mobile Location.”
It is a dedicated Android app designed to harness the power of IMEI numbers for phone tracking. This anti-theft app & IMEI tracker provides a comprehensive method to locate a misplaced or stolen device. Its core work revolves around using the IMEI number to find the Nokia C12 Plus device’s location. With it, you can send commands via SMS (text messages) from an alternate device.
![]()
These functionalities encompass using secure commands with a designated secret code. Using these commands, you can have the smartphone ring audibly at its maximum volume. It can also get the GPS coordinates of the Nokia C12 Plus device. You can also display a personalized message across the screen. Lastly, it can even capture photographs through the front-facing camera.
Part 3: Online Solutions: Finding The Best Anti-Theft Online Tool Using IMEI Tracking
The internet makes it easy to deal with lost or stolen devices. Online solutions offer another way to find your smartphone using IMEI tracking. In contrast to conventional approaches, these digital tools enhance the efficiency of the process.
They provide a ray of optimism, even for individuals with limited tech proficiency. Below are two prominent anti-theft apps & IMEI trackers online that use IMEI tracking to aid in phone location:
Method 1. IMEI-Tracker
The purpose of this web-based platform is to streamline the procedure for locating a misplaced or stolen mobile phone. With just the IMEI number of your lost device, you can ascertain its GPS coordinates. Employing sophisticated algorithms, the platform triangulates the rough whereabouts of the Nokia C12 Plus device. The following steps outline how to use IMEI-Tracker to find the location of your lost device:
- Step 1: Begin by accessing a web browser on a device and navigate to the IMEI-Tracker.com website. Here, click “Track IMEI” to access the IMEI tracking feature.
- Step 2: On the next page, enter your lost device’s IMEI number and select the country. Afterward, click “Track IMEI” to kickstart the tracking process.
![]()
Method 2. TrackIMEI.net
Another player in the online IMEI tracking space is TrackIMEI.net. It offers a user-friendly approach to locating missing devices. By inputting the IMEI number into the platform, you can pinpoint the location of your device. This service also facilitates the reporting of lost or stolen devices. Use the following steps to locate your device via TrackIMEI.net.
- Step: On a web browser, access TrackIMEI.net and type your IMEI number in the text field. Then click “Search” to initiate the search for your lost device.
![]()
Part 4: Anti-Theft Apps That Locate Devices Without IMEI
Anti-theft apps offer a mean to locate a device even without relying on the IMEI number. These apps provide an alternative route to safeguard your valuable possessions. Moreover, these apps offer an extra layer of security and assurance. Below are two noteworthy anti-theft apps that enable users to track their devices:
Method 1. Find My Device (IMEI Tracker)
Available on the Play Store, the Find My Device (IMEI Tracker) is a popular choice among users. It allows you to experience the utmost simplicity in tracking your Android device. With this cutting-edge GPS tracker, you can effortlessly track your Android phone.
To activate the tracking function, the app must be installed on the targeted phone. After installing the anti-theft app & IMEI tracker, you can use the website to track the Nokia C12 Plus device’s location.
![]()
Method 2. Anti-Theft Mobile Tracker
The Anti-Theft Mobile Tracker app provides an innovative approach to tracking devices. It allows the transmission of the precise location of the lost device to a recipient device. This functionality operates without requiring an active Internet connection.
The anti-theft app & IMEI tracker for all mobile locations enables remote actions, including locking the Nokia C12 Plus device and erasing personal data. Through this app, users can lock their phones and safeguard their data from a distance.
![]()
Bonus Part: Got Your Nokia C12 Plus Locked? Unlock It Easily With the Best Third-Party Utility
Losing access to our own devices due to a forgotten password or lock pattern can be exasperating. In such cases, a reliable third-party utility, Wondershare Dr.Fone, comes to the rescue. It offers a seamless method to regain access and control over your precious devices. It is designed to provide a straightforward way to unlock locked Android devices.
The utility offers different unlock modes to cater to various scenarios. These include PIN, pattern, password, and even fingerprint or facial recognition. Wondershare Dr.Fone boasts a high success rate in unlocking devices, making it a reliable option.

Dr.Fone - Screen Unlock (Android)
The Best UnlockJunky Alternative to Bypass FRP and Solve Your Screen Locks
- Completely unlinked from the previous Google account, it won’t be traced or blocked by it anymore.
- Remove all Android screen locks (PIN/pattern/fingerprints/face ID) in minutes.
- Almost all Samsung phones and tablets are supported (Currently for Android 6-13).
- Provide specific removal solutions to promise good success rate.
4,008,671 people have downloaded it
Prominent Features of Wondershare Dr.Fone
- When unlocking a locked Android Phone, like a Samsung or LG device, with Dr.Fone, you can do it without data loss.
- It allows you to bypass Google FRP lock on all major Android brands like Samsung, Mi, OPPO, etc.
- With Wondershare Dr.Fone, you can unlock screen locks such as PIN, password, pattern, and fingerprint.
Unlocking a Locked Smartphone Using Dr.Fone – Screen Unlock (Android)
Unlocking your locked Android device using Wondershare Dr.Fone is a straightforward process. Here’s a simplified step-by-step guide to help you through the process of unlocking your Android screen lock:
- Step 1: Navigate to Screen Unlock in Wondershare Dr.Fone
You start with launching Wondershare Dr.Fone on your computer. Navigate to “Toolbox” and access “Screen Unlock.” On the following screen, choose “Android” as your device type.
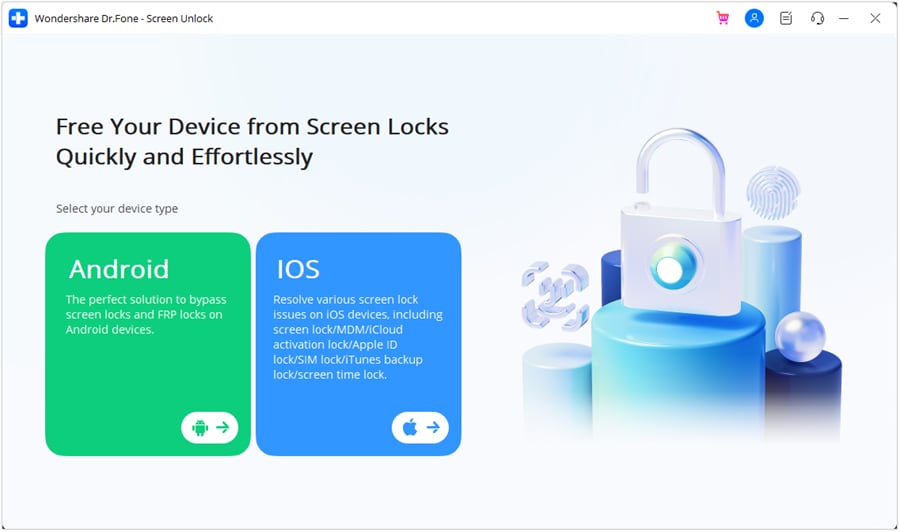
- Step 2: Choose Your Nokia C12 Plus Device Brand
After choosing the Nokia C12 Plus device type, select “Unlock Android Screen”. Now choose the brand of your Android, for example, Samsung, and on the next screen, click “Remove without Data Loss”. Following this, you need to input the “Brand”, “Device Name”, and “Device Model” of your smartphone.

- Step 3: Agree to the Android Screen Unlock Terms
Enable the checkbox that indicates your agreement with the warning and your readiness to proceed. Then, proceed by clicking the “Next” button to unlock the screen. A confirmation step will appear, asking you to enter the code “000000”. Once you’ve entered the code, click on “Confirm” to carry out the necessary operation.
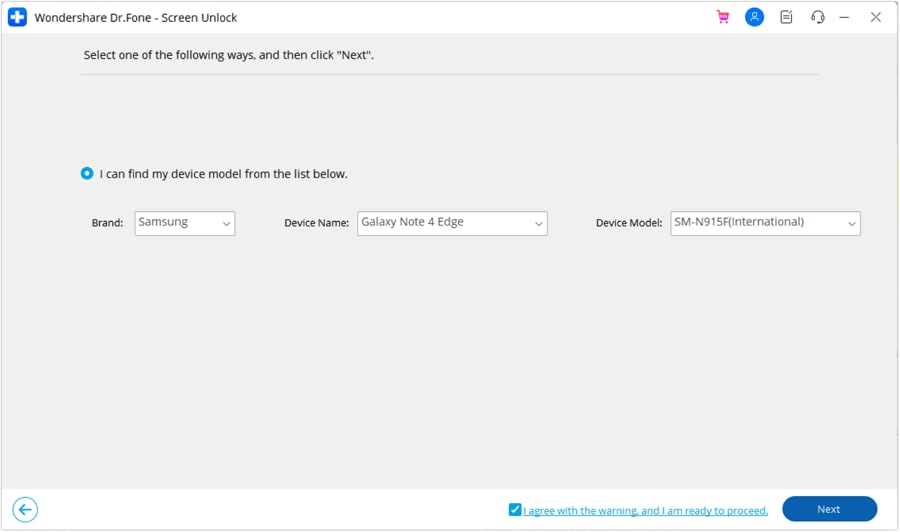
- Step 4: Unlock Your Locked Android Device
The final step is to put your Android device into Download Mode. To make it easier for you, the instructions are given on the screen. As soon as the Download Mode is activated, the Android screen unlock process will start. Click “Done” once the process has been completed.

Conclusion
In short, it can be scary to lose your smartphone due to theft, misplacement, or unauthorized access. During our exploration, we discovered many ways to locate your device if you lose it. The “Anti-theft App & IMEI Tracker All Phone Location“ stands out as a beacon of hope. It provides a dedicated Android solution to locate devices even in adverse situations.
As a bonus, Wondershare Dr.Fone emerged as a powerful ally for those locked out of their devices. This Android screen unlock toolkit offers a user-friendly interface and a high success rate. To conclude, as technology continues to evolve, your ability to safeguard your devices and data becomes robust.
- Title: In 2024, Rootjunky APK To Bypass Google FRP Lock For Nokia C12 Plus
- Author: Aaron
- Created at : 2024-07-15 19:20:00
- Updated at : 2024-07-16 19:20:00
- Link: https://easy-unlock-android.techidaily.com/in-2024-rootjunky-apk-to-bypass-google-frp-lock-for-nokia-c12-plus-by-drfone-android/
- License: This work is licensed under CC BY-NC-SA 4.0.


