
:max_bytes(150000):strip_icc():format(webp)/frenchopen-4d320297828b413f84f9940d5bd258f9.jpg)
In 2024, Mastering Lock Screen Settings How to Enable and Disable on Nokia C32
Mastering Lock Screen Settings: How to Enable and Disable on Nokia C32
In the modern world, the use of smartphones has become such a common trend that everyone would feel abnormal if they don’t have a smartphone of their own. So big the demand is that all IT companies are trying their best to introduce as well as innovate several excellent brands of smartphones. To support the function of smartphones, by far there have been numerous operating systems existed. Among them, Android is one of the most popular as well as trustworthy OS.
Just like any other smartphone, all Android devices have their ways to protect the data stored inside a smartphone from being corrupted or leaked. One of the simplest and most easy-to-use ways is to make use of the lock screen.
The lock screen has proved to be a traditional yet efficient way to help you protect your Android phones. In this article, we will provide you with an informative piece of writing about everything you need to know when it comes to the Android lock screen, and ways to enable and disable it.
If you have spent time searching and looking for features of your Android devices, you will find the process of enabling a lock screen is a piece of cake.
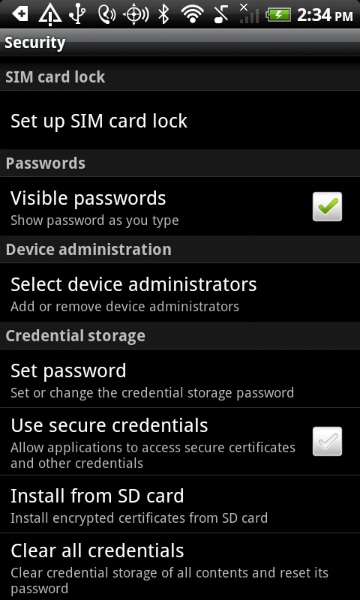
· Step 1: On the main screen of your Android devices, tap on the gear icon - which is the icon representing the Settings menu. Once you have chosen it, you will see a drop-down menu on the screen. In the options provided, tap on the Security bar.
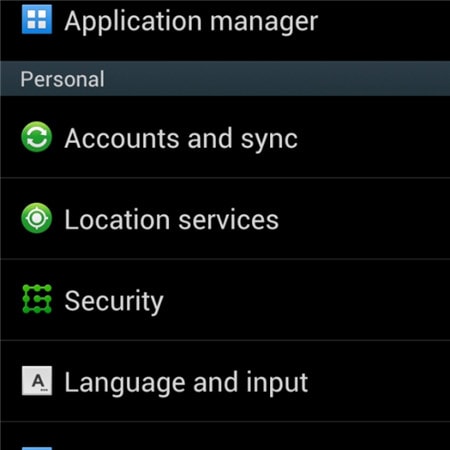
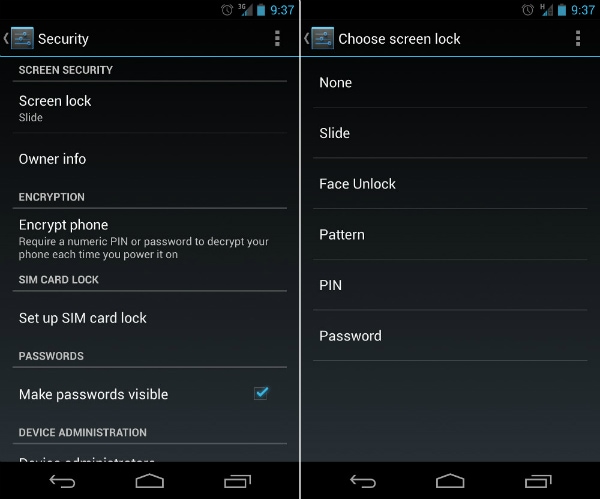
· Step 2: Under the tab whose heading is entitled Screen Security, tap on the first bar in the list called Screen lock.

· Step 3: Once the step is done successfully, Android will give you plenty of choices about ways to lock your Android devices’ screens. Among these ways, select one particular type which you feel is most convenient as well as free-risk. After that, type in your PIN code to confirm the choice and finally activate your lock screen feature as you wish.
Part 2: How to Disable Android Lock Screen
To certain customers, the lock screen can do more harm than good, and they would prefer to disable the screen lock on their Android devices. This process is also an easy one to follow, as long as you still hold good memory of the security code.
· Step 1: On the main screen of your Android devices, tap on the gear icon. It will directly lead you to the Settings menu of the phone. After that, a drop-down menu will appear with several choices and bars. Among them, tap on the Security option to begin your work.
· Step 2: Under the heading called Screen Security heading, you will be shown 3 choices. Tap on the first one, which is entitled Screen lock.
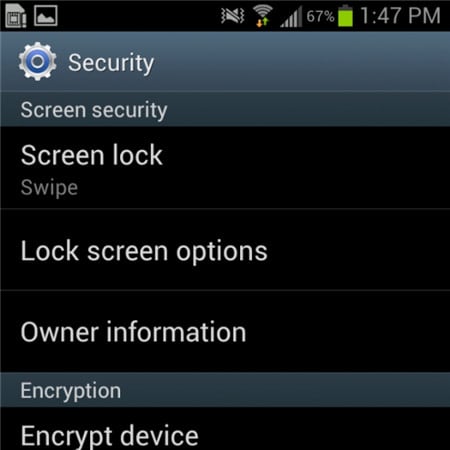
· Step 3: Once you have done the previous step, a brand new screen will appear and then you will be asked to fill in your PIN code. This is a step that helps guarantee that you are the true owner of the Android device.

Step 4: As soon as you have confirmed the right PIN code in the bar provided, you will then be presented to the next drop-down menu. A similar screen will appear which shows you plenty of choices. Tap on the top of that list, which is a bar called None.

Step 5: In the end, you have successfully disabled the screen lock on your Android devices. You are now capable of using it without any hesitation about the screen lock.
Part 3: Common Problems of Disabling Lock Screen
The process to disable the screen lock on Android may seem easy to handle as well as straightforward to several customers, but there are still some annoying problems that users have to deal with while trying to disable the lock screen.
What are the top 2 common problems?
Below are the two most common problems faced by Android users during their efforts to disable the feature of screen lock.
1. In the Screen Security choice, the None bar can not be chosen.
Description of the problem: There is a sentence below it stated: “Disabled by administrators, encryption policy or credential storage”. All the space of the None option is in white and grey.
The solution to this problem is quite simple. Once you have made sure you are suffering from this nasty one, try to follow these below pieces of advice to see if it is capable of giving you a hand.
Step 1: Open the Settings menu from the main screen. Then tap on the Credential Storage. You will see a drop-down menu like the screenshot below.
Step 2: Continue to tap on the Clear Credentials (Remove all certificates) option. Then next click on the OK button. Wait for some seconds until your Android device has finished the process.
Step 3: To make sure that the previous step has been performed successfully, try looking at the bottom of the drop-down menu. If the Clear Credentials (Remove all certificates) are grey out and can not be selected, then you have managed to do it.

Step 4: Now that the problem is solved, you can feel free to turn back to your Screen lock option in the beginning and disable the feature of locking screen Android as usual.
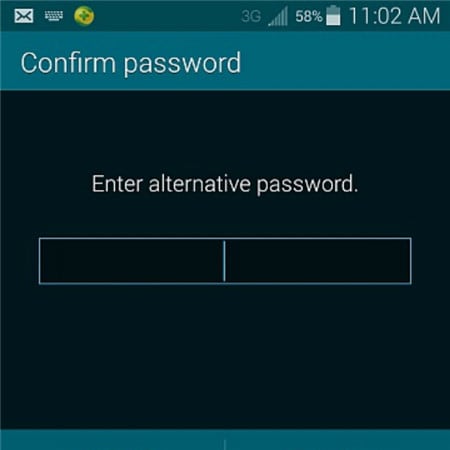
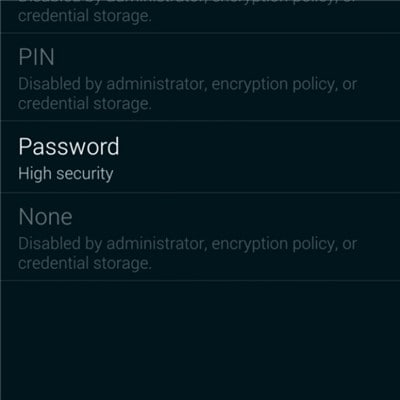
2. You have mistakenly encrypted your SD card. You want to disable the encryption, only to realize that it requires you to set a new screen lock code. But when you come to the Screen lock menu, all the options but Password have been greyed out.
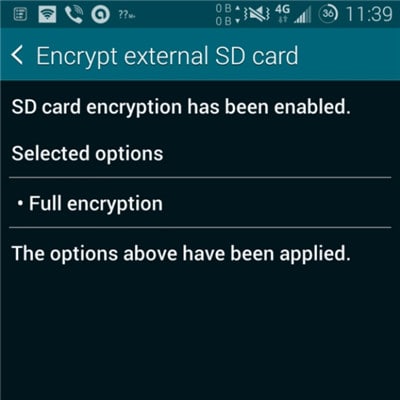
This is pretty weird, but actually, it is one of the most common troubles that many users have complained about. But to your surprise, the solution is very simple and easy. All you have to do is to reset your password, but with a little change. Your password MUST include at least ONE NUMBER in it. Confirm your new password then you will be able to disable the lock screen Android as usual.
Bonus Tip: Remove Android Screen Lock If Forgotten Password/Pattern
As much as the lock screen can protect the personal information on the phone, it can also cause much trouble if you forget the lock screen password or enter the wrong password too many times. So here comes the need for phone unlocking software . One of the best is Dr.Fone - Screen Unlock (Android), which can help us bypass forgotten Android screen locks without any data loss(limited to Samsung and LG series phones). Other Android brand phones will be wiped out all the data once starting to unlock with Dr.Fone
Dr.Fone - Screen Unlock (Android)
Remove 4 Types of Android Screen Lock without Data Loss
- It can remove 4 screen lock types - pattern, PIN, password & fingerprints.
- One-time payment for unlimited use of multiple devices within a specified time period.
- Work for Samsung Galaxy S/Note/Tab series, LG G2/G3/G4, etc.
- Besides, unlocking the screen lock, it also works best to unlock the Samsung FRP lock in devices with Android 5.0 and higher.
3981454 people have downloaded it
Steps on How to Unlock Forgotten Password in Android Phones
Step 1: Launch Dr.Fone and click on Screen Unlock from the primary window.

Step 2: Connect your Android device to the computer via USB cable. The program will recognize the phone directly. Select the phone model or “I can’t find my device model from the list above” to continue.

Step 3: Follow the instruction on the program exactly to set the phone to Download Mode. First, you will need to Power off your Phone. Secondly, Press on Volume Down, Home button, and Power button simultaneously. Thirdly press the Volume up button to navigate until the phone enters Download mode.

Step 4: After you set the phone to Download mode, it will begin to download the recovery package. When the recovery package is downloaded successfully, the lock screen on your Nokia C32 devicewill be removed. You won’t lose any data during the whole process.

How to Change Lock Screen Wallpaper on Nokia C32
Every smartphone user wants their lock screen wallpapers to be the finest quality. Since the Nokia C32 device comes with a generic lock screen wallpaper on itself, changing it is necessary. Regardless of your Android device, the need to change the lock screen wallpaper on Android is significant. If so, the article will provide two diverse techniques familiar to any Android device.
Along with the basic methods, the article will redirect its discussion to changing the lock screen wallpaper for different brands. Find more about how to change the lock screen wallpaper on Android with the available methods and techniques to bring aesthetics to your device.
Part 1: How To Change Lock Screen Picture on Android Phone With 2 Common Methods
Every Android smartphone has its interface to follow while changing the lock screen wallpaper or screen saver of the Nokia C32 device. However, before we dive into the Nokia C32 device-specific details, let’s dissect the two common methods to change the lock screen wallpaper on Android:
Method 1: Pressing Home Screen Method
The first thing to try for changing the lock screen wallpaper includes the long press technique. This technique is available for almost all Android devices, a basic approach to changing lock screen wallpapers. To know how it is done, follow the steps provided below:
Step 1: As you unlock your Android smartphone, press the clear region until the home-screen options appear on the front.
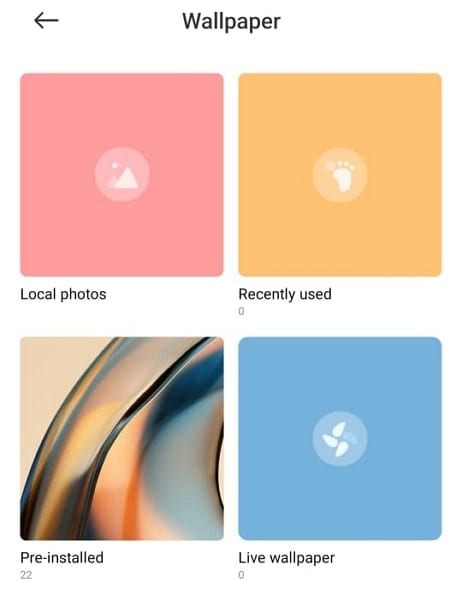
Step 2: Select the “Wallpaper” option in the available buttons to lead to another window showing different wallpapers.

Step 3: Out of all the wallpapers, select any of them and tap on the “Apply” button to set it as your lock screen wallpaper.
Method 2: Using Your Gallery
You can also set your favorite picture as the Android lock screen wallpaper from the settings provided in your gallery. To know how you can utilize your device’s Gallery, look into the steps provided next:
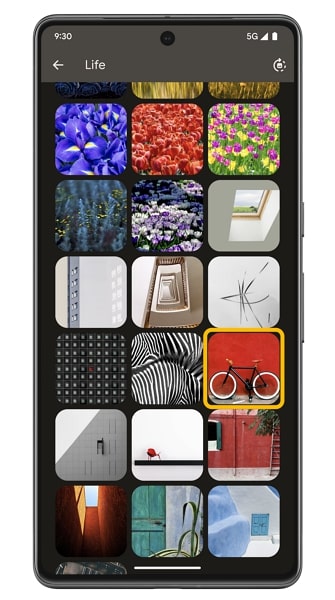
Step 1: Access the menu of your Android device and locate the “Gallery” app in the available options. Continue to locate your respective photo in the “Albums.”

Image name: lock-screen-wallpaper-on-android-3.jpg
Image alt: access the gallery
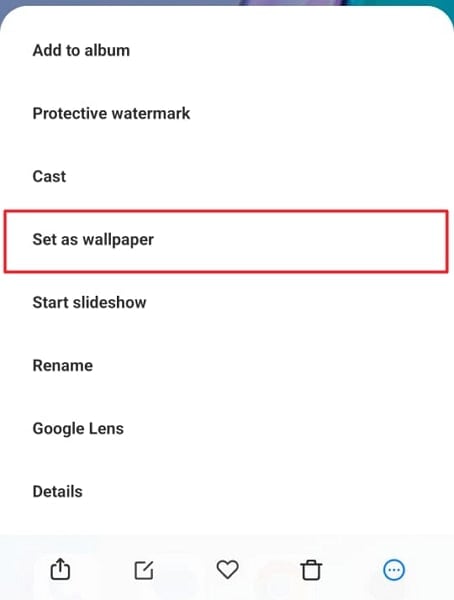
Step 2: Choose and open the image on the screen, and continue to select the “Three-Dotted” icon on the bottom-right of the screen.

Step 3: On selecting the option of “Set as wallpaper,” you will apply the particular image from the Gallery as your lock screen wallpaper.
Part 2: How to Change Lock Screen Wallpaper on Different Brands of Android Phones
The provided methods in the above part are comprehensive in changing the lock screen wallpaper of any Android smartphone. This, however, is not the same and is true for every Android device in the market. Since the difference in operation brings a clash for many users, the need for an idea for different smartphone brands is essential.
For this part, we will bring a guide explaining how to change the lock screen wallpaper on Android of different brands:
For Samsung Users
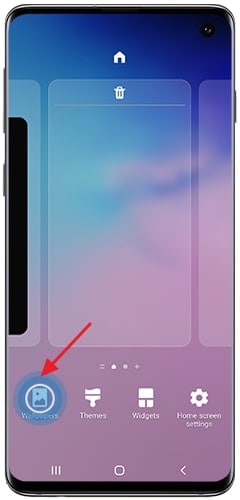
Step 1: On unlocking your Samsung, hold the empty space on your home screen to open a set of options. Select “Wallpapers” from the available list and continue to the next screen.
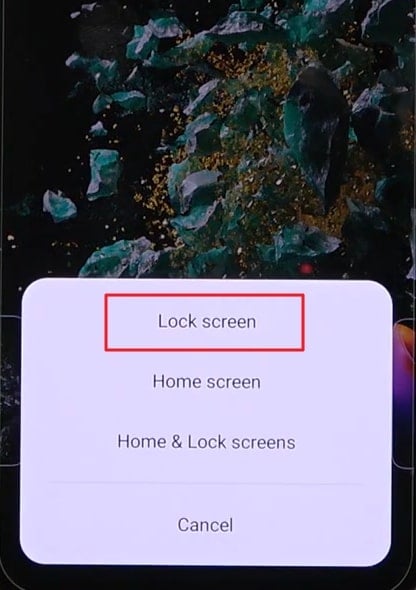
Step 2: Choose the option of “My wallpapers” or “Gallery” from the available list and select the wallpaper of your choice. As you select one, you will have to set it as your “Home screen,” “Lock screen,” or wallpaper for both screens.
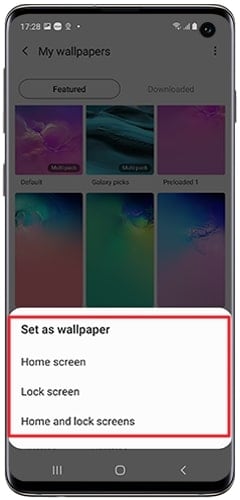
Step 3: Once you observe the image on the preview window, tap on the button on the bottom to set it as your lock screen wallpaper.

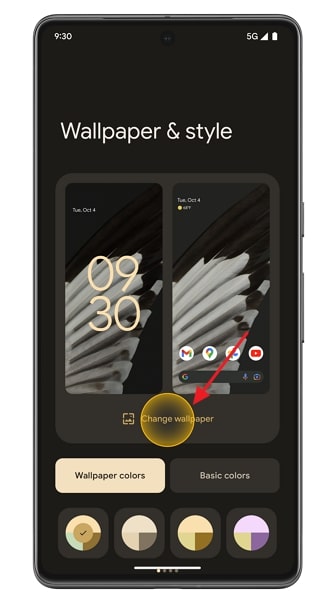
Step 1: As you access the home screen of your Google Pixel, continue to hold the space. This will open a list of options where you must tap on “Wallpaper & style.” Continue to select the “Change wallpaper” option to bring new colors to your Google Pixel.
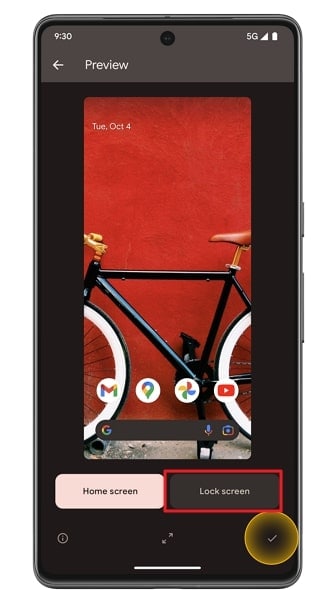
Step 2: On the next screen, select any particular category you want to set the lock screen wallpaper. For instance, if you selected “My photos,” choose your image and preview it on the following screen.
Step 3: To proceed, specify where you wish to set it as your wallpaper. As the options appear on the front, select the “Lock screen” option and continue to set your wallpaper.
For Motorola Users
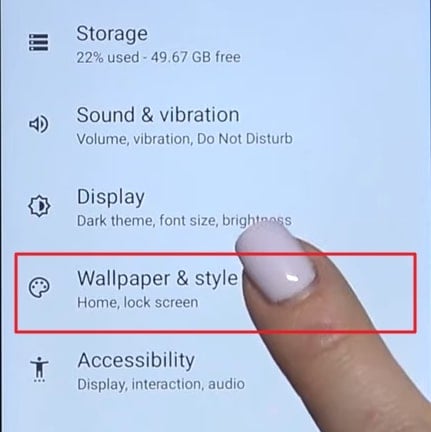
Step 1: Lead into the “Settings” of your Motorola device and look for the “Wallpaper & style” option in the list.
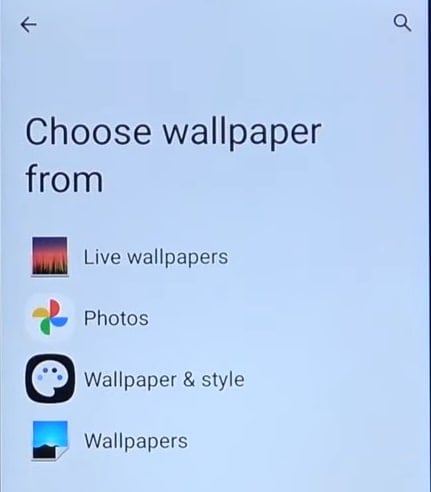
Step 2: Select any options appearing on the next screen that defines the location from where you will add the new wallpaper. Selecting a particular wallpaper from the available options leads to the “Preview” screen.
Step 3: Continue to select the “Lock Screen” option on the preview screen and tap on the “Tick” icon at the bottom. To confirm, tap “Lock screen” to change the wallpaper on the lock screen of your Motorola.

Step 1: Launch the “Settings” application on your OnePlus smartphone and continue to the “Personalizations” option.

Step 2: On the next screen, continue to the “Wallpapers” section and go through the available media to select a new wallpaper.

Step 3: As you select a particular wallpaper and continue to the preview screen, select the “Apply” button and proceed to choose “Lock Screen” from the pop-up menu.
Part 3: Top 10 Download Sites About Cool Screen Wallpaper on Android
What if you feel that you do not have the coolest screen wallpaper that you can change on your Android device? Before changing your Android lock screen wallpaper on your device, find a unique option that can be easily replaced. Instead of limiting yourselves to the options available on the Nokia C32 device, you can consider moving to different download sites for downloading the coolest lock screen wallpaper:
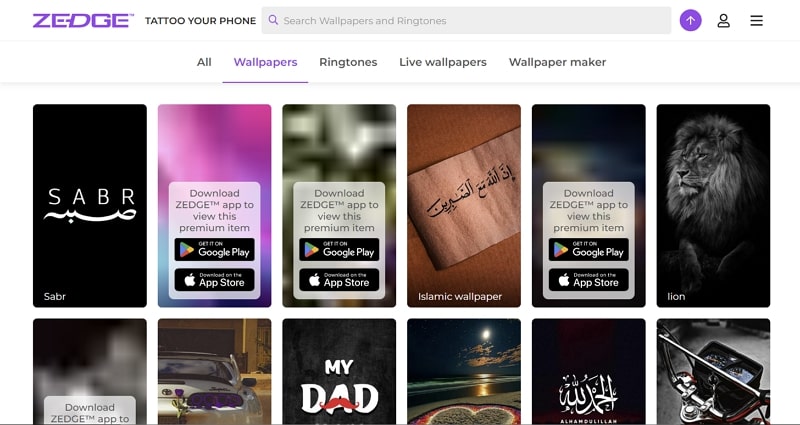
1. Zedge
Zedge is one of the most premium websites for accessing wallpapers for Android devices. With accessibility to content from exclusive artists, Zedge presents the best personalization options to its users. For effective wallpaper creation, you can add your creativity to bring in the best results for your device.
2. Interfacelift
For exclusive access to free wallpapers of multiple categories, Interfacelift provides some impressive and high-quality results. This intuitive wallpaper site provides some captivating options. Along with that, it asserts a special force on photographs of landscapes, which makes it a great site.

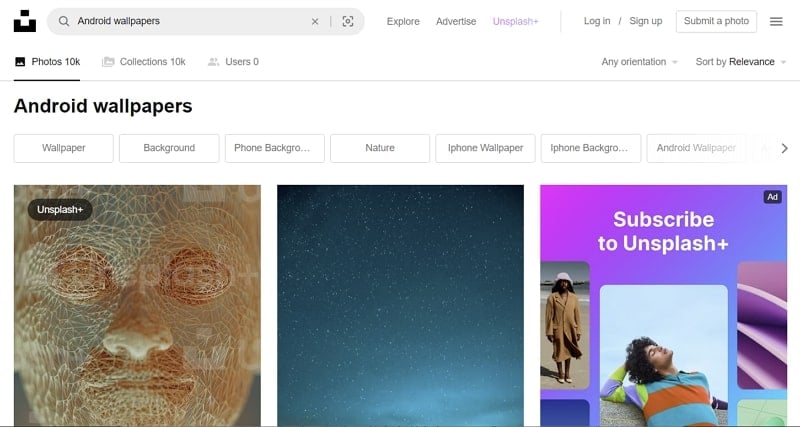
3. Unsplash
Known for keeping royalty-free, high-quality content, Unsplash can be a great Android wallpaper site. Download your favorite wallpapers that will perfectly suit your Android device. Along with its smooth interface, Unsplash offers diversity with its dedicated Unsplash+ plan.
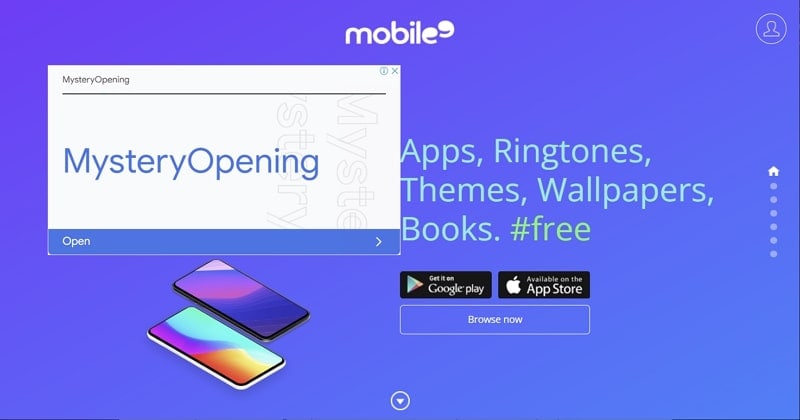
4. Mobile9
For variety, you can always go for Mobile9. This unique, expressive, and productive wallpaper site provides the best Android wallpapers. Following this, it offers multiple diversity of content, including ringtones and books. However, to get your hands on the finest quality wallpaper, do consider trying the site.
5. Dribbble
If you seek the best design for your Android lock screen, Dribbble provides the finest quality. Out of the 10,000+ designs, you can find your choice. Along with that, the site service also presents the wallpapers in dedicated categories. Searching for the right Android lock screen wallpaper gets easy in such an environment.

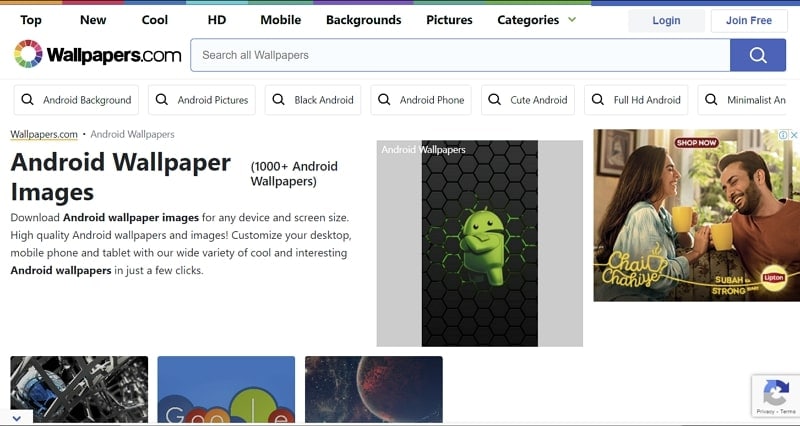
6. Wallpapers.com
For a service that provides dedicated Android lock screen wallpapers, Wallpapers.com holds a good position. With the finest wallpapers to use on the Android device, you can also customize the available wallpapers. Dedicated categories make it easy for users to select their favorite wallpaper from the 1000+ options.
7. Pexels
There are very few websites that offer the finest quality wallpapers for free. Pexels, being one of them, displays a great interface for users with sub-categorization. With descriptions for every wallpaper, you can select the best one for your device. Find a categorized section of more than 70,000 wallpapers on this platform.

8. Pixabay
Who won’t have heard of Pixabay as a haven for lock screen wallpapers? This platform provides a different perspective on wallpaper search. To find the best option, you can diversify your search according to orientation, size, and color. This makes your search much easier and swift for changing the Android lock screen.

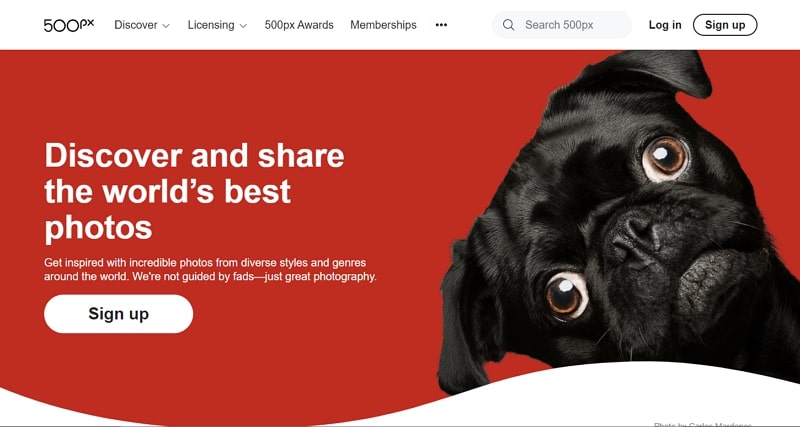
9. 500px
To access the best wallpapers in the world, 500px is a good platform to keep in mind. While it helps a wide community fulfill their tasks, it can be a purposeful option. For diverse operability in the site, users can also sell their work into a global marketplace.
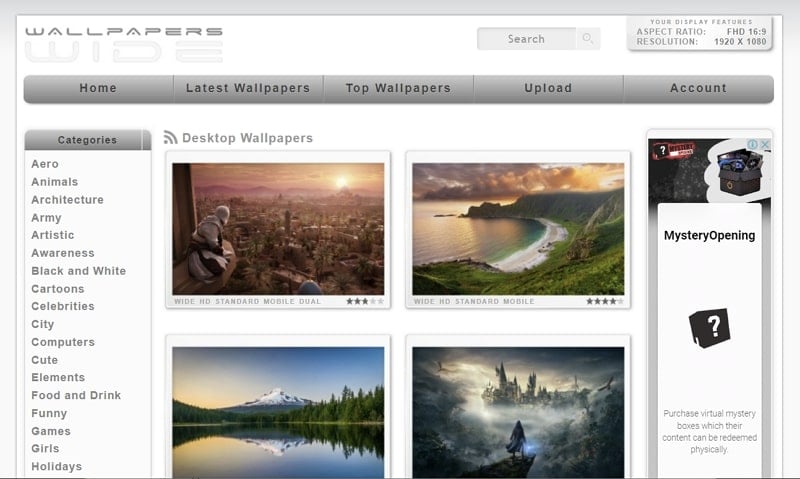
10. Wallpaperswide
From desktop to Android wallpapers, Wallpaperswide holds a diverse set of options. This platform is designed to provide a diversity of categories to its users. With a simple interface, it is a great option for gathering content.
Bonus Part: How To Unlock Android Screen if Forgotten the Password
Although you have learned how to change the lock screen wallpaper on Android, multiple complications can arise. One such problem that can occur on your device involves it getting locked. If the Nokia C32 device gets locked, you cannot use it. For an Android whose password is locked, you will require a platform to amend the problem.
Dr.Fone – Screen Unlock (Android) provides a complete platform to unlock the Android device. This is the right place to go if you seek to remove such locks from your device within minutes. With the option of bypassing any screen lock, it can protect your device’s data.
Such options make it the finest platform to resolve issues with the Android device. To know how one can unlock their Android device with Dr.Fone, look through the provided steps:
Step 1: Open Screen Unlock Tool
You need to download and launch Dr.Fone on your computer and continue to the “Screen Unlock” tool. On accessing the tool, connect your Android device with a cable.
Step 2: Start Unlocking the Android
Proceed to select the “Unlock Android Screen/FRP” option and continue into the “Unlock Android Screen” option.

Step 3: Select Mode and Device Details
If you intend not to lose data, continue to the “Remove without data loss” option. You will have to select the details of the connected Android device.

Step 4: Access Download Mode
Put your Android device in Download Mode by powering it off. Continue to press the “Volume Down,” “Home,” and “Power” buttons simultaneously. After a few seconds, press the “Volume Up” button to enter the Download Mode.
Step 5: Unlock Android Successfully
The package starts downloading as the Nokia C32 device gets into Download Mode. It will take a while until it completes. Once the download process gets completed, press the “Remove Now” button to remove the Android screen lock.
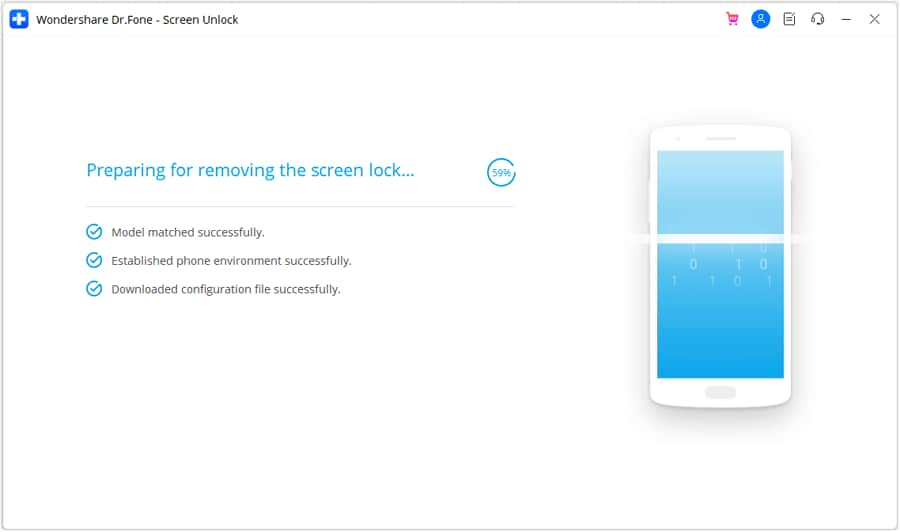
Image name: lock-screen-wallpaper-on-android-32.jpg
Image link: https://images.wondershare.com/drfone/guide/android-unlock-07.png
Image alt: start removing screen lock
Conclusion
The details provided are comprehensive in helping you change the lockscreen wallpaper on Android. While learning unique ways, along with dedicated techniques for smartphones, we are sure that you are clear about how to change lock screen picture on Android phone.Why not take a try now? This article has also introduced some of the best sites to download Android wallpapers. For effective results and to save your locked device from getting useless, use Dr.Fone – Screen Unlock.
How to Use Google Assistant on Your Lock Screen Of Nokia C32 Phone
Android has undergone numerous changes to enhance user experience and security. One notable feature that was once present was the ability to unlock phones with voice Google Assistant. However, Google Assistant has removed this feature across all versions since 2021.
While this voice-unlocking feature is no longer available, there are still many things you can do with Google Assistant, even when the Nokia C32 device is locked. This tool brings an added layer of convenience to your smartphone experience.
Let’s dig deeper into how you can use Google Assistant on the lock screen and make the most out of this tool in the following article.
Part 1. What You Can Do With Voice Google Assistant
Google Assistant is a virtual assistant powered by artificial intelligence (AI) developed by tech giant Google. This application is readily available on most recent mobile phone models, especially those operating on Android 6.0 and newer versions.
Although you can no longer use the Google Assistant unlock feature, you can still perform a myriad of tasks using Google Assistant. These include:
- Getting the weather
- Setting alarms
- Playing music
- Sending texts
- Making a call
- Asking Google for information, etc.
Enable Google Assistant on Lock Screen: A Step-by-Step Guide
Now that you’re eager to try the potential of Google Assistant on your lock screen, let’s walk through the simple steps on how to enable this tool.
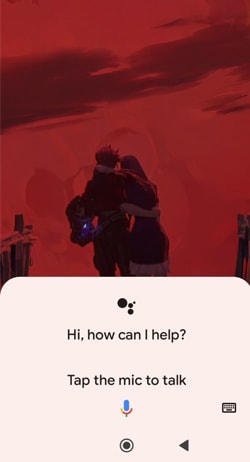
- Step 1: Open Google Assistant:
Look for “Google Assistant” and open the app.
- Step 2: Ask Google Assistant to open the settings.
You can ask, “Hey Google, open the Google Assistant settings,” and it will show you the Google Assistant settings.
- Step 3: Allow Google Assistant on the lock screen.
Locate the “Lock Screen” settings and make sure to switch on “Assistant responses on lock screen.”

Part 2. How To Use Google Assistant on Lock Screen
After you’ve successfully enabled Google Assistant on your lock screen, let’s see how to use Google Assistant to do certain tasks more efficiently and hands-free.
- Step 1: Wake Up Google Assistant
Start by waking up Google Assistant. You can do this by saying the wake word “Hey Google” or “OK Google.” If it doesn’t work, you can long-press the home button or use any dedicated gesture to activate Google Assistant.
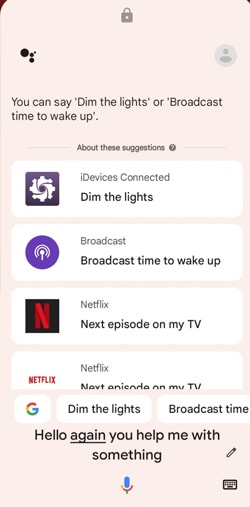
- Step 2: Issue a Voice Command
Once Google Assistant is active, issue a voice command related to the task you want to perform. For example:
“Hey Google, what’s the weather today?”
“OK Google, set an alarm for 5 PM.”
“Hey Google, play my Spotify playlist.”
When you can still unlock with Google Assistant, you can ask it to “unlock my phone” or use any similar command.
- Step 3: Interact with Responses
Google Assistant will then provide spoken responses and display relevant information on the lock screen. For instance, if you ask for the weather, it might verbally provide the current conditions and display a brief summary on your lock screen.
Part 3. Common Problems When Using Google Assistant
Unable to use Google Assistant to unlock phone is not the only drawback that users may have encountered in recent changes. Although Google Assistant on the lock screen presents a revolutionary way to interact with your phone, like any technology, it also comes with its share of challenges. Some of the common problems when using Google Assistant are:
- Misunderstandings and misinterpretations
One prevalent issue users encounter is Google Assistant misunderstanding or misinterpreting voice commands. This can be influenced by factors such as background noise, accent variations, or pronunciation differences.
- Limited context understanding
While Google Assistant is adept at understanding individual commands, it may struggle with complex, multi-step requests that rely heavily on context. Break down your tasks into simpler commands to enhance comprehension and execute it more accurately.
- Inability to execute certain tasks
Google Assistant’s capabilities are extensive, but there are instances where it may struggle to execute specific tasks. For example, it can’t execute tasks that involve interacting with certain third-party applications or services. You can’t also unlock phone with voice Google Assistant.
Tips to Make Voice Google Assistant Recognize Your Commands
One of the most infuriating problems with voice Google Assistant is that users often encounter difficulties in having their commands accurately recognized. To enhance the accuracy of voice recognition with Google Assistant, you can consider implementing the following tips:
- Speak Clearly and Naturally
Make sure that you speak in a clear and natural manner. Avoid mumbling or speaking too quickly. Enunciate your words, giving Google Assistant a better chance to interpret your commands accurately.
- Use Simple and Direct Phrases
Keep your commands simple and direct. Avoid unnecessary elaboration or complex sentence structures. Google Assistant is more likely to understand straightforward commands.
- Check Your Microphone
Ensure that your device’s microphone is in good working condition. Dirt or debris on your phone’s microphone can affect its performance. Clean the microphone area and try again.
- Quiet Environment
Background noise can interfere with voice recognition. Try to issue commands in a quiet environment to minimize any potential confusion caused by external sounds.
Part 4. How to Unlock Android Phone Screen Without Passcode
Now, you know that you can’t unlock phone via Google Assistant anymore. But what if you accidentally forget your phone’s passcode? Is there a reliable method to regain access to your Android device without the passcode?
Fortunately, Wondershare Dr.Fone offers a straightforward solution for precisely such scenarios. It provides a simple and effective way to unlock your Android phone screen through Dr.Fone - Screen Unlock when the screen lock is forgotten or becomes inaccessible.
![]()
Dr.Fone - Screen Unlock (Android)
The Best UnlockJunky Alternative to Solve Your Screen Locks
- Completely unlinked from the previous Google account, it won’t be traced or blocked by it anymore.
- Remove all Android screen locks (PIN/pattern/fingerprints/face ID) in minutes.
- Compatiable with various Android models.
- Provide specific removal solutions to promise good success rate.
4,008,670 people have downloaded it
If you are wondering how to unlock your Android phone screen without a passcode with Dr.Fone – Screen Unlock, follow the steps below.
- Step 1: Launch the Screen Unlock Tool
Open the latest version of Wondershare Dr.Fone on your computer and connect your phone device using a USB cable. Once connected, navigate to the Toolbox > Screen Unlock to access Dr.Fone – Screen Unlock tool.
- Step 2: Select Android for your device type.
As the Dr.Fone Screen Unlock tool supports both Android and iOS, you will need to indicate the specific device you are using. Opt for the Android option if you are unlocking an Android device. Then, continue to choose “Unlock Android Screen” on the next screen.
- Step 3: Remove Screen Lock Without Data Loss
- In this step, you will be directed to select your device brand. Choose the Android device brand you are using and opt for “Remove without Data Loss” if you don’t want to lose your data.

- Step 4: Define Device Details
Next, make sure to check and confirm the Brand, Device Name, and Device Model to unlock your Android screen. Tick the checkmark that says you agree with the warning and are ready to proceed. Click “Next” to unlock your screen.

- Step 5: Confirm to Unlock Screen
Type “000000” continue by clicking Confirm.

- Step 6: Put Android in Download Mode
Dr.Fone will then guide you to put your Android device into Download Mode according to the model you have identified. After you have followed the instructions, Dr.Fone will automatically lead to the next screen to proceed the unlocking process.
After that, you can monitor the progress and wait for a few minutes until it shows “Unlocked successfully.”
You May Also Interested:
Unlocking Your Realme Phone Made Easy: Step-by-Step Guide
8 Safe and Effective Methods to Unlock Your iPhone Without a Passcode
Complete Guide to Unlock Mi Account Without Password In 2024
Conclusion
Google Assistant is a versatile virtual assistant that is designed to help you with a wide range of tasks and make your daily life more convenient. Accessible on most modern Android devices, it enables users to perform several tasks through voice commands.
However, if you are looking for ways to unlock phone with Google Assistant, this function is no longer available. Google Assistant unlock feature has been discontinued since 2021. But in case you’ve forgotten the screen lock passcode, you can use Wondershare Dr.Fone Screen Unlock tool to regain access to your Android phone. This tool facilitates the unlocking process without data loss, featuring a user-friendly learning curve.
Also read:
- In 2024, Downloading SamFw FRP Tool 3.0 for Nubia Z50S Pro
- In 2024, Unlock Your Poco X5s Potential The Top 20 Lock Screen Apps You Need to Try
- In 2024, How to Unlock Realme 12 Pro 5G Phone with Broken Screen
- How to Lock Apps on Nokia C32 to Protect Your Individual Information
- A Complete Guide To OEM Unlocking on Realme GT Neo 5 SE
- Lock Your Nokia C12 Pro Phone in Style The Top 5 Gesture Lock Screen Apps
- Complete Review & Guide to Techeligible FRP Bypass and More For Motorola Moto G34 5G
- In 2024, 10 Easy-to-Use FRP Bypass Tools for Unlocking Google Accounts On Poco F5 Pro 5G
- In 2024, How to Unlock Nubia Z50S Pro Phone without Google Account?
- In 2024, Still Using Pattern Locks with Realme C53? Tips, Tricks and Helpful Advice
- In 2024, Universal Unlock Pattern for Realme
- Rootjunky APK To Bypass Google FRP Lock For Motorola Edge 2023
- Delete Gmail Account With/Without Password On Nubia Red Magic 8S Pro
- In 2024, How to Show Wi-Fi Password on Realme Narzo 60 5G
- A Complete Guide To OEM Unlocking on Poco C65
- In 2024, Full Guide to Unlock Your Nokia C12
- In 2024, Best Nubia Red Magic 9 Pro+ Pattern Lock Removal Tools Remove Android Pattern Lock Without Losing Data
- In 2024, 7 Ways to Unlock a Locked Realme 11 5G Phone
- How to Unlock Realme Narzo 60 Pro 5G Phone without Google Account?
- How To Enable USB Debugging on a Locked Realme C55 Phone
- Complete Review & Guide to Techeligible FRP Bypass and More For Realme C67 4G
- In 2024, Everything You Need to Know about Lock Screen Settings on your Realme C51
- In 2024, Tips and Tricks for Setting Up your Realme Phone Pattern Lock
- Everything You Need to Know about Lock Screen Settings on your Nokia C210
- How to Change Lock Screen Wallpaper on Oppo Find X6 Pro
- In 2024, How to Unlock a Network Locked Poco X6 Phone?
- In 2024, How to Remove Forgotten PIN Of Your Realme C67 5G
- How To Fix OEM Unlock Missing on Realme 12 5G?
- In 2024, How To Unlock Any Poco X5 Phone Password Using Emergency Call
- In 2024, Top 4 SIM Location Trackers To Easily Find Your Lost Motorola Moto G34 5G Device
- In 2024, Still Using Pattern Locks with Realme V30T? Tips, Tricks and Helpful Advice
- In 2024, How to Remove Forgotten PIN Of Your Realme C67 4G
- In 2024, Full Tutorial to Bypass Your Poco Face Lock?
- In 2024, Universal Unlock Pattern for Realme 11 Pro
- Everything You Need to Know about Lock Screen Settings on your OnePlus Nord N30 5G
- In 2024, Mastering Lock Screen Settings How to Enable and Disable on Realme Narzo 60 Pro 5G
- 5 Solutions For Nokia 105 Classic Unlock Without Password
- In 2024, Complete Review & Guide to Techeligible FRP Bypass and More For Poco X5
- How to Change Lock Screen Wallpaper on Nubia
- In 2024, A Perfect Guide To Remove or Disable Google Smart Lock On Realme 12 Pro 5G
- In 2024, Complete Review & Guide to Techeligible FRP Bypass and More For Realme GT 5
- 6 Proven Ways to Unlock OnePlus 12R Phone When You Forget the Password
- Recover Apple iPhone 6s Data From iOS iCloud | Dr.fone
- In 2024, Tips and Tricks for Setting Up your ZTE Phone Pattern Lock
- Gionee F3 Pro Messages Recovery - Recover Deleted Messages from Gionee F3 Pro
- Lava Bypass Tools to Bypass Lock Screen(Lava Storm 5G)
- In 2024, Tutorial to Change Lava Yuva 3 Pro IMEI without Root A Comprehensive Guide
- All Must-Knows to Use Fake GPS GO Location Spoofer On OnePlus 12R | Dr.fone
- In 2024, How To Use Allshare Cast To Turn On Screen Mirroring On Infinix Smart 8 Pro | Dr.fone
- Updated 2024 Approved Elevate Your Job Search The Best Video Resume Makers Free
- Which Pokémon can Evolve with a Moon Stone For Realme 11X 5G? | Dr.fone
- Updated The Best Video Creation Tools with Music and Audio Options
- Things You Dont Know About Vivo Y100i Power 5G Reset Code | Dr.fone
- 2024 Approved How to Make GIF Stickers for WhatsApp 100 The Simple Way
- 4 Most-Known Ways to Find Someone on Tinder For OnePlus Nord N30 SE by Name | Dr.fone
- My Videos Arent Playing on Infinix Smart 7 – What Can I Do? | Dr.fone
- Updated How to Record Clips Using Your Camera and Edit Them Using Wondershare Filmora to Make a Loop Video? A Complete Guide for Beginners for 2024
- How To Transfer Data From iPhone 14 Pro To Other iPhone 12 Pro devices? | Dr.fone
- Updated In 2024, Top TikTok Watermark Removal Tools to Remove Logos for Free
- How to get the dragon scale and evolution-enabled pokemon On Realme 12 Pro+ 5G? | Dr.fone
- In 2024, 9 Mind-Blowing Tricks to Hatch Eggs in Pokemon Go Without Walking On Xiaomi Redmi Note 12 Pro 5G | Dr.fone
- How to Unlock Samsung Galaxy A14 5G Phone Pattern Lock without Factory Reset
- How to Transfer Text Messages from Huawei P60 to New Phone | Dr.fone
- How to retrieve lost files from Tecno ?
- In 2024, Ultimate Guide to Catch the Regional-Located Pokemon For Honor 90 Pro | Dr.fone
- In 2024, iCloud Unlocker Download Unlock iCloud Lock for your iPhone 11 Pro Max
- How To Change Xiaomi Redmi Note 13 5G Lock Screen Password?
- CatchEmAll Celebrate National Pokémon Day with Virtual Location On Xiaomi Redmi Note 12 Pro+ 5G | Dr.fone
- In 2024, Top 15 Augmented Reality Games Like Pokémon GO To Play On Apple iPhone 11 Pro | Dr.fone
- How to Factory Reset Oppo Find N3 in 5 Easy Ways | Dr.fone
- In 2024, The Updated Method to Bypass Meizu FRP
- In 2024, Does find my friends work on Vivo T2x 5G | Dr.fone
- In 2024, How To Remove Screen Lock PIN On Vivo V30 Lite 5G Like A Pro 5 Easy Ways
- What is the best Pokemon for pokemon pvp ranking On Vivo V29e? | Dr.fone
- Three Ways to Sim Unlock Nokia C22
- 3 Solutions to Hard Reset Xiaomi Redmi Note 12 Pro 5G Phone Using PC | Dr.fone
- In 2024, Forgot Locked iPhone 15 Plus Password? Learn the Best Methods To Unlock
- How to Update Apple iPhone 15 without iTunes? | Dr.fone
- Do You Want to Make TikTok Videos More Elemental by Using Countdown but Dont Know How to Do This? Here We Will Thoroughly Guide You About This for 2024
- In 2024, How To Unlink Apple ID From iPhone 11 Pro
- Updated AVS Video Editor 2023 Review Does It Live Up to the Hype, In 2024
- Title: In 2024, Mastering Lock Screen Settings How to Enable and Disable on Nokia C32
- Author: Aaron
- Created at : 2024-05-19 09:20:07
- Updated at : 2024-05-20 09:20:07
- Link: https://easy-unlock-android.techidaily.com/in-2024-mastering-lock-screen-settings-how-to-enable-and-disable-on-nokia-c32-by-drfone-android/
- License: This work is licensed under CC BY-NC-SA 4.0.
