
How To Unlock Any OnePlus Nord N30 SE Phone Password Using Emergency Call
How To Unlock Any OnePlus Nord N30 SE Phone Password Using Emergency Call
Today, smartphones are an extension of people. Securing them with a PIN, passcode, pattern, fingerprint, or face unlock has become the norm. It’s like putting a digital lock on our private world.
But you have to face it: sometimes, people forget the codes they set to protect their phones or can’t unlock them with their injured fingers or faces. Picture this: you’re staring at your phone screen, trying to recall that password, but it’s not coming to you.
That’s where emergency call bypass is a nifty little trick that can be a lifesaver. In this article, you’ll learn how to unlock any phone password using the emergency call technique. The article will also explore other methods for when your memory fails you. So, read through and never go through this trouble again.
Part 1: What Is the Emergency Call Bypass Method?
The Android emergency call bypass method is a lesser-known workaround for those unfortunate moments when you’re locked out of your phone. This method exploits a loophole in the phone’s lock screen, allowing you to access your device even when you’ve forgotten your password, PIN, or pattern. It’s like finding a secret backdoor when the front door is bolted shut.
“How can unlocking Vivo, Oppo, and Samsung phones using emergency calls be effective?” You may ask. Imagine you need to access important information on your phone but can’t remember your lock screen code. Instead of panicking or rushing to a technician, the emergency call bypass can be a quick and handy solution. It’s particularly useful when immediate access to your phone is crucial and you don’t have time to reset your password through official channels.
Limitations of the Emergency Call Bypass Method
However, it’s important to note that this method has its limitations. It primarily works on older Android devices, specifically those running Android 5.0 (Lollipop) and below. As smartphone technology has evolved, manufacturers have patched many loopholes to enhance security. So, this method might not work for you if you have a more recent Android version.
But don’t worry – if you’re locked out of a newer phone, you can try several other methods, which you will explore later in this article. Remember, the emergency call bypass can be a lifesaver in specific scenarios. However, it’s always best to use such methods responsibly and ethically. And, of course, you should always note your passwords.
Part 2: How To Perform Emergency Call Bypass To Unlock Screen
Unlocking your Android phone without a password using the Emergency Call Bypass method can be tricky, but it’s doable, especially on devices running Android OS 5.0 (Lollipop) and below. Here’s a step-by-step guide on how to unlock any phone password using the emergency call feature:
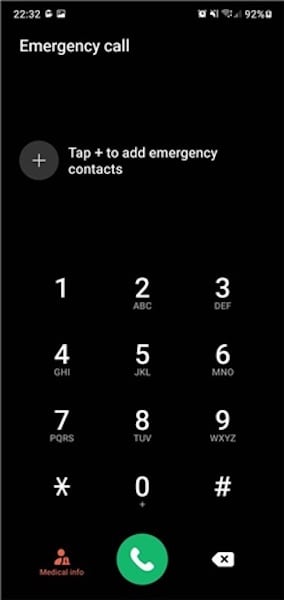
- Step 1: Start by tapping the Emergency Call button on your lock screen. This will bring up the emergency dialer screen.
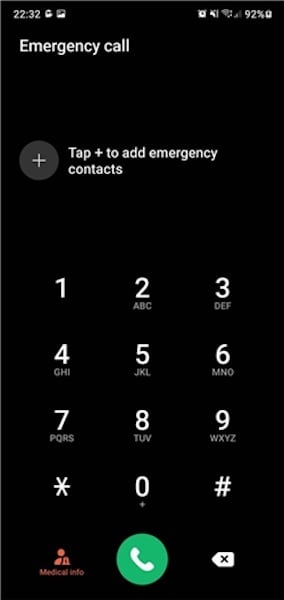
- Step 2: Type a series of special symbols on the dialer screen, such as asterisks (*). Do this several times in a row.
- Step 3: Double-tap the string of symbols to highlight them, then copy the string. Now, tap on the screen to paste the copied string. Repeat this process 10 to 11 times until you can no longer highlight the series.
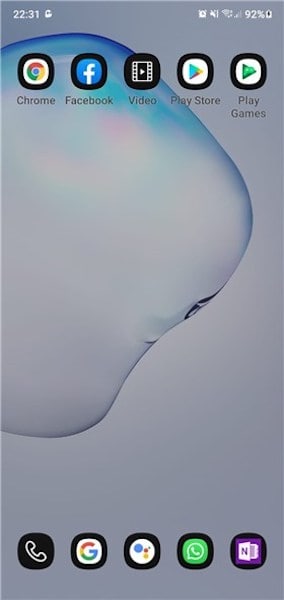
- Step 4: Go back to the lock screen. Open the Camera app by tapping the camera icon or sliding left. Simultaneously, pull down the Notification Panel from the top.
- Step 5: In the Notification Panel, tap the gear icon to try and access your device’s settings.
- Step 6: When prompted for a password, long-press and paste the copied string into the password field. Repeat this several times until the option to paste is no longer available.
- Step 7: Keep pasting the string until the interface crashes. The lock screen should disappear, and the camera interface will expand. After some time, the camera app should also crash, and your device will unlock, displaying the home screen.
This method, while unconventional, has been known to work on various Android 5 devices, including Samsung models. However, using this technique responsibly and only on devices you own or have permission to access is important. Remember, this method exploits a security flaw and should be used as a last resort.
Part 3: Other Ways To Unlock Your Screen
While the emergency call bypass for Android method is interesting, it’s largely unreliable and outdated, mainly effective on older Android versions. Modern devices have significantly improved security, making this method obsolete. There are other, more reliable methods for those needing to unlock their phone’s screen.
Method 1: Wondershare Dr.Fone – Screen Unlock
Wondershare Dr.Fone is a comprehensive software solution for various mobile issues, including screen unlocking. It’s especially useful when you’ve forgotten your password, pattern, or PIN. Here’s how you can use Dr.Fone to unlock your screen:
![]()
Dr.Fone - Screen Unlock (Android)
The Best UnlockJunky Alternative to Bypass FRP and Solve Your Screen Locks
- Completely unlinked from the previous Google account, it won’t be traced or blocked by it anymore.
- Remove all Android screen locks (PIN/pattern/fingerprints/face ID) in minutes.
- Compatiable with various Android models.
- Provide specific removal solutions to promise good success rate.
4,008,670 people have downloaded it
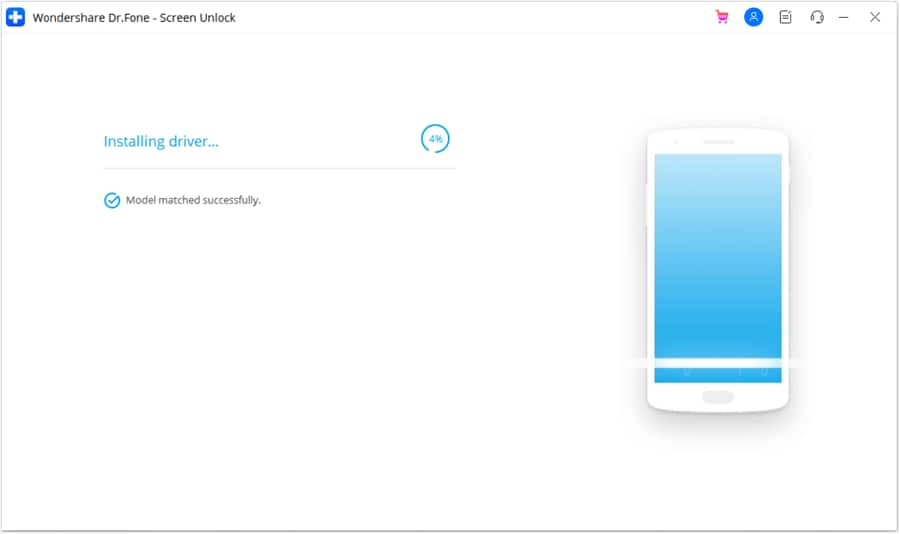
- Step 1: Launch the Dr.Fone toolkit and go to Toolbox > Screen Unlock. Connect your Android device to your PC.

- Step 2: On the next page, choose Android.

- Step 3: Select Unlock Android Screen, as this is specifically for bypassing the lock screen

- Step 4: Select the brand of your device.

- Step 5: Click Remove without Data Loss to ensure your data stays intact.

- Step 6: Confirm device details. Then, enter “000000” to confirm and initiate the unlocking process.

- Step 7: The software will provide specific instructions to put your device into download mode. Follow them.

- Step 8: Once the process is complete, click Done. If it doesn’t work the first time, try again.

Method 2: Using “Forgot PIN/Passcode” and Google Account
You can use the Forgot PIN/Passcode feature if you’ve linked your phone to a Google account. After multiple failed attempts to unlock your phone, you’ll see a prompt to reset the password via your Google account credentials.
Method 3: Forcing a Data Reset on Your Android Phone
As a last resort, you can perform a factory reset. This will erase all data on your device but remove the lock screen. Access the recovery mode by pressing a combination of keys (usually volume up/down and the power button) and then selecting Wipe data/Factory reset.
Method 4: Booting Into Safe Mode
Booting into safe mode can bypass third-party lock screens. This method won’t work on the default lock screen but can be helpful if an app sets the lock.
In summary, while the emergency call bypass is a thing of the past, there are still various ways to unlock your phone. There’s always a solution, whether through a sophisticated tool like Wondershare Dr.Fone or built-in Android features.
Conclusion
This guide explored how to bypass the Android lock screen using an emergency call. It mainly focused on outdated Android emergency call bypass and more reliable alternatives. Key takeaways include understanding that while older methods like the emergency call bypass are largely ineffective on modern devices, tools like Wondershare Dr.Fone offer a safe and trusted solution.
Learning to unlock your phone screen ensures you’re never locked out of your device, keeping it within your reach. Consider using Dr. Fone- Screen Unlock for a secure and effective way to bypass phone lock screens. It’s an excellent tool for regaining access to your device without risking your data.
Unlocking the Power of Smart Lock: A Beginner’s Guide for OnePlus Nord N30 SE Users
Google constantly comes up with features to simplify the way users interact and complete tasks on the Android platform. One of the most important features that techies loved to debate about was the Smart Lock Android, a secure password manager functioning in sync with a Google account on the Android phone.
Part 1: What is Android Smart Lock?
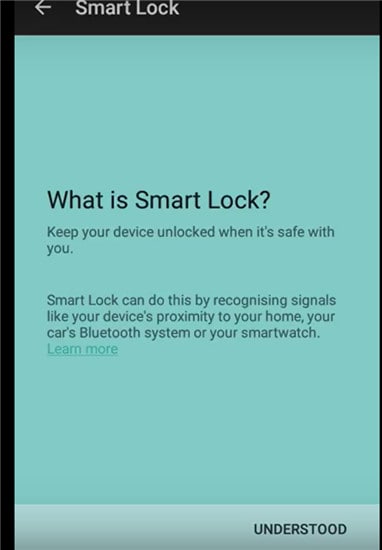
Android Lollipop added a feature called Smart Lock, and the feature was devised as a smart tool to prevent the Android phone from locking once it was initially unlocked. In other words, the feature overrides an Android phone’s Lock Screen feature, thereby saving users the need to enter passwords every time the OnePlus Nord N30 SE device locks.
If you’re at home, it’s likely your android phone is locked out if you haven’t accessed at for some time. Smart Locks solves the problem in many ways. It allows you to allocate trusted places. Once you within range of the trusted places, your phone won’t lock. Trusted devices come next. Smart Lock is assigned to Bluetooth and Android NFC unlock devices.

Finally, trusted face unlocking is the ultimate face recognition system that unlocks your Android device as soon as you look at it across the front-facing camera. A face unlock first introduced with Android Jelly Bean and has been significantly improved in later versions.
Turning On Smart Lock
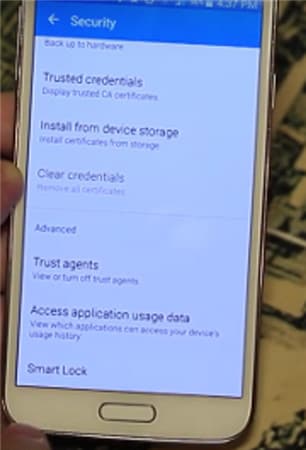
The feature is enabled by first accessing settings. For example, in a Samsung Galaxy S6:
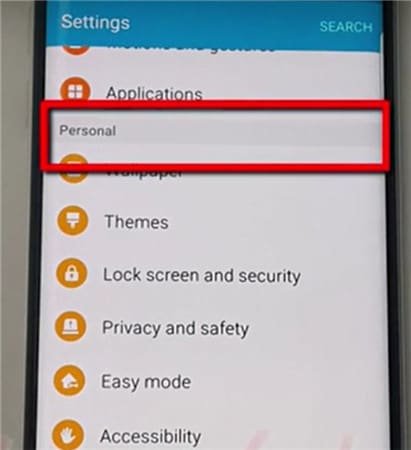
Tap on Settings, which is the gear symbol.
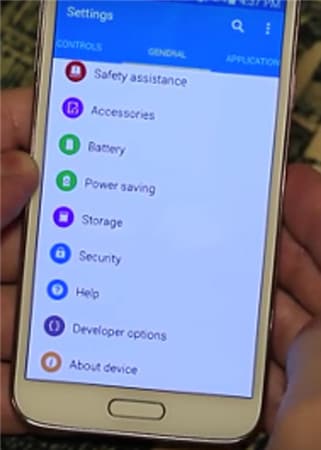
- • Click on Personal and tap on Security.
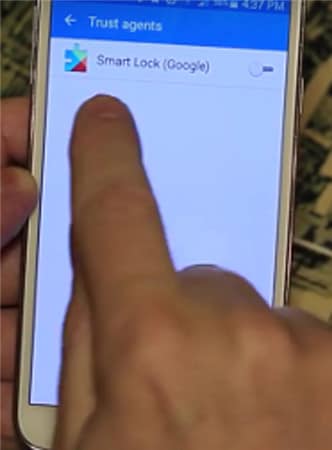
- • Go to Advanced and tap on Trust agents and make sure Smart Lock is turned on.
- • Under Screen Security tap Smart Lock.
- • Here, you need to enter your Screen Lock. If you haven’t done so, set up a password and PIN by following the on-screen prompts. The screen Lock is needed every time you have to change the Smart Lock settings.
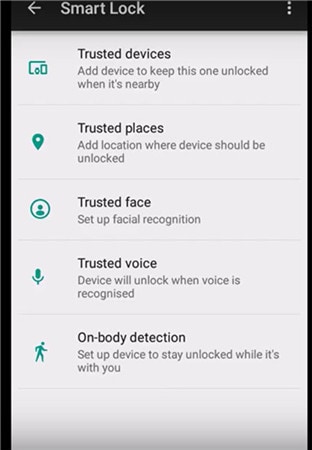
Within Smart Lock, there are three options for setting the system. You can set up trusted devices, trusted face, and trusted places individually, combining two or all three at the same time. You can choose just one trusted face, but you have the option to set up as many trusted devices and trusted places as needed.
Part 2: Turn On Smart Lock For Android with Trusted Devices
You can decide on a trusted device to be paired with Smart Lock Android.
For example, you can set up a Smart Lock for Bluetooth in your Android Bluetooth settings. It can also be done for Android NFC unlock devices. Examples include the Bluetooth system in your car, NFC unlocks, android sticker on the car’s phone dock, or Bluetooth in your watch.
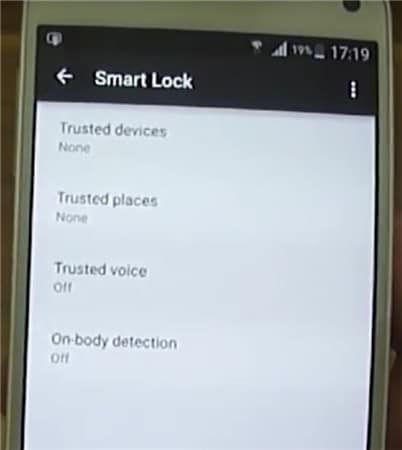
- • Go to Settings.
- • Tap on Security and then Smart Lock.
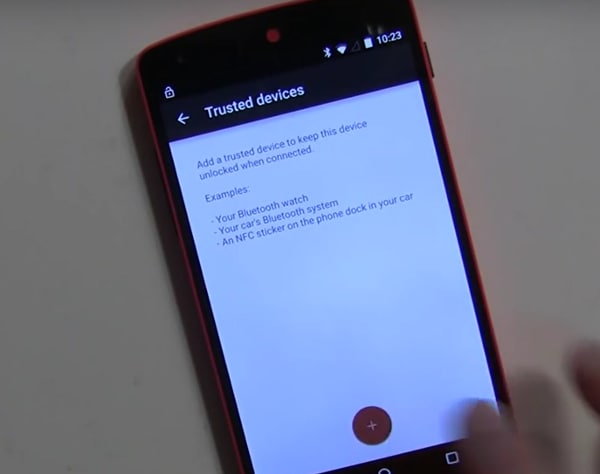
- • Existing paired options are listed under Trusted Devices.
- • Initially, trusted devices will show None.
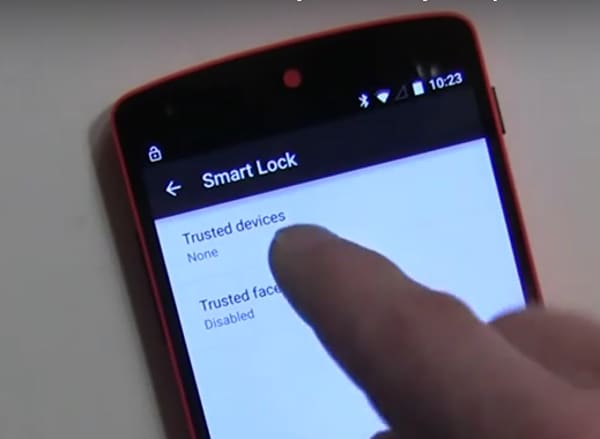
Tap on Add Trusted Devices.
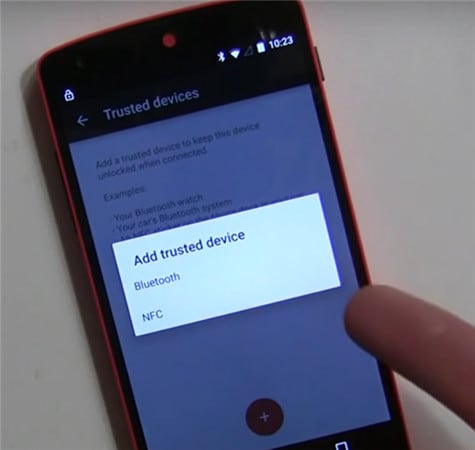
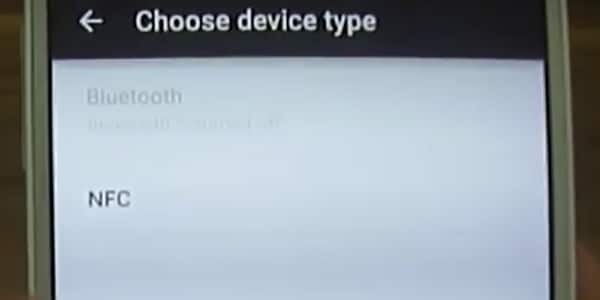
The next screen is the Choose Device Type.

Since you have already paired Bluetooth, it will ask you to choose the OnePlus Nord N30 SE device from the list.
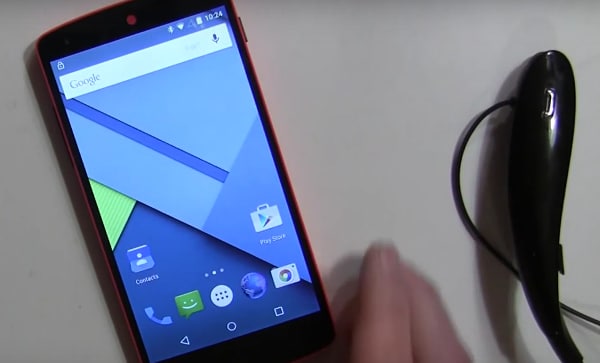
- • As an example, let’s take the case of LG HBS800. It may show Not connected until you add it.
- • It will show up under Trusted devices in the Smart Lock menu.
- • When you turn the added device on, Smart Lock now unlocks the Android mobile.
Similarly, other Bluetooth and NFC unlock android supported gadgets can be added under the list of Trusted Devices.
Part 3: Turn On Smart Lock For Android With Trusted Locations
You can also add locations or addresses to Smart Lock Trusted Locations, and the phone unlocks automatically as soon as you arrive at the desired location. For example, you can set up your home or work address under Trusted Locations.
Check current settings first.

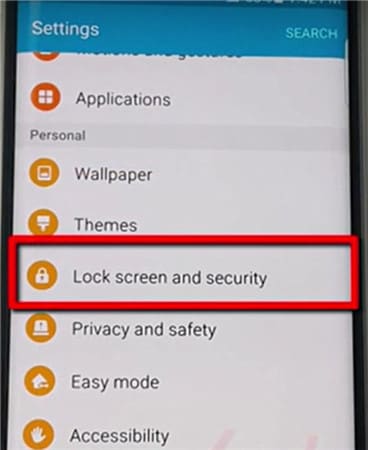
On a new Android phone, visit Settings>Personal.
Then Lock Screen and Security.
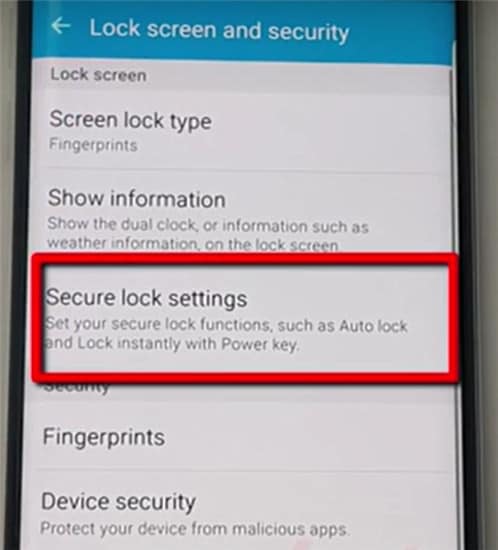
Then Secure Lock Settings.
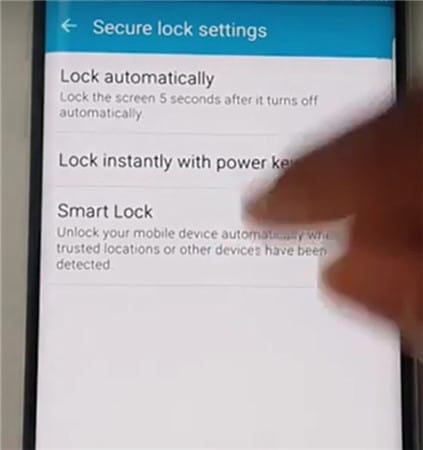
Tap Smart Lock.
Tap on Trusted Places.
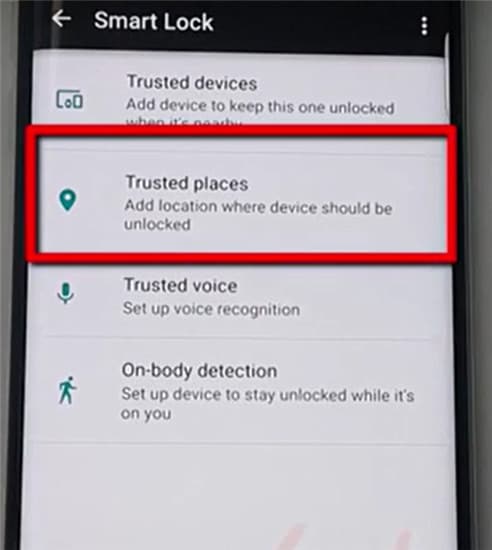
Tap on Add Trusted Places
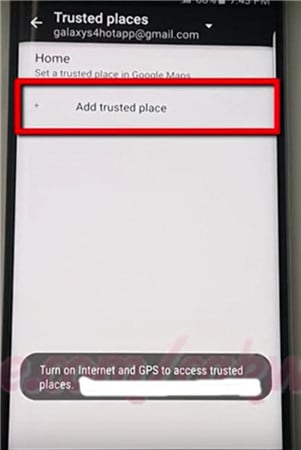
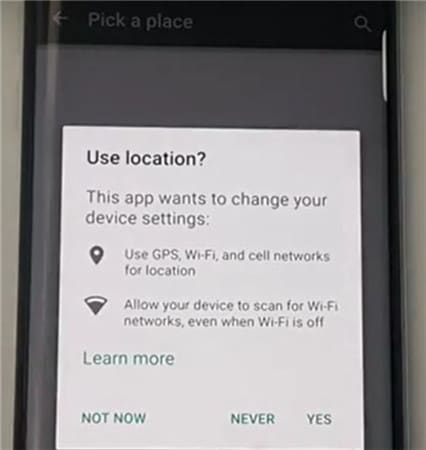
- • Initiate the Google Maps app on the Android phone. Make sure the Internet and GPS are on.
- • Pick a place.
- • Click on Settings.
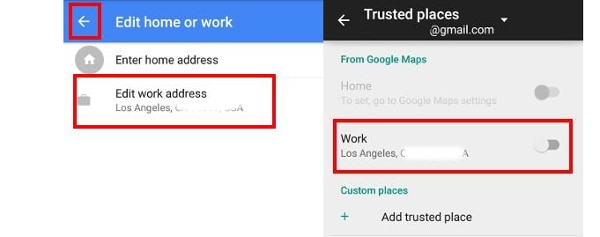
- • Click on Edit home or work. You can now add or edit the required addresses.
- • As an example, click on the Enter work address.
- • You now have the option to type in the address or use the address listed on Google Maps as the required work address.
- • A successful addition is listed and can be edited under the Edit work address.
- • Close the Google Maps app.
- • The work address is automatically propagated and configured with Smart Lock settings.
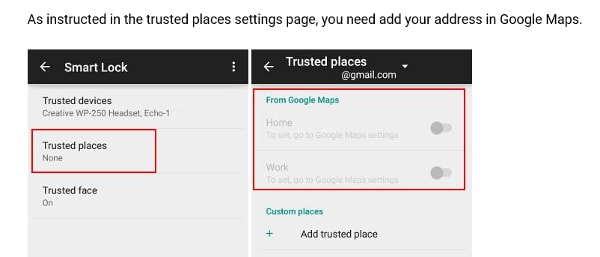
- • Go back to Settings> Security> Smart Lock> Trusted Places.
- • The work address you added is now listed under Work.
- • However, it is not yet configured as a Smart Lock option. Tap the location once, and it is enabled.
- • The switch along the address to the right turns blue, indicating it is enabled.
- • The work address is now listed under Trusted places for Work.
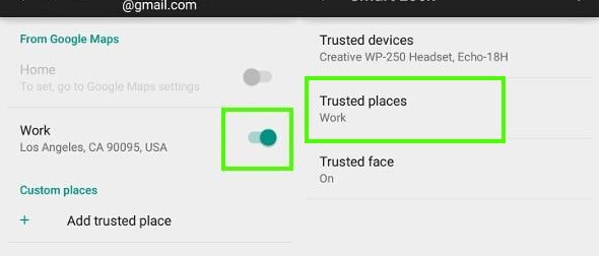
- • The phone is now configured for the work address and will unlock whenever you are at the location.
- • Since it works on Google Maps, the feature works through an Internet connection.
Part 4: Turn On Smart Lock For Android With Trusted Face
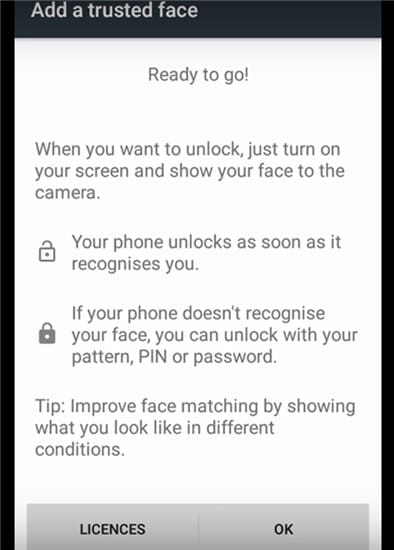
The feature recognizes your face and then unlocks the OnePlus Nord N30 SE device. Once you set up the OnePlus Nord N30 SE device to recognize your face as a trusted face, it will unlock the OnePlus Nord N30 SE device as soon as it recognizes you.
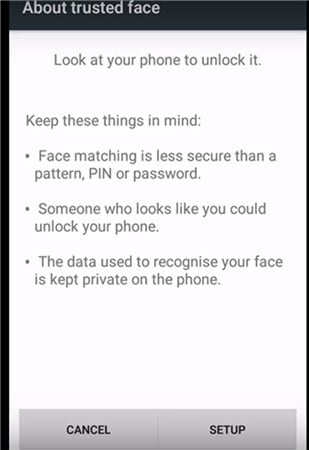
PRECAUTION: At best, this can be the first level of security, as one who resembles you to some extent can unlock the OnePlus Nord N30 SE device. Photographs are not stored in the system. The device does hold necessary data to recognize your face, and the security level is determined by how good the OnePlus Nord N30 SE device is configured. The data is not accessed by any app or loaded onto a Google server for backup.
Setting Up Trusted Face
- • Go to Smart Lock and tap Trusted Face.
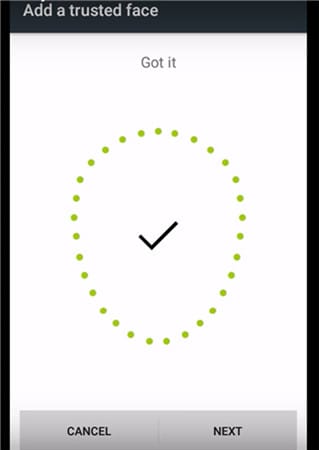
- • Tap on Setup. Follow on-screen instructions.
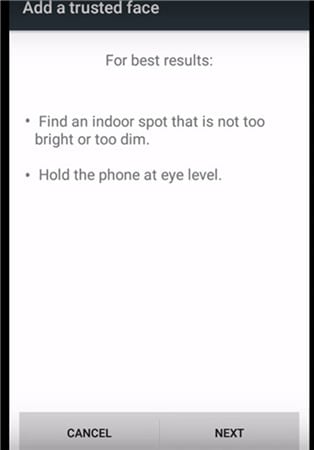
The device begins to gather data about your face. The trusted face icon appears. As a backup, in case Smart Lock does not recognize your face, use the manual system by applying the PIN or password to unlock the OnePlus Nord N30 SE device.
In case Trusted Face is not required, tap on reset Trusted Face appearing under the Trusted Face menu. Tap on Reset to reset the option.
How To Improve Facial Recognition In Your Bluetooth and Android NFC Unlock Devices
- • If you feel facial recognition is not up to the mark, go to Smart Lock and tap on a Trusted face.
- • Tap on Improve face matching.
- • Tap on Next and follow instructions on the screen to complete the task.
Smart Lock Android is a great feature and is only going to improve on time. With added security measures being introduced by Google for Bluetooth and NFC unlock android devices, including configuration to Google maps and Gmail, the feature may be one of the most important features to overcome constant blocking of devices even in protected places.
Video on How to Remove Android Lock Screen Without Data Loss
Mastering Android Device Manager: The Ultimate Guide to Unlocking Your OnePlus Nord N30 SE Device
So, what is Android Device Manager? Android has this amazing native tool to help you locate and remote wipe your lost or stolen phone. We lock our phones via passwords or patterns or fingerprints to maintain the security but what if someone dares to meddle with your phone or unfortunately, it gets stolen? Don’t worry, all you need to do is let Android Device Manager unlock your Android phone. For this, it just needs to be enabled on your phone (before you unluckily locked yourself out of it). Android Device Manager unlocks your phone in a small amount of time, saving you from all the troubles.
In addition to this, the Android Device Manager also unlocks your password/pin-encrypted phone if you have forgotten the passcode by chance. The procedure is quite simple; all you need is a Google account to set this up onyour phone and then you can make use of any other online device to track down your lost or stolen phone or to even wipe all data in it. Phew!
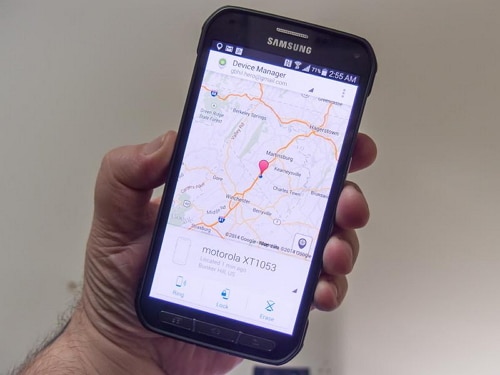
Using the Android Device Manager to track a lost phone
Part 1: What is Android Device Manager lock?
Android Device Manager is Google’s take on Apple’s Find My iPhone. Enabling the ADM is quite easy; just go to google.com/android/devicemanager on your computer and search through your list of devices that are already connected to your Google account. Once you are there, you can easily send a notification to the phone you want to enable remote password application and wiping upon.
ADM comes with a set of features that helps you to unlock your Android phone as well. It not only helps you to find your device, but also Ring it, lock it, and wipe and erase all the data as well, if your phone is lost or stolen. Once you’re logged into the ADM website from your computer, you can avail all these options once your phone is located. It is a wise option to get your device locked by Android Device Manager in case it is lost or stolen, so that your phone is secured.
Android Device Manager can unlock your phone under a specific set of circumstances only.
- • First of all, Android Device Manager needs to be enabled on your phone before it is lost, stolen, etc.
- • Secondly, your phone can only be tracked by ADM if the GPS option is switched on.
- • Thirdly, the OnePlus Nord N30 SE device you are using for ADM, must be connected to Wi-Fi or internet, to login to your Google account.
- • Lastly, Android Device Manager is not compatible for all Android versions. For now, it is only compatible with devices running Android 4.4 and above, so your phone must be in this category for ADM to work.
Part 2: How to unlock Android phone with Android Device Manager?
Just act according to the following steps, and the Android Device Manager will unlock your phone.
1. On your computer or any other mobile phone, visit: google.com/android/devicemanager
2. Then, sign in with the help of your Google login details that you had used in your locked phone as well.
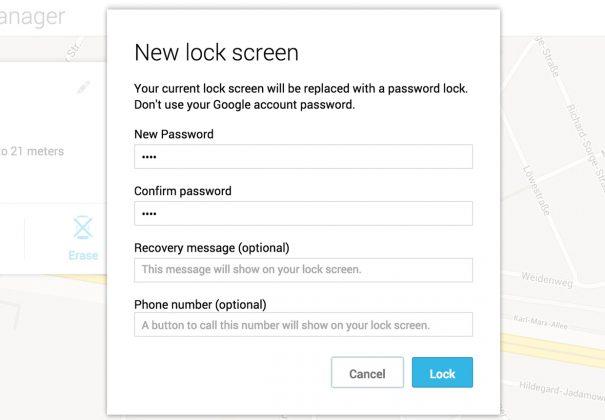
3. In the ADM interface, choose the OnePlus Nord N30 SE device you want to unlock. Now, select “Lock”.
4. Enter a temporary password. Now go ahead and click on “Lock” again.
5. If the previous step was successful, you should be seeing a confirmation below the box with the buttons – Ring, Lock and Erase.
6. Now, you should see a password field on your phone screen. Enter a temporary password to unlock your phone.
7. Visit your phone’s lock screen settings and disable the temporary password.
The Android Device Manager has successfully unlocked your phone!
A downside to this process, is an error message faced by some users while using ADM. Many users have reported the issue, that when they have tried using ADM to unlock their locked device, an error message has occurred, saying, “since Google has verified that a screen lock is already set”. Basically, this error message conveys that you will not be able to unlock your phone using Android Device Manager, and this is a flaw on Google’s part, not your phone’s.
Part 3: What to do if phone is locked by Android Device Manager
There are 2 situations where you would want to know how to unlock the Android Device Manager lock – one, when you have unfortunately forgotten the screen lock passcode and the other is when your phone is locked by Android Device Manager.
ADM is built to completely lock your device so that unknown people cannot access it. So, if your phone is locked by Android Device Manager, you might be in a problem.While ADM is a wonderful tool to lock your phone or erase and wipe data if its stolen or lost, most of the users have reported the issue that they cannot unlock their phones that are locked by Android Device Manager. A possible solution to this is adding a temporary password via Google login and bypassing the ADM lock. Or, you can try resetting the password again by entering a new password via ADM. If that does not work, you can make use of several third-party applications which can be found in the internet, that will help to completely erase the Android Device Manager lock.
So, now you know how to unlock the Android Device Manager lock. Do keep in mind, your device must be connected to internet or Wi-Fi, to login to your Google account.
Part 4: Unlock Android devices with Dr.Fone - Screen Unlock (Android)
As mentioned before, many were unable to unlock their phones with ADM. This is why we use the Dr.Fone - Screen Unlock (Android) . It is hassle-free and easy-to-use; the Dr.Fone toolkit needs to be downloaded on your computer and with a few easy steps, it erases any kind of lock-screen passcode and avoids any kind of data loss as well!
Dr.Fone - Android Lock Screen Removal
Remove 4 Types of Android Screen Lock without Data Loss
- It can remove 4 screen lock types - pattern, PIN, password & fingerprints.
- Only remove the lock screen, no data loss at all.
- No tech knowledge asked, everybody can handle it.
- Work for Samsung Galaxy S/Note/Tab series, and LG G2, G3, G4, etc.
3,224,627 people have downloaded it
This tool works on removing all four types of lock-screen passcodes – PINs, Patterns, Fingerprints, and Passwords. Anyone can use this tool following these easy steps:
You can also use this tool to bypass the locked screen beyond Samsung and LG.Things you should pay attention is that it will remove all the data after finishing unloking on other brand android phone.
1. Fire up the Dr.Fone toolkit for Android on your computer and select the Screen Unlock among all the other tools.
2. Now, connect your Android device to the computer and select phone model in the list on the program.
3. Boot your phone into Download mode:
- • Power off your Android phone.
- • Press and hold the volume down+the home button + the power button at the same time.
- • Press the volume up button to enter Download Mode.
4. After you get your phone into the Download mode, it will start downloading a recovery package. Wait for this to be completed.
5. When the recovery package download is completed, Dr.Fone toolkit will begin removing the screen lock. This process will not cause any data loss on your Android device, so do not worry. Once the whole procedure is over, you can easily access your Android phone without entering any kind of password. Hurrah!
The Dr.Fone software is currently compatible with Samsung Galaxy S/Note/Tab series, and LG G2/G3/G4 series. For windows, it is compatible with 10/8.1/8/7/XP/Vista.
The Android Device Manager is an excellent initiative taken by Google to give people the chance to not lose any data and regain access to their phones. This also teaches us to take precautions before such unfortunate incidents take place. Phones are probably one of the most important belongings of ours, in which we confide all our private and confidential documents that we wouldn’t want to be meddled with.
So, make use of this guide and get back command over your Android phone.
Also read:
- [New] 2024 Approved The Complete Catalog of Livestreaming Cameras Review
- [Updated] Stellar Background Choices for Effective Video Conferencing for 2024
- 2024 Approved Leading Edge Top 15 On-the-Go Video Gear
- A Complete Guide To OEM Unlocking on Oppo Reno 10 5G
- Behind the Headset Today's VR, Tomorrow's Trials for 2024
- Bypassing Google Account With vnROM Bypass For Poco M6 Pro 5G
- Ease Through Excess Learn the Quick Edits for Large Drafters on TikTok
- Guías Espirituales | Free Book
- How to Fix Civilization 6 Startup Problems in Windows 11
- How To Transfer Data From iPhone 13 Pro Max To Android devices? | Dr.fone
- How To Unlock Any Poco F5 5G Phone Password Using Emergency Call
- How to Unlock Nokia C300 Phone without Any Data Loss
- In 2024, Forgotten The Voicemail Password Of Nokia C12? Try These Fixes
- In 2024, Optimal Steadicam Devices for Professional Drone Cinematography
- In 2024, Universal Unlock Pattern for Poco
- Top 10 Fingerprint Lock Apps to Lock Your Realme 11 Pro Phone
- Title: How To Unlock Any OnePlus Nord N30 SE Phone Password Using Emergency Call
- Author: Aaron
- Created at : 2024-12-12 16:08:11
- Updated at : 2024-12-13 17:17:16
- Link: https://easy-unlock-android.techidaily.com/how-to-unlock-any-oneplus-nord-n30-se-phone-password-using-emergency-call-by-drfone-android/
- License: This work is licensed under CC BY-NC-SA 4.0.