
How To Remove or Bypass Knox Enrollment Service On Nokia
How To Remove or Bypass Knox Enrollment Service On Nokia 105 Classic
In today’s digitally-driven work environment, many companies rely on Knox Enrollment Service to secure their employees’ phones and safeguard sensitive data. However, you might have a Knox-enrolled phone you wish to unlock for personal use.
This article will guide you through removing or bypassing the serviceon your phone. However, it’s important to note that this should ideally be done with your employer’s consent. For transitioning to personal use or other reasons, understanding how to remove or bypass Knox Enrollment Service can be crucial for some users.

Part 1: What Is the Knox Enrollment Service?
Knox Enrollment Service is an integral part of Samsung’s Knox, a toolbox of security features for enterprise-level management of mobile devices. This service is pivotal in how companies manage and secure their mobile devices, especially in a corporate environment.
What It Is
Knox Enrollment Service by Samsung is a tool businesses use to automatically enroll Samsung devices into their management systems when the Nokia 105 Classic device is connected to the internet. It’s designed for IT administrators to easily deploy, manage, and enforce policies across devices in their network, ensuring consistency and security.
What It Does
The service allows IT administrators to pre-configure settings and apps and manage other aspects of the Nokia 105 Classic device’s functionality. When a device is enrolled, it can be remotely controlled and monitored. The administrators can push updates, track device locations, remotely wipe data for security, and enforce specific compliance policies. This automation of device enrollment simplifies the setup process for both the IT department and the end-user.
Advantages
Of course, Samsung Knox would not be popular without any advantages. Here are some of them:
- Enhanced security. Knox Enrollment Service ensures corporate devices have robust security features. This helps in safeguarding sensitive data against unauthorized access.
- **Streamlined management.**It simplifies the Nokia 105 Classic device management, allowing administrators to configure devices without physical access.
- The service enables the customization of devices to fit specific business needs, including installing necessary applications and restrictions on unauthorized apps.
- Compliance Assurance. With the ability to have policies remotely, companies can ensure that all devices comply with corporate standards and regulations.
Disadvantages
However, it also has some disadvantages:
- **Restrictive for users.**For employees, this can mean reduced control over their devices. After all, certain functionalities might be restricted by the employer.
- Potential privacy concerns. The ability of IT administrators to monitor and control devices may raise privacy concerns among employees.
- Complexity in management. While it simplifies many aspects, managing many devices through Knox can become complex. This is particular in diverse environments with different user needs.
Knox Enrollment Service is a powerful tool for enterprise mobile management, offering enhanced security and simplified device management. However, it also introduces challenges, particularly regarding user autonomy and privacy. Understanding these advantages and disadvantages is crucial before removing or bypassing this service.
Part 2: How To Remove Knox Enrollment Service on Your Nokia 105 Classic
In most cases, an administrator can only effectively remove the Knox Enrollment Service through the Samsung Knox Portal. This typically requires cooperation from your employer.
Here’s a step-by-step guide to removing itfrom the Admin’s Portal:
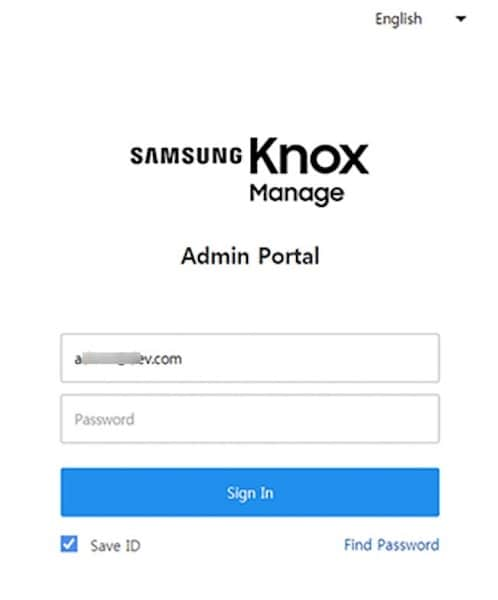
- Step 1: Sign in to the Samsung Knox Portal using administrative credentials.
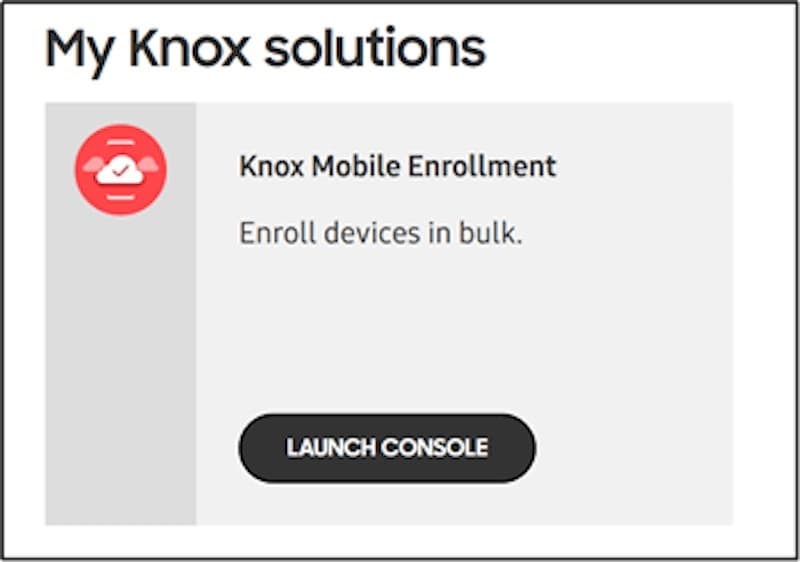
- Step 2: Navigate to Samsung Knox Mobile Enrollment, then click Devices.
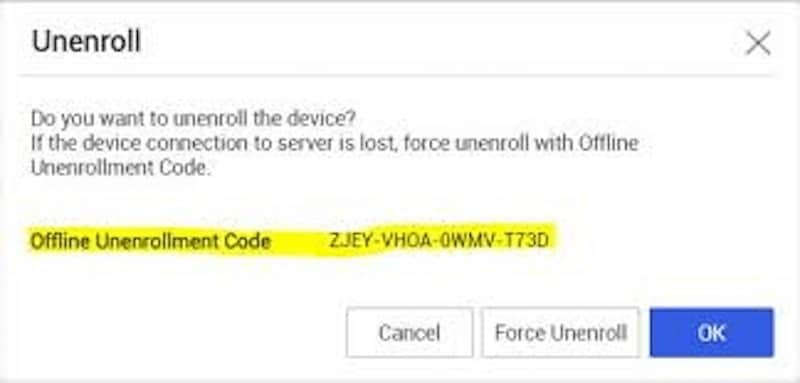
- Step 3: Select the Nokia 105 Classic device in question and click Actions.
- Step 4: Choose the Clear Profile option to remove all profiles from the Nokia 105 Classic device. This action will disassociate the Nokia 105 Classic device from any existing Knox configurations.

After removing the Nokia 105 Classic device from Knox Enrollment via the admin account, you may still need to uninstall the Knox app from the Android device. This can usually be done through the Nokia 105 Classic device’s settings. Navigate to ‘Apps’ in the settings menu, locate the Knox app, and select ‘Uninstall’ or ‘Disable’. Be aware that this option might not be available on all devices, depending on how Knox was configured.
Rooting and Flashing a New ROM To Remove Knox Enrollment Service
For the more tech-savvy users, another method to bypass Knox Enrollment Service is by rooting the Nokia 105 Classic device and flashing a new ROM. This process involves gaining root access to the Nokia 105 Classic device’s operating system, which allows you to modify the software extensively. After rooting, you can flash a new ROM that doesn’t include the Knox software.
However, this method is risky and not recommended for the average user. It will void your warranty and potentially ‘brick’ your device, rendering it unusable. Furthermore, this action could notify your employer of your attempt to remove Knox, which could have professional repercussions. Proceed with this method only if you know the risks and consequences.
Removing Knox Enrollment Service from your phone is feasible but requires careful consideration, especially in a corporate context. Always ensure you have the necessary permissions and understand the risks of modifying your device’s software.
If You Can’t Use the Above Methods
If none of the above methods are feasible, and you find your phone locked or restricted due to Knox, read through the next section. It will provide additional insights on what to do next.
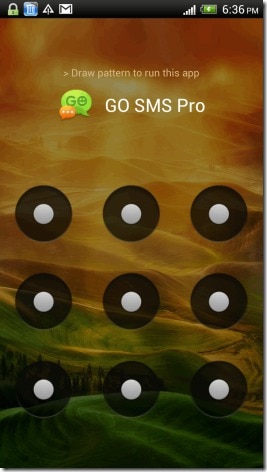
Part 3: How To Bypass a Locked Phone With a Professional Tool
When faced with a locked phone due to Knox security features, and if conventional methods don’t yield results, turning to a third-party tool can be a viable solution. One such tool known for its efficiency in bypassing phone locks is Wondershare Dr.Fone - Screen Unlock.
Wondershare Dr.Fone is a versatile software suite that tackles various smartphone issues, including unlocking screens. Its Screen Unlock feature is useful for bypassing security barriers without requiring extensive technical knowledge. It hosts several features, such as those you need for data recovery, system repairs, and other smartphone services.

Dr.Fone’s Screen Unlock Feature
The Screen Unlock feature in Dr.Fone is specifically designed to bypass screen locks. Often, you can use it for issues such as forgotten passwords or the like. The great thing is that it can also bypass those locks enforced by Knox. You can do all these without causing data loss or significant changes to your device’s system.
![]()
Dr.Fone - Screen Unlock (Android)
The Best UnlockJunky Alternative to Bypass FRP and Solve Your Screen Locks
- Remove all Android screen locks (PIN/pattern/fingerprints/face ID) in minutes.
- Bypass the FRP lock of Samsung without a PIN or Google account.
- Everyone can handle the lock screen without any tech knowledge.
- Provide specific removal solutions to promise good success rate.
4,008,669 people have downloaded it
How To Use Dr.Fone - Screen Unlock
- Step 1: Open Dr.Fone and select the Screen Unlock module under Toolbox. Connect your locked phone to the computer using a USB cable.

- Step 2: On the next pages, select Android > Unlock Android Screen.

- Step 3: Find the brand of your device.
- Step 4: Select Remove without Data Loss.

- Step 5: Enter “000000” to start the process after confirming device details.

- Step 6: Follow the instructions to put your device into Download Mode.

- Step 7: After the process is completed, click Done. Don’t be afraid to retry the process if it doesn’t work.

If you find yourself locked out of your phone due to Knox and unable to use conventional methods to regain access, Wondershare Dr.Fone offers a reliable and user-friendly alternative. Its Screen Unlock feature is designed to bypass such security features effectively, ensuring you can regain phone access with minimal fuss.
You May Also Interested:
Tutorial to Change Android IMEI without Root
8 Safe and Effective Methods to Unlock Your iPhone Without a Passcode
How to Unlock OPPO Phone Without Password?
Conclusion
In this article, you’ve explored the intricacies of the Knox Enrollment Service and the steps to remove or bypass it. Key takeaways include understanding what Knox is and its removal or bypass methods. However, securing authorization from your organization or phone provider is important before proceeding. This precaution is crucial to avoid potential complications.
For those facing a locked phone due to Knox and unable to follow conventional methods, Wondershare Dr.Fone emerges as a reliable solution. Its Screen Unlock feature offers a safe and efficient way to regain access to your device, ensuring you stay connected without compromising security.
How to Lock Apps on Nokia 105 Classic to Protect Your Individual Information
If you are not a fan of having to go through the process of getting through a pattern or password every time you want to use your phone, the good news is that you don’t have to. There are really just a few Apps on your Android device that have sensitive information you don’t want others getting access to. It would really be great if you could lock those apps individually as opposed to locking the Nokia 105 Classic device as a whole.
Well, in light of helping you out, this article will address just how you can lock Apps on your device and not have to type in a code every time you want to use the Nokia 105 Classic device.
Part 1. Why you need to Lock Apps on Android?
Before we get down to the business of locking some of your Apps, let’s look at some of the reasons why you would want to lock certain apps.
- You may simply want better access on your device. Locking certain apps will allow you to easily access the Nokia 105 Classic device and use it without having to remember passwords and patterns.
- If you are a person who is not good at remembering passwords or patterns, simply locking certain apps will help you not get locked out of your entire device which can cause a lot of problems.
- If your device is used by more than one person, locking certain apps will keep the other users out of information you would rather they didn’t access.
- If you have children, you can eliminate the many accidental in-app purchases by locking the apps your children shouldn’t be on.
- Locking apps is also a good way to keep children from content they shouldn’t be accessing.
Part 2. How to Lock Apps in Android
There is always a good reason to Lock Apps on your device and we have two easy and effective methods you can use to do this. Choose the one that you are most comfortable with.
Method One: Using Smart App Protector
Smart App Protector is a freeware that allows you to lock specified applications.
Step 1: Download and Install Smart App Protector from the Google Play Store and Launch it. You may be required to install a helper application for Smart App Protector. This helper will ensure that the many App services running on your device will not be killed by third party apps.
Step 2: The default password 7777 but you can change this in the Password & Pattern Settings.

Step 3: The next step is to add apps to the Smart App Protector. Open the Running Tab on Smart Protector and tap on the “Add” button.

Step 3: Next, select the apps you would like to protect from the pop up list. Tap on the “Add” button once you have chosen your Apps.
Step 4: Now close the app and the Apps chosen will now be password protected.
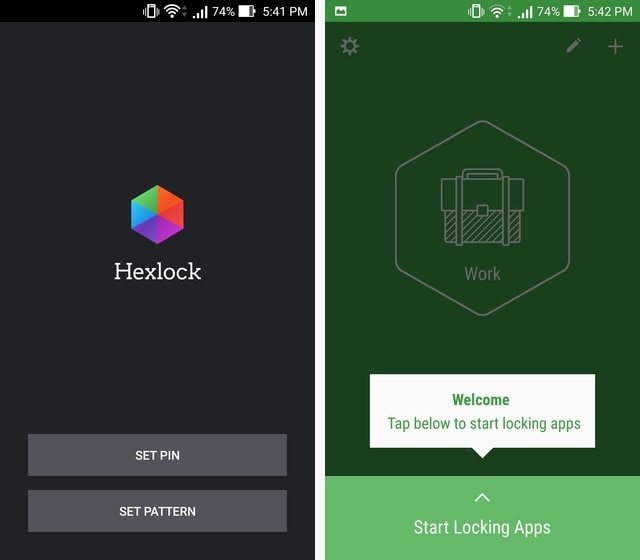
Method 2: Using Hexlock
Step 1: Download Hexlock from the Google Play Store. Once it is installed, open it. You will be required to enter a pattern or PIN. This is the lock code that you will use every time you open the app.

Step 2: Once the PIN or Password is set, you are now ready to lock apps. You can create multiple lists of Apps to be locked ba_x_sed on your different needs. As an example, we have chosen the Work panel. Tap on “Start Locking Apps” to start.
Step 3: You will see a list of Apps to choose from. Choose the Apps you wish to lock and then Tap the down arrow in the upper left when you are done.
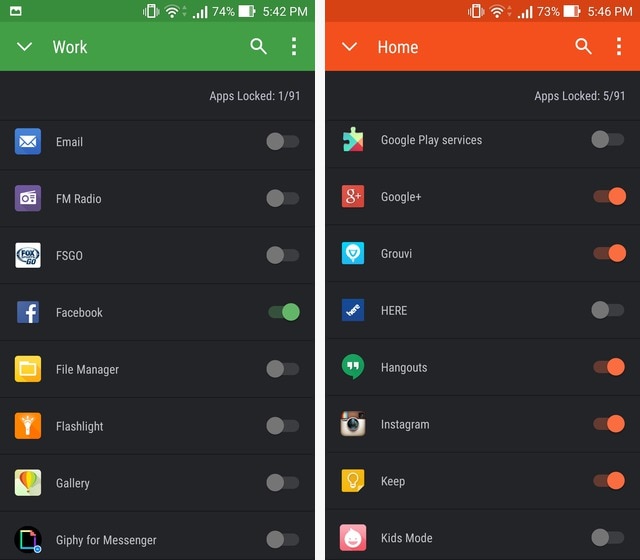
You can then Swipe to the left to move to other lists such as “Home” and proceed to lock apps in this group as well.
Part 3. 6 Private Apps that you should lock on your Android
There are certain apps that may require to be locked more than others. Of course the choice of which apps you should lock will depend on your own uses and preferences. The following are some of the apps you would like to lock for one reason or another.
1. The Messaging App
This is the application that allows you to send and receive messages. You may want to lock this app if you use your device to send messages of a sensitive nature that you would rather keep private. You may also want to lock this app if your device is used by more than one person and you don’t want other users reading your messages.

2. Email App
Most people use individual email applications such as Yahoo Mail App or Gmail. This is another critical one if you are going to protect your work emails. You may want to lock the email app if your work emails are sensitive in nature and contain information that is not for all individuals.

3. Google Play Services
This is the application that allows you to download and install applications to your device. You may want to lock this one if you are trying to prevent other users from downloading and installing further apps to your device. This is especially valuable if your device is utilized by children.
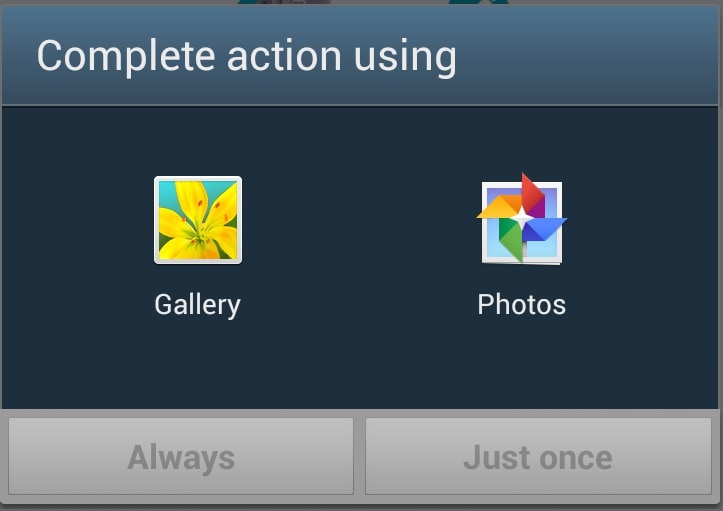
4. Gallery App
The Gallery app displays all the images on your device. The main reason you may want to lock the Gallery app may be because you have sensitive images that are not suitable for all viewers. Again this is ideal if children make use of your device and you have images that you would rather they didn’t see.
5. Music Pla_x_yer App
This is the Application that you use to play the music on your device. You may want to lock it if you don’t want anyone else making changes to your saved audio files and playlists or don’t want someone listening to your audio files.
6. File Manager App
This is the App that displays all of the files that are saved on your device. It is the ultimate app to lock if you have sensitive information on your device that you would rather not share. Locking this app will ensure that all of the files on your device will remain safe from prying eyes.

Having the ability to lock your Apps is an easy way to keep information out of the limelight. It also allows you to take full control of your device. Try it, it might just be freeing as opposed to locking your entire device.
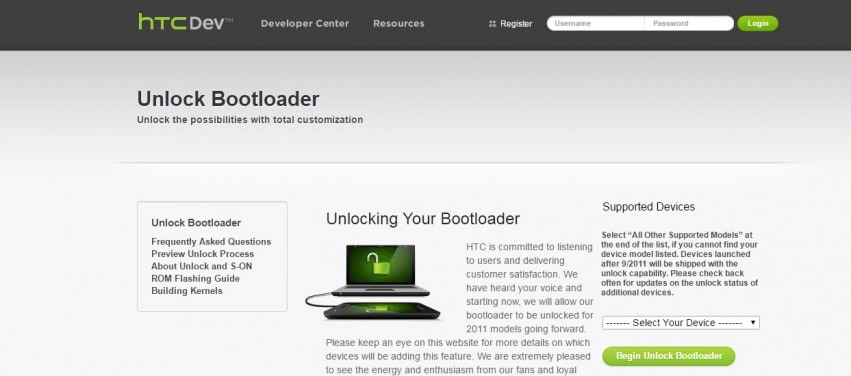
How to Unlock Nokia 105 Classic Bootloader Easily
Do you want to unleash the true power of your smart phone? Do you wish to have complete control over your smart phone? If yes, well, here is the answer; unlock bootloader. For people who are already into the tricks of hacking and rooting smart phones, might be aware of this. But still, there are exciting new developments. Bootloader is a code existing in all operating systems which usually comes pre-locked. So, it is important, if you wish to have a custom ROM installed on the Nokia 105 Classic device, or if you wish to have other controls like installing applications which are incompatible, to have the Nokia 105 Classic device bootloader unlocked. But going through with the process of unlocking bootloader and rooting the Nokia 105 Classic device will not help and rather might break the warranty of the Nokia 105 Classic device. This definitely calls for a diligent watch on how to unlock HTC bootloader. So, it is imperative as a user to know the process of HTC bootloader unlock. This article serves you with some ways you could follow to unleash the true power of your HTC device. Here’s how you can do it.
Part 1: Why We Want to Unlock HTC Bootloader
For people with HTC device, unlocking bootloader would mean complete authority over the smart phone and you have all the power to control the HTC device by all means. Since, bootloader usually comes pre-locked, unlocking the bootloader is the initial step if you would like to have a custom ROM installed in your device. There are various advantages of HTC unlock starting from gaining rights of control to installing latest custom ROMs in the phone and installing incompatible applications. Moreover, HTC unlock bootloader could boost the Nokia 105 Classic device speed and battery life and also help in making complete backups of the Nokia 105 Classic device. You could also have controls to remove bloatware from the HTC device. So, all in all, while there could be certain side effects, if not done properly, there are various advantages of unlocking HTC bootloader. If the process is carried out properly, the Android device could be the perfect smart phone you would like to have.
Part 2: How to Unlock Nokia 105 Classic Bootloader
Nokia 105 Classic is the flagship device of HTC by all means. With a world of features and offerings, Nokia 105 Classic truly is a beast. While the phone is very powerful without any modifications, the true potential is yet to be seen and that can only be done if the bootloader is unlocked. So, to have a complete control over the Nokia 105 Classic device, it is important to unlock the bootloader and the process has to be carried out diligently. One of the initial things that needs to be ensured is that the Nokia 105 Classic device is fully charged or atleast 80% mark. Make sure you have the fastboot drivers for the Nokia 105 Classic device configured on the windows machine and the Android SDK. Here are some of the steps which can be followed to unlock bootloader.
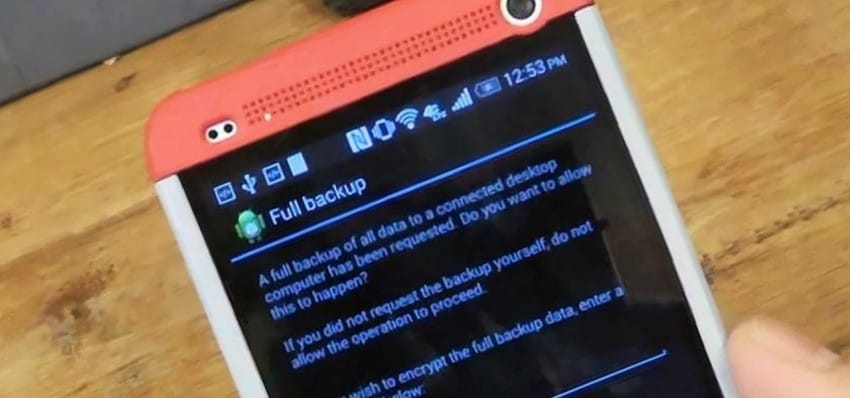
Step 1: It is always very important to keep the phone data backed up and more so when you are planning to unlock the bootloader.
As one of the initial measures, backup the Nokia 105 Classic device completely as bootloader unlocking process will wipe all the data off. So, backup all the data like photos, contacts, multimedia files, documents, etc.
Step 2: Go to htcdev.com/bootloader. Ensure that you are registered with HTC and once the sign up is done, log in to HTC dev.
Now, ensure that HTC Sync Manager is installed on the PC.
Step 3: From the bootloader page, select your device using the drop down option as shown in the picture below.
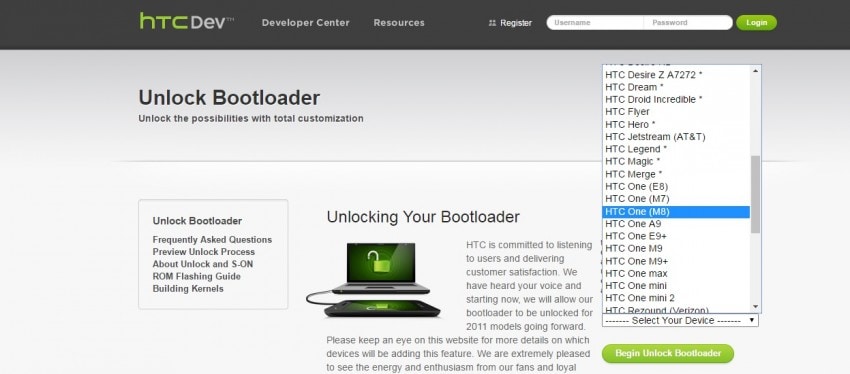
After selecting the Nokia 105 Classic device, click on “Begin Unlock Bootloader”, and then confirm all the dialogue boxes which come your way on screen.
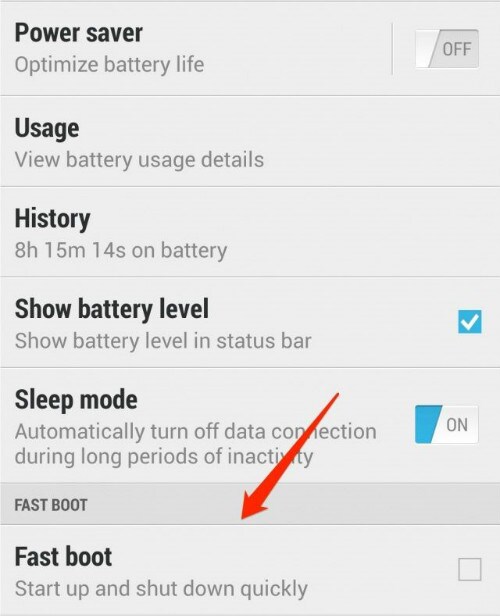
Step 4: Now, you will be presented with four steps to put the Nokia 105 Classic device in bootloader mode. Disconnect the Nokia 105 Classic device from the PC and turn the Nokia 105 Classic device off completely. Press the volume down button along with the power button to switch the Nokia 105 Classic device on in bootloader mode.
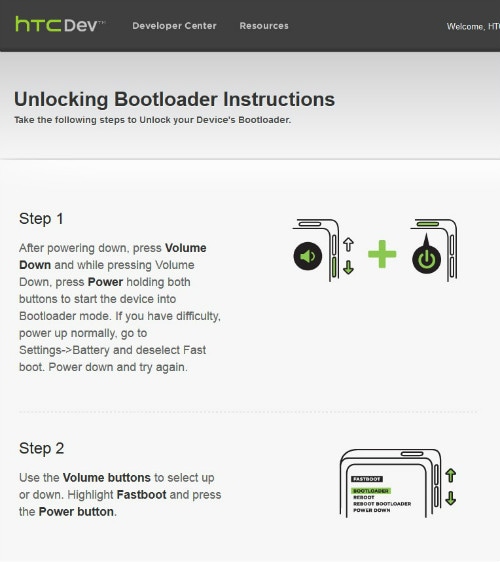
Step 5: Use the volume keys of the Nokia 105 Classic device to select Fastboot option along with pressing power button to confirm, after the Nokia 105 Classic device is in bootloader mode. Now, connect the Nokia 105 Classic device to the computer using a USB cable.
Step 6: Go to Fastboot folder on the PC and holding down the shift key, click on any empty space followed by a click on “Open command window here”.
Step 7: In the command prompt window, type “fastboot devices” and press enter. Nokia 105 Classic will show up in the command prompt.
Note: The drivers have to be installed correctly to see the Nokia 105 Classic device in the command prompt. So, if the Nokia 105 Classic device does not show up, reinstall HTC Sync Manager and try again after restarting the computer.
Step 8: On HTC Dev’s website third page, click on “proceed to Step 9”. Follow the steps listed and then click on submit. The unlock token code for the Nokia 105 Classic device will be mailed by HTC. Download the token and name it “Unlock_code.bin” and place the token in the fastboot folder.
Step 9: Now, in the command prompt window, type the following:
fastboot flash unlocktoken Unlock_code.bin
Step 10: On the Nokia 105 Classic , one message will appear asking if you want to unlock the Nokia 105 Classic device bootloader.
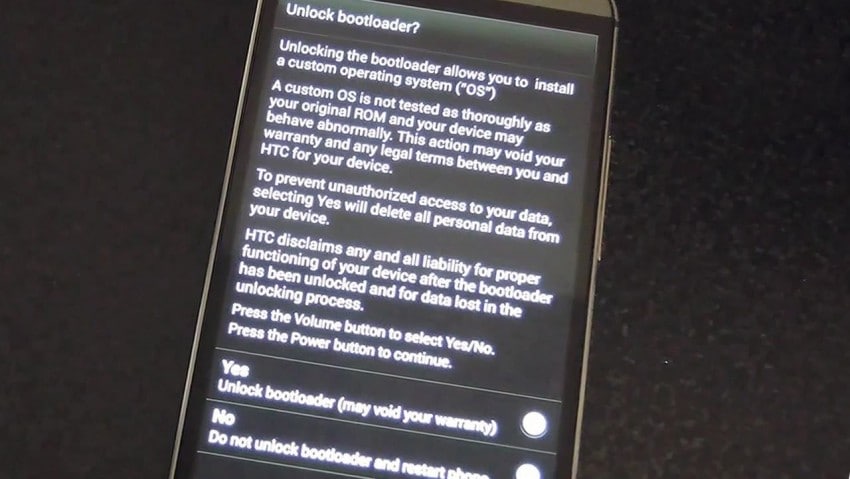
Use volume keys to select and power button to confirm. Once this is done, the Nokia 105 Classic device will restart once and it’s done. The device is now bootloader unlocked.
- Title: How To Remove or Bypass Knox Enrollment Service On Nokia
- Author: Aaron
- Created at : 2024-07-15 18:58:39
- Updated at : 2024-07-16 18:58:39
- Link: https://easy-unlock-android.techidaily.com/how-to-remove-or-bypass-knox-enrollment-service-on-nokia-by-drfone-android/
- License: This work is licensed under CC BY-NC-SA 4.0.