
How to Remove a Previously Synced Google Account from Your Nokia C22
How to Remove a Previously Synced Google Account from Your Nokia C22
The setting up process of a new Android phone requires you to add a Google account that saves all activities and data of the phone like search history, details of online shipping, play store purchases, and more. Once the account is set, it cannot be changed till you delete everything from your phone. Moreover, with the introduction of FRP lock, even a factory reset will not remove the synced Google account.

So, now what if you want to sell your phone or have purchased a second-hand device that is still associated with the previous owner’s Google account? No, worries as there are workarounds available that will help you remove your previously synced google account from your Android device.
Keep reading to know more in detail about how to bypass previously synced google accounts.
Heres a full guide on how to remove google account from android, click to know more!
Part 1: Remove Previously Synced Google Account from Android Phone Without Phone Reset
In this part, we will discuss the methods that can be used for removing the previously synced account from your Android phone without a phone reset.
Method 1: Removing Google Account using the Android Settings Menu
If you just plan to reset your phone, maybe because of the lag caused by the phone cache, and you know the inconvenience of Google FRP as a protection mechanism, then you can remove Google FRP through the Settings menu.
The steps for this method are listed below.
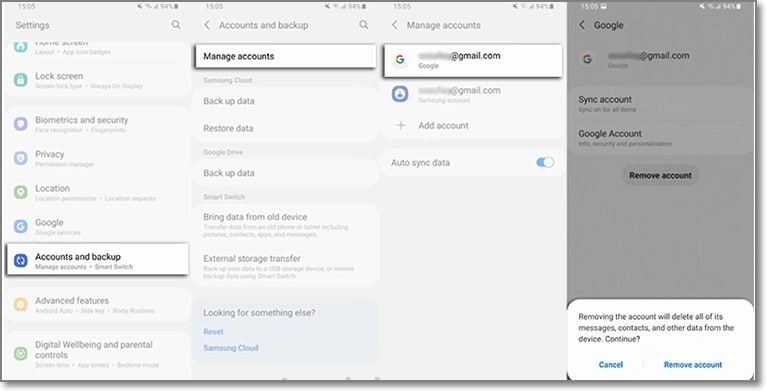
- Step 1: On your Android phone go to the Settings option and choose Accounts & Backup.
- Step 2: Select the Manage Accounts option now and the list of the associated Google Devices will appear.
- Step 3: Choose and click on the Google Account that you want to remove and a pop-up message will appear to inform you that all the account data will be deleted with this action.
To confirm the removal of the account, click on the Remove account button.
Method 2: Remove the Google account from the Android phone using the computer
There is another method using which you can remotely remove the Google account associated with your phone. The steps for the method are listed below.
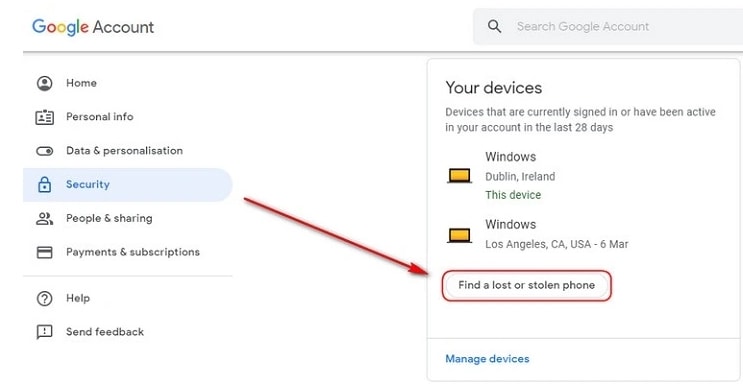
- Step 1: Using another device or a PC, sign in to your Google account that was previously synced on this device and choose the Security option.
- Step 2: Next scroll down and then tap on the Your devices option and choose to Manage devices.
- Step 3: You will now see the list of devices linked to your Google account. Next, tap on Find a lost or stolen phone and then select the Remove option present next to Account access.
- Step 4: You will be again asked if you want to delete the account. Select the Remove option.
- Step 5: The account will be removed successfully and the confirmation message will appear.
Note: This method will actually sign out you from the Google account and will not delete it permanently. To again get access to the account, a notification will appear on your phone to enter the password.
Part 2: How to Disable Factory Reset Protection to Bypass Google Account Verification After Factory Reset
The Factory Reset Protection (FRP) is a security feature for the Android device that allows factory reset only after the associated Google ID and password are entered correctly. With multiple accounts and passwords to remember there is quite a possibility that you may forget your Android phone Google account details and here the need to bypass Google account verification arises.
Though there are multiple tools available we recommend Dr. Fone - Screen Unlock (Android) as the best and the most reliable option. Using this excellent Windows and Mac-based software, FRP lock on all popular Android devices including Samsung, LG, HTC, and others. The tool is simple to use and requires no technology. There is also an option where you can unlock your device if you do not know the OS version.
![]()
Dr.Fone - Screen Unlock (Android)
Get into Locked Phones within Minutes
- 4 screen lock types are available: pattern, PIN, password & fingerprints.
- Easily remove the lock screen; No need to root your device.
- Everybody can handle it without any technical background.
- Provide specific removal solutions to promise good success rate
4,008,669 people have downloaded it
Steps to remove FRP lock using Dr. Fone-Screen Unlock (Android)
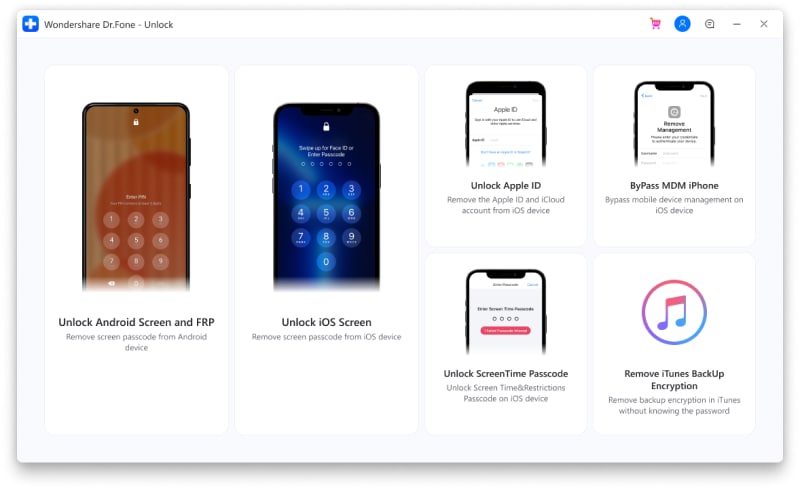
Step 1: Download, install and run the software on your system, and from the main interface choose the Screen Unlock option. Make sure that your phone is connected to WiFi.

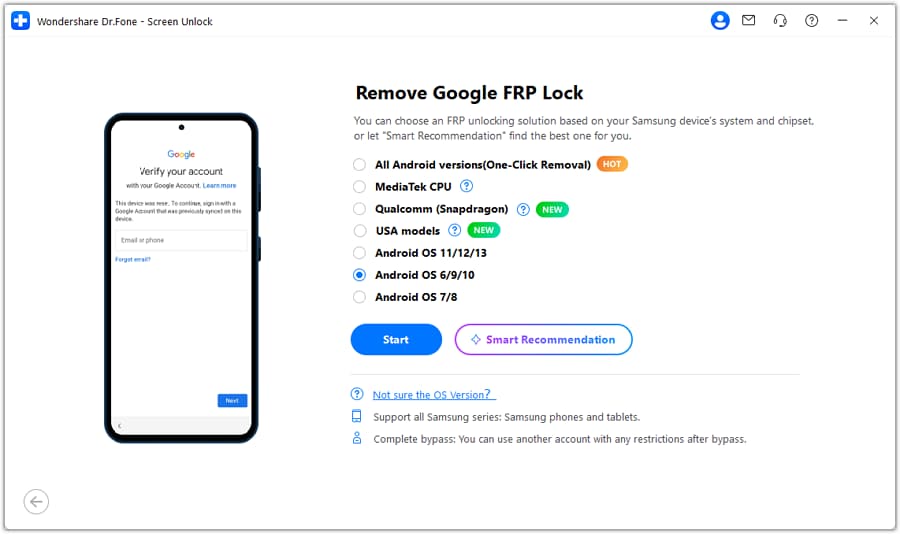
Step 2: Next, choose Unlock Android Screen/FRP and then select the Remove Google FRP Lock option.
Step 3: Next, choose the OS version of your device from the given options, and then using a USB cable, connect your phone to your system.
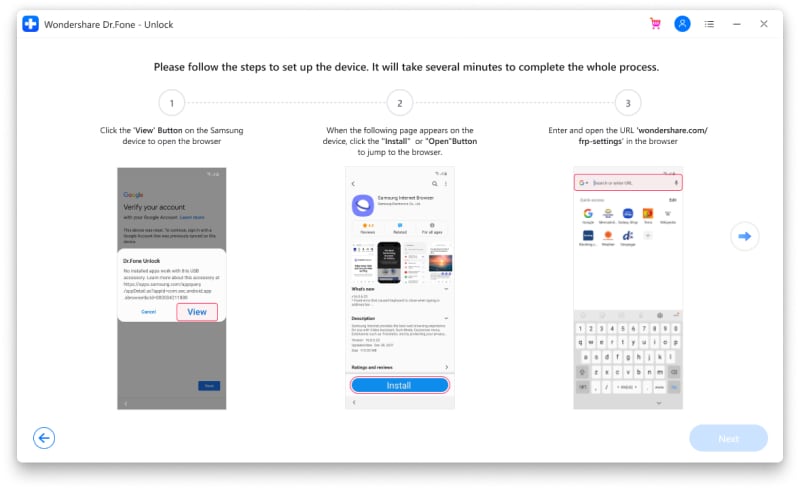
Step 4: After the Nokia C22 device is connected, the Nokia C22 device information will appear on the software for you to confirm and the notification for the same will be sent to your Android phone.
Step 5: Now follow the notifications for removing the FRP lock and in the browser enter drfonetoolkit.com.
Step 6: Next, click on the Android 6/9/10 button, choose Open Settings and select the PIN option to set a PIN to be used in the further steps.
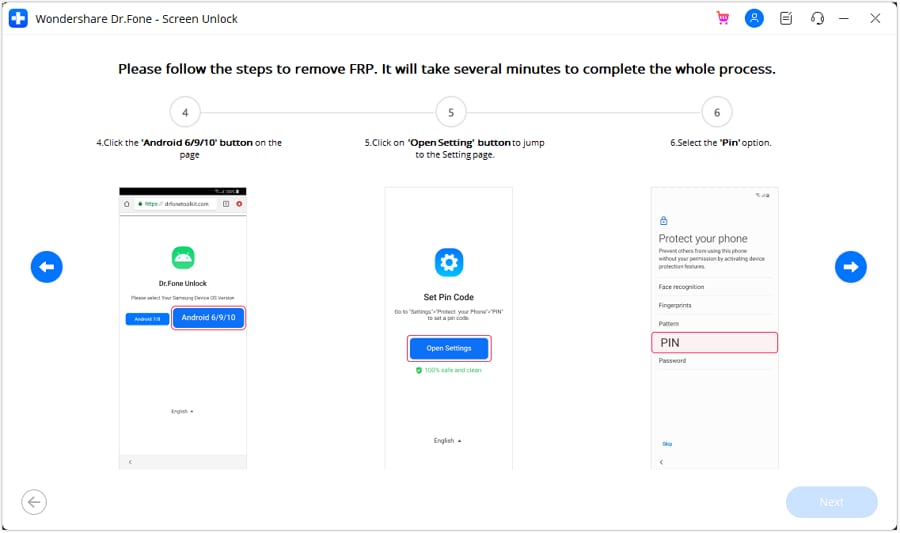
Step 7: Keep following the steps as they appear till you reach the Google Account Sign-In page. Here click on the Skip option that will successfully remove and bypass the Google Account.

The above given are the brief steps for the FRP bypass process. To learn about the entire process in detail, check Dr.Fone-Screen Unlock (Android) guide .
Part 3: Hire a Remote FRP Removal Service to Bypass ZTE/Motorola After Factory Reset
To bypass the FRP lock on your ZTE, Motorola, and Samsung device, there is also an online service called UnlockJunky.com that claims to remove the FRP lock and previously linked account on your Android device within 5-15 minutes. This is a paid service that also claims that if they are unable to remove the lock, they will refund the amount to their customers.
So, if you cannot sign in with a Google account that was previously synced, you can give this, method a try.
Step 1: Open the official service page Unlockjunky on your browser.
Step 2: Next, choose the Nokia C22 device’s brand, model, and unlock type from their respective drop-down menus. Click on Unlock Now button after entering the details.
Step 3: Now you need to initiate the order by providing the details asked and completing the payment.
Step 4: Next, the software needs to be downloaded and installed on your system, and using a USB cable, connect your phone to your computer.
Step 5: Connect with one of the support provider members through the live chat and they will help you remove the FRP lock on your Android phone.
With the steps above, you can remove the account previously synced on this device.

Limitations of using the Unlockjunky method:
- This is a paid service.
- Works only with Motorola, ZTE, and Samsung devices.
- There is no surety that the service will work for removing the FRP lock on your devices.
- If you have to remove the FRP lock from multiple devices, a separate payment for each device has to be done.
Conclusion
Above we have listed several ways to remove a previously synced Google account on your Android device. The best of all the listed solutions is Dr. Fone - Screen Unlock (Android) as it supports bypassing FRP lock on multiple Android devices in a hassle-free manner. Once the license is purchased, you can unlock as many numbers of devices as you want without any worries.
How to Bypass Android Lock Screen Using Emergency Call On Nokia C22?
The main reason why we keep our smartphone locked is to prevent children (or stalkers) checking out our private photos or messages. You don’t want anyone to access your pictures, emails, or other important data. What if you forget your pattern or PIN and cannot access your phone? Or someone changes lock screen pattern to leave you annoyed?
To avoid such types of conditions, we have tried and tested the following methods to bypass the Nokia lock screen pattern, PIN, password, and fingerprint.

Method 1. Use ‘Find My Mobile’ feature on Nokia Phone
All Nokia devices come with the “Find My Mobile” feature. To bypass the Nokia lock screen pattern, PIN, password, and fingerprint, you can just follow the below steps to get it done.
- Step 1. First, set up your Nokia account and log in.
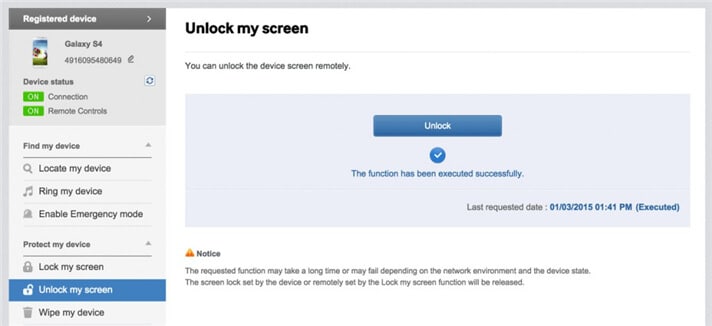
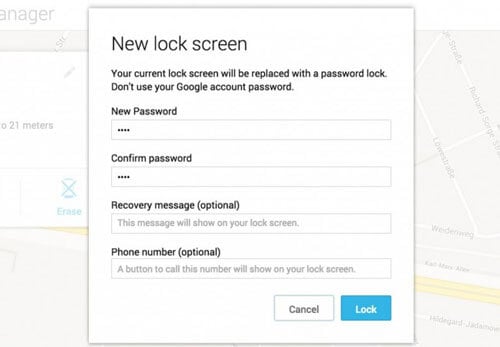
- Step 2. Click the “Lock My Screen” button.
- Step 3. Enter a new PIN in the first field
- Step 4. Click the “Lock” button at the bottom
- Step 5. Within a few minutes, it will change the lock screen password to the PIN so that you can unlock your device.
Method 2. Use Android Device Manager to Bypass Nokia Password
To know how to unlock a Nokia phone lock password with Android device manager, make sure the Android Device Manager is enabled on your device.
- Step 1. Visit google.com/android/devicemanager on other smartphones or PC.
- Step 2. Log into your Google account that you used on your locked device.
- Step 3. Choose the Nokia C22 device you want to unlock in ADM interface
- Step 4. Click on the “Lock” option.
- Step 5. Enter a password. There is no need to enter any recovery message. Select “Lock” again.
- Step 6. You would see a confirmation below if it is successful, with “Ring, Lock and Erase” buttons.
- Step 7. Now you must get the password field on your phone where you can enter your new password, and your phone will be unlocked.
- Step 8. Go to lock screen settings on your device and disable the temporary password.
Method 3. Google Login (Supports Only Android 4.4 or Lower)
If your device is still running on Android 4.4 or lower, here’s how to bypass the Nokia lock screen fast.
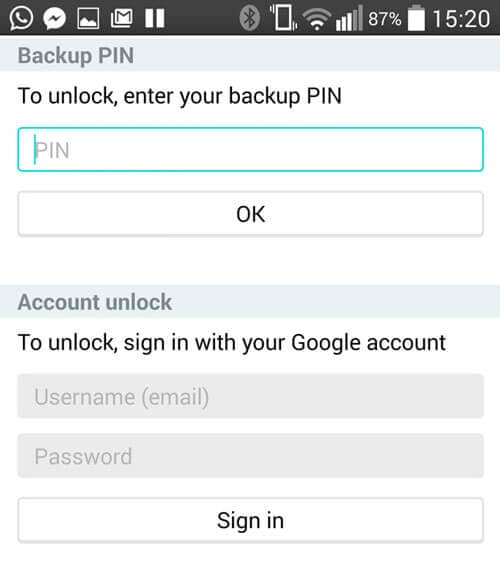
- Step 1. Enter the wrong pattern for five times
- Step 2. Choose “Forgot Pattern”
- Step 3. Enter your Google account login or backup PIN
- Step 4. Now your phone would be unlocked.
Method 4. ‘Pattern Password Disable’ and Custom Recovery (SD Card needed)
To bypass the Nokia lock screen in this method, you ought to be an advanced user who knows what are “custom recovery” and “rooting”. You have to install any kind of customer recovery, and you should have an SD card on your phone. SD card is required to move a ZIP file to the phone, and it is the only way to transfer the file when the Nokia C22 device is locked.
- Step 1. Download a zip file named “Pattern Password Disable” on your computer and move it to the SD card of your Nokia device.
- Step 2. Insert the card on your device
- Step 3. Restart your device into recovery mode.
- Step 4. Flash the file on your card and restart the phone.
- Step 5. Now your phone would boot up without lock screen. Don’t worry if you had a gesture lock or password. All you need to do is to input a random gesture or password, and it will be unlocked.
Method 5. Delete the Password File Using ADB
It is yet another option that will work only when you have enabled USB Debugging previously on your device, and your PC is allowed to connect via ADB. If you meet such requirements, it is ideal to use this method to unlock the Nokia lock screen.
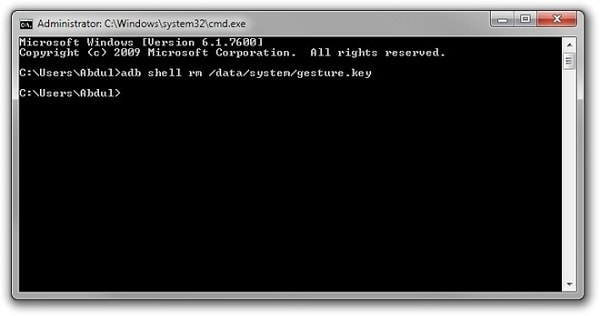
- Step 1. Connect your device to the PC using USB cable and open command prompt in the adb directory. Type the command “adb shell rm /data/system/gesture.key” and then press “Enter”.
- Step 2. Restart your phone, and a secure lock screen must be gone, and you can access your device. Be sure to set a new PIN, pattern, or password before rebooting again.

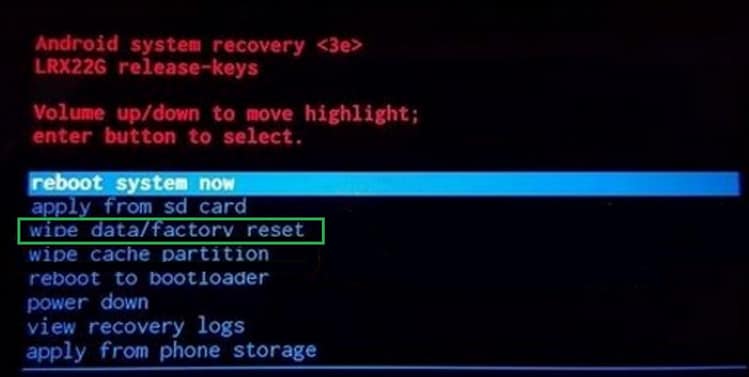
Method 6. Factory Reset to Bypass Nokia Lock Screen
A factory reset is the best option in almost any case if one of these solutions couldn’t work. According to your device type, the process may vary. In most devices, you have to turn off the Nokia C22 device completely to start the process. But this method will delete all the precious data on the Nokia C22 device after the factory reset.
- Step 1. Hold the power button and volume down at the same time. It will open the Bootloader menu.
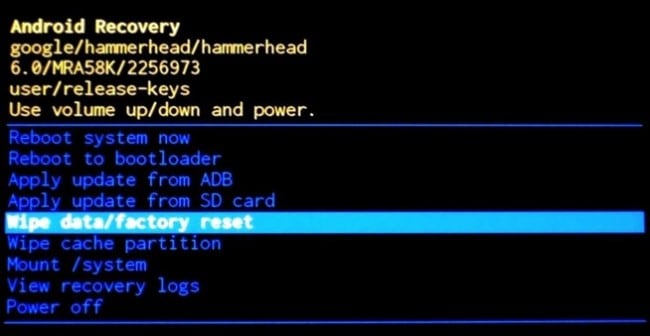
- Step 2. Press the volume down button two times to choose “Recovery Mode” and select it by pressing the “Power” button.
- Step 3. Hold down the power button and tap “Volume Up” once, and you would enter “recovery” mode.
- Step 4. Choose “Wipe Data/Factory Reset” option by using volume buttons.
- Step 5. Select it by pressing the Power button.
- Step 6. Select “Reboot System Now” once the process is done.
Backup your Nokia phone regularly in case of any data loss in the future.
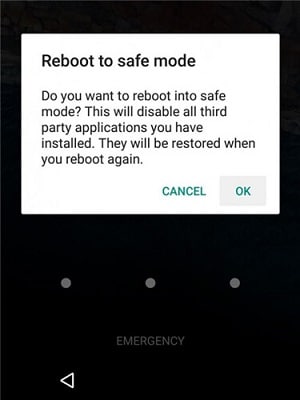
Method 7. Boot into Safe Mode
Chances may be that you are using a third-party lock screen app. Then lucky for you, this way works best to bypass the Nokia lock screen. Specifically, you can boot your Nokia device into Android Safe Mode .
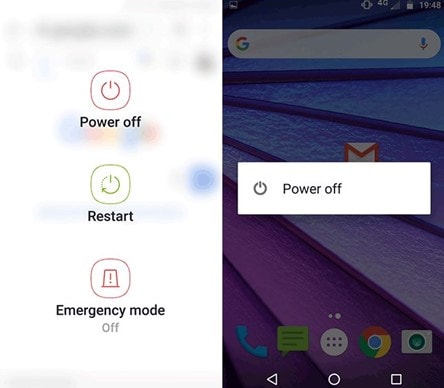
- Step 1. Open up the Power menu from the lock screen and press and hold the “Power Off” option.
- Step 2. It will ask if you want to boot in safe mode. Tap “OK”
- Step 3. Once the process finishes, it will temporarily disable the lock screen activated by the third-party app.
- Step 4. Uninstall the third-party lock screen or just reset the data.
- Step 5. Reboot your device and get out of safe mode.
- Step 6. Now the irritating lock screen app is removed completely.
Method 8. Other Methods
- Step 1. Take your friend’s phone to call on your locked phone.
- Step 2. Accept the call and press the back button without disconnecting.
- Step 3. Now you can access the Nokia C22 device completely
- Step 4. Go to the security settings of the Nokia C22 device and remove the pattern or pin.
- Step 5. It will ask you the correct pin that you don’t know, guess, and try various combinations you can recall.
To avoid forgetting your password or PIN next time, be sure to write the pattern or numbers on a text file or paper to keep them safe. If you have to bypass the Nokia lock screen pattern, PIN, password, and fingerprint, you may consider using Dr.Fone - Screen Unlock (Android). It is a professional tool that can remove all the fingerprints, pattern, and password lock screens without losing any data on your phone.
Remove the Lock Screen Fingerprint Of Your Nokia C22
Users of Android phones can benefit from data and file protection tools like passwords, patterns, and PINs. But there are also some significant disadvantages, for example:
- Someone may have repeatedly entered the wrong password to access your phone.
- You may have forgotten the PIN on your device, pattern, or PIN.
- The lock screen fingerprint can also malfunction if there are repeated tries from an unauthorized finger.
If you use a wrong password or a fingerprint unlock, it can permanently lock your Android device.
We can use many practical methods to remove the Android phone lock screen fingerprint. For example:
According to you, the most typical or initial option must be factory reset. However, when you try the factory reset method, you will lose all data on your phone. So, can you unlock an Android phone without a factory reset? Yes, we will tell you how to unlock your phone without fingerprint and resetting your Android phone.
Follow these methods to bypass the fingerprint lock without resetting the phone. It will save you from losing your data. All our methods are very easy and safe.
Useful Methods to Bypass Fingerprint Lock
1. Restart your Phone
If your fingerprint is not working or the Nokia C22 device prompts you with an error in the fingerprint functioning, possibly the fingerprint reader is not responding, and the Nokia C22 device needs to restart to get rid of this error.

When a device restarts, the fingerprint functionality is restored after entering the Nokia C22 device pattern, password, or PIN. This is the simplest method to reset your fingerprint hardware.
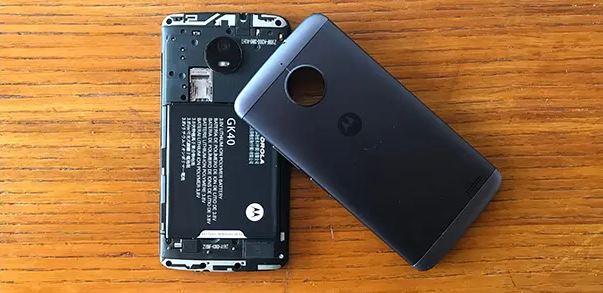
2. Remove your phone battery
Old android phones have removable batteries. If you can remove your phone battery, remove it and then put it back. Now turn on your phone. Doing so can help solve the fingerprint lock issue if there are bugs or system errors.
3. Dr.Fone - Screen Unlock
On Android handsets, you can attempt Dr.Fone to remove the fingerprint without professional skills. It allows you to delete the password, PIN, pattern, and fingerprint from an Android phone.
Step 1: Connect your Android device.
Open Dr.Fone on your PC, then among all the tools, choose “Screen Unlock.”
Step 2: Select a device type.
We are in this part to provide you with two ways to unlock practically any Android handset, including those made by Samsung, Huawei, OPPO, Vivo, Lenovo, LG, and others. It’s crucial to choose the right device brand to unlock the lock because the recovery modes for various phone models vary. The list contains every supported device model.

Here you will have some brands to choose from, don’t make it wrong.

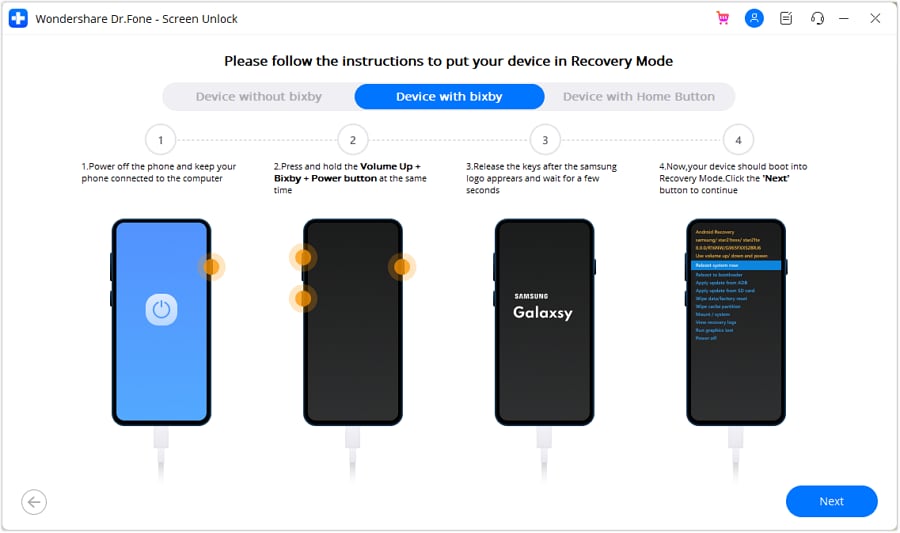
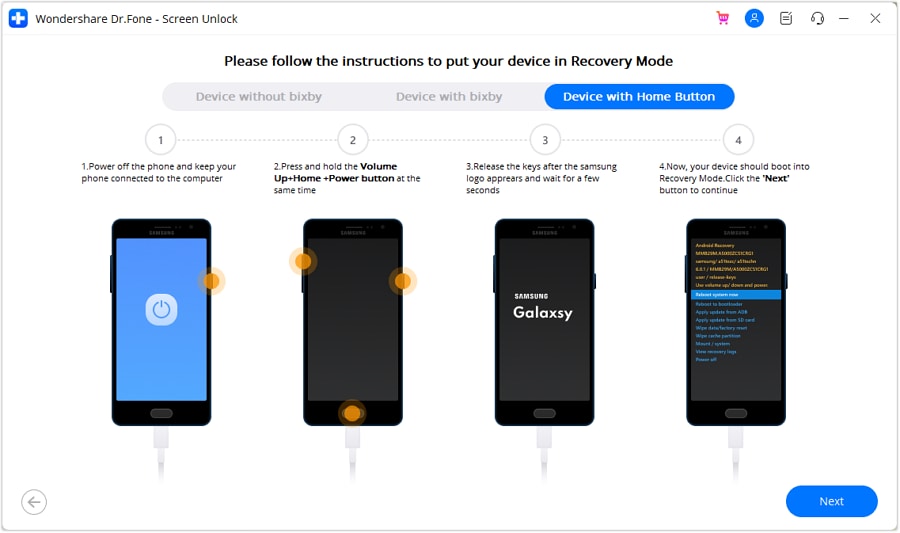
Step 3: Put your device into Recovery Mode.
You will learn how to put your device into Recovery Mode; it’s important to do as instructions, although this part may look a little strange. And there are 3 different Samsung Recovery Modes as examples.
(Get into Recovery Mode in Samsung phone with Bixby)
(Get into Recovery Mode in Samsung phone without Bixby)

(Get into Recovery Mode in Samsung phone with the Home button)
Step 4: Instructions to Wipe Cache Partition
In this part, it is the final but crucial step to unlock your device; if you click any wrong button, your phone may not work anymore.
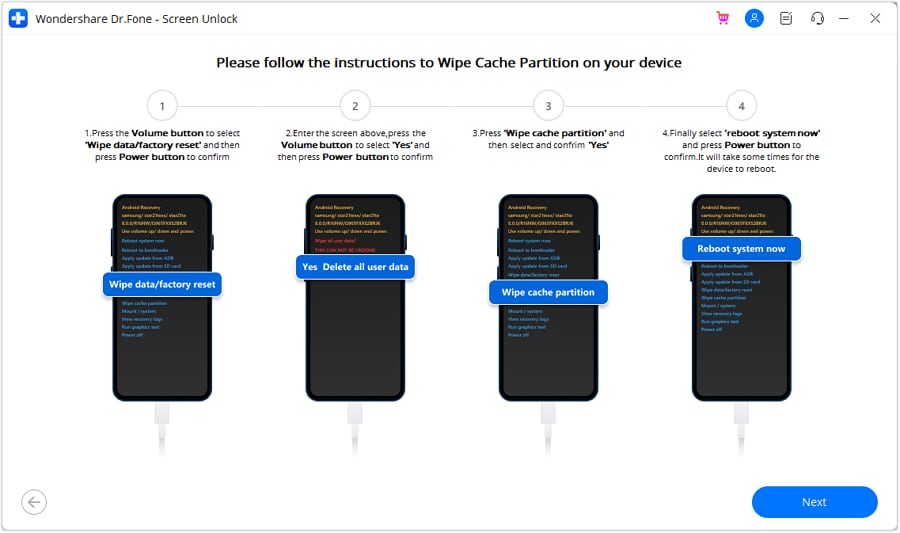
OK, you already passed the unlock process; locks like pattern, password, or fingerprint disappear!

4. Hard Reset your Device
Users of Android smartphones and tablets can troubleshoot various issues with their devices using a feature known as Android Recovery Mode. For example, it might be helpful if you discover that your device is functioning strangely. Recovery Mode Android technically refers to a unique bootable partition with a recovery application installed inside it.
However, users can also use it to reset the android password if it is forgotten. This password also includes fingerprint locks. The instructions for resetting android devices through recovery mode differ for every android device.
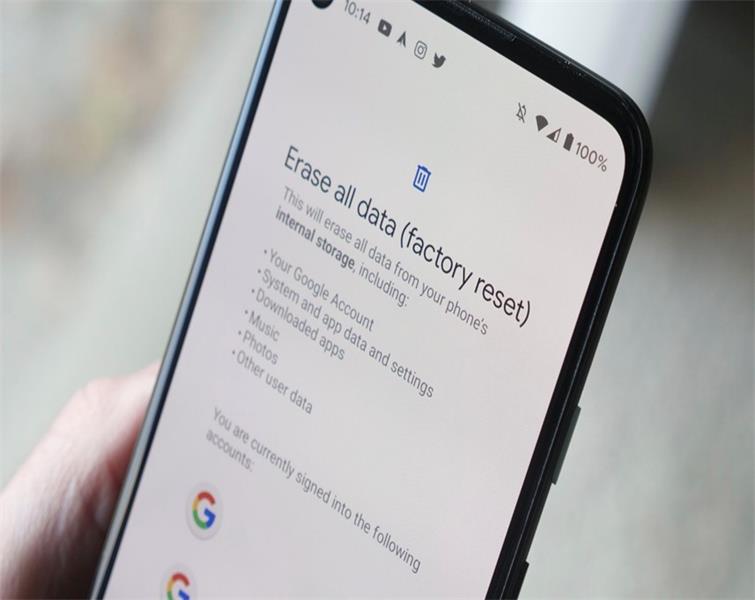
5. Google Find My Device
As you are likely aware, every Android device is connected to a Google account. As a result, if you’d like, you may also use it to unlock Android. You’ll need to know your Google account login information for this. When you’re ready, use these instructions to find out how to unlock a phone password.
- Login using your Google credentials by going to the official Google Find My Device website.
- You will see the gadgets connected to your Google account as you enter the interface and a map of where they are.
- To wipe the Nokia C22 device, click the ERASE DEVICE option on the left side panel. You will then be required for your password.
- Once more, select “Erase.” This will reset the Nokia C22 device and get rid of the dysfunctional fingerprint lock.
6. Seek Help from Local Dealers
It might be a complicated case if you cannot reset your lock screen fingerprint through the methods described above. In this situation, you need to visit your nearest mobile technician, who can help you restore your device.
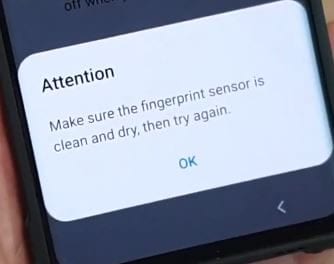
Why does not Fingerprint Work
1. Fingerprint Hardware Module Problems
The fingerprint module should be clean, just like a clean finger is. Unfortunately, the module would collect liquid from your fingers, especially if you had used a moisturizer earlier, making it difficult for the sensor to read your fingers accurately.

Please inspect the fingerprint module for any fluids or debris and clean it with a dry cloth to resolve this. If the dirt is on the module, clean it with wipes or a moist cloth wet with water.
2. Software Update
Another software-related issue that may occur because “ fingerprint sensor not working” issue is a software defect. Try checking if you have a pending update on your device and install it. Moreover, if the problem started after a system update, you may wait for a new update to fix the problem or go back to the previous update.
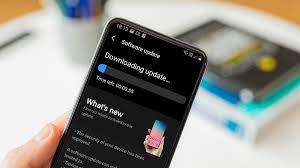
To install an update, open the Settings app, tap on ‘System,’ pick ‘System Update,’ and download and install any pending update.
3. Clean your Screen
If you have a device with under-display fingerprint scanner, you might need to clean the screen properly before using the fingerprint. In some cases, screen protectors also interfere with fingerprint functioning.
Conclusion
Any method can solve the problems of using your device with your Android handset. The best thing about these solutions is that you don’t need difficult professional skills to complete the tasks. Dr.Fone-Screen Unlock is the easiest way to help your device if you have a password or fingerprint problem.
- Title: How to Remove a Previously Synced Google Account from Your Nokia C22
- Author: Aaron
- Created at : 2024-07-15 19:08:45
- Updated at : 2024-07-16 19:08:45
- Link: https://easy-unlock-android.techidaily.com/how-to-remove-a-previously-synced-google-account-from-your-nokia-c22-by-drfone-android/
- License: This work is licensed under CC BY-NC-SA 4.0.