
How to Lock Apps on Poco X6 Pro to Protect Your Individual Information
How to Lock Apps on Poco X6 Pro to Protect Your Individual Information
If you are not a fan of having to go through the process of getting through a pattern or password every time you want to use your phone, the good news is that you don’t have to. There are really just a few Apps on your Android device that have sensitive information you don’t want others getting access to. It would really be great if you could lock those apps individually as opposed to locking the Poco X6 Pro device as a whole.
Well, in light of helping you out, this article will address just how you can lock Apps on your device and not have to type in a code every time you want to use the Poco X6 Pro device.
Part 1. Why you need to Lock Apps on Android?
Before we get down to the business of locking some of your Apps, let’s look at some of the reasons why you would want to lock certain apps.
- You may simply want better access on your device. Locking certain apps will allow you to easily access the Poco X6 Pro device and use it without having to remember passwords and patterns.
- If you are a person who is not good at remembering passwords or patterns, simply locking certain apps will help you not get locked out of your entire device which can cause a lot of problems.
- If your device is used by more than one person, locking certain apps will keep the other users out of information you would rather they didn’t access.
- If you have children, you can eliminate the many accidental in-app purchases by locking the apps your children shouldn’t be on.
- Locking apps is also a good way to keep children from content they shouldn’t be accessing.
Part 2. How to Lock Apps in Android
There is always a good reason to Lock Apps on your device and we have two easy and effective methods you can use to do this. Choose the one that you are most comfortable with.
Method One: Using Smart App Protector
Smart App Protector is a freeware that allows you to lock specified applications.
Step 1: Download and Install Smart App Protector from the Google Play Store and Launch it. You may be required to install a helper application for Smart App Protector. This helper will ensure that the many App services running on your device will not be killed by third party apps.
Step 2: The default password 7777 but you can change this in the Password & Pattern Settings.

Step 3: The next step is to add apps to the Smart App Protector. Open the Running Tab on Smart Protector and tap on the “Add” button.


Step 3: Next, select the apps you would like to protect from the pop up list. Tap on the “Add” button once you have chosen your Apps.
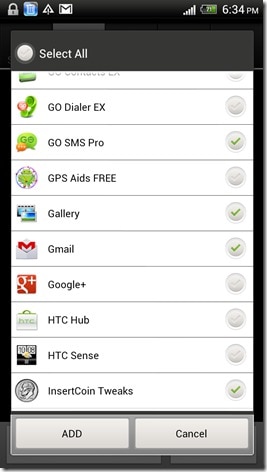
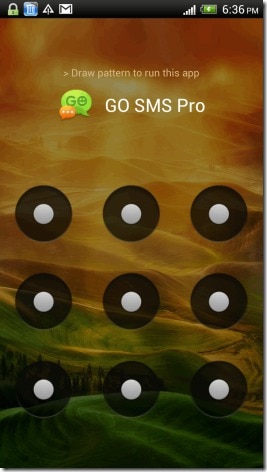
Step 4: Now close the app and the Apps chosen will now be password protected.
Method 2: Using Hexlock
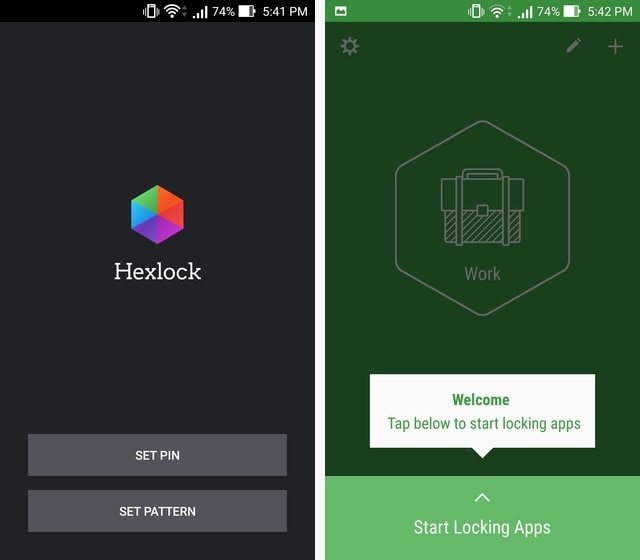
Step 1: Download Hexlock from the Google Play Store. Once it is installed, open it. You will be required to enter a pattern or PIN. This is the lock code that you will use every time you open the app.

Step 2: Once the PIN or Password is set, you are now ready to lock apps. You can create multiple lists of Apps to be locked ba_x_sed on your different needs. As an example, we have chosen the Work panel. Tap on “Start Locking Apps” to start.
Step 3: You will see a list of Apps to choose from. Choose the Apps you wish to lock and then Tap the down arrow in the upper left when you are done.
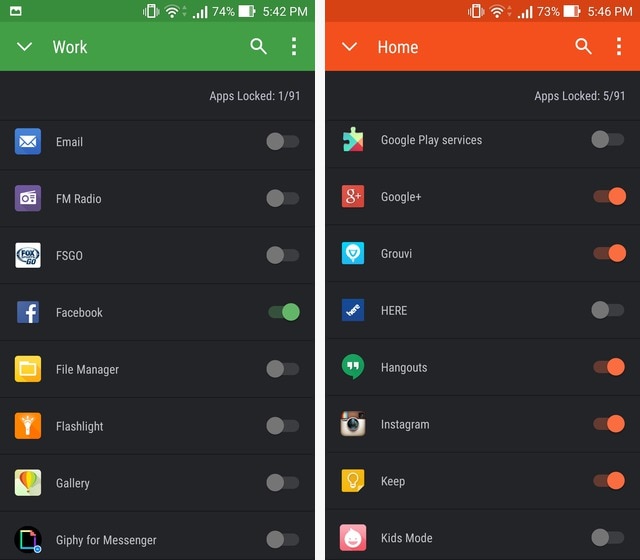
You can then Swipe to the left to move to other lists such as “Home” and proceed to lock apps in this group as well.
Part 3. 6 Private Apps that you should lock on your Android
There are certain apps that may require to be locked more than others. Of course the choice of which apps you should lock will depend on your own uses and preferences. The following are some of the apps you would like to lock for one reason or another.
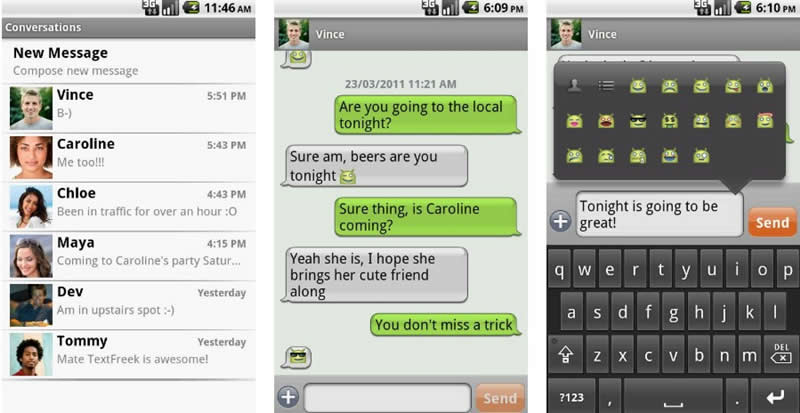
1. The Messaging App
This is the application that allows you to send and receive messages. You may want to lock this app if you use your device to send messages of a sensitive nature that you would rather keep private. You may also want to lock this app if your device is used by more than one person and you don’t want other users reading your messages.
2. Email App
Most people use individual email applications such as Yahoo Mail App or Gmail. This is another critical one if you are going to protect your work emails. You may want to lock the email app if your work emails are sensitive in nature and contain information that is not for all individuals.
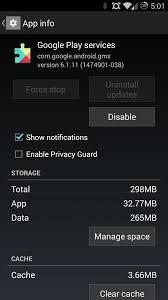
3. Google Play Services
This is the application that allows you to download and install applications to your device. You may want to lock this one if you are trying to prevent other users from downloading and installing further apps to your device. This is especially valuable if your device is utilized by children.
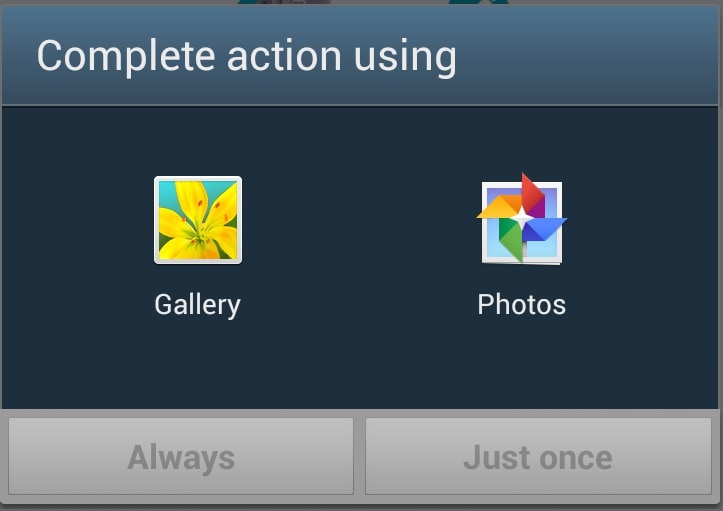
The Gallery app displays all the images on your device. The main reason you may want to lock the Gallery app may be because you have sensitive images that are not suitable for all viewers. Again this is ideal if children make use of your device and you have images that you would rather they didn’t see.
5. Music Pla_x_yer App
This is the Application that you use to play the music on your device. You may want to lock it if you don’t want anyone else making changes to your saved audio files and playlists or don’t want someone listening to your audio files.
6. File Manager App
This is the App that displays all of the files that are saved on your device. It is the ultimate app to lock if you have sensitive information on your device that you would rather not share. Locking this app will ensure that all of the files on your device will remain safe from prying eyes.

Having the ability to lock your Apps is an easy way to keep information out of the limelight. It also allows you to take full control of your device. Try it, it might just be freeing as opposed to locking your entire device.
Delete Gmail Account With/Without Password On Poco X6 Pro
Email accounts have proven their worth in digital devices beyond sending emails. Lately, Android devices have only operated with a Gmail account. This is because most of the data, such as contact information, messages, and other details, are saved across the storage space offered with the email. Against all recognizable uses of Gmail accounts, users look for ways how to delete Gmail accounts.
To this day, it is known that Gmail accounts can be removed with or without a password. However, one should know that if they consider deleting their Gmail account, they won’t be able to send or receive emails. With that, let’s proceed to reveal all essential methods that can be used to delete a Gmail account permanently. This article will also focus on a perfect tool that assists in making the process easier.

Part 1. Synopsis: Things To Know Before Deleting Gmail Account
Although the process of deleting a Gmail account sounds basic, there are many pointers connected to it. For that, this part is putting up a discussion on the important things that a user should know before they delete their Gmail account permanently:
- No Going Back: If you delete a Gmail account, the process is irreversible. All details and information will be lost, and the email won’t be trackable ever again.
- Cannot Reset Passwords if Connected: If the Gmail account is connected to any other service, make sure that you remember their passwords. Since the account will be deleted, you cannot reset their passwords.
- Access to Other Services: Although you are deleting your Gmail account, you can still access Google Photos, Google Drive, and other services.
- Lookout For Emails: Ensure that the emails in your account are saved. You can easily download them anywhere before deleting the Gmail account.
Part 2. Delete Your Gmail Account Using Your Password: Desktop Solution
For the first method, we will discuss how to delete a Google account with your password. You will use your computer for this process and access the Google Account services. The service helps you save all your essential Gmail data before you remove it. To understand how it makes it possible, look through the steps provided below:
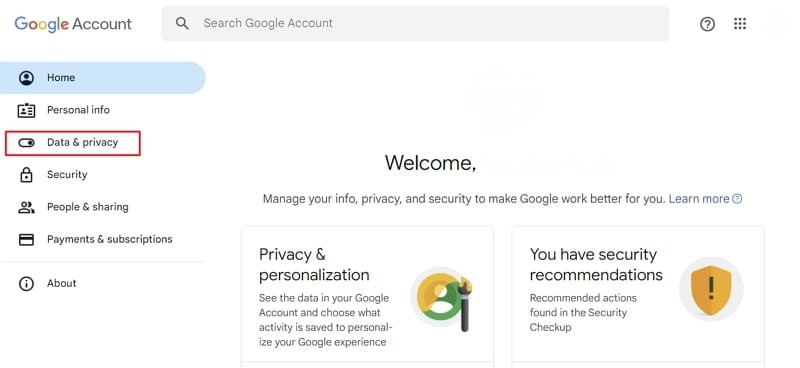
- Step 1. Access the website https://myaccount.google.com/ on your desktop browser and log in with your credentials. Proceed to the “Data & privacy” section from the left panel.
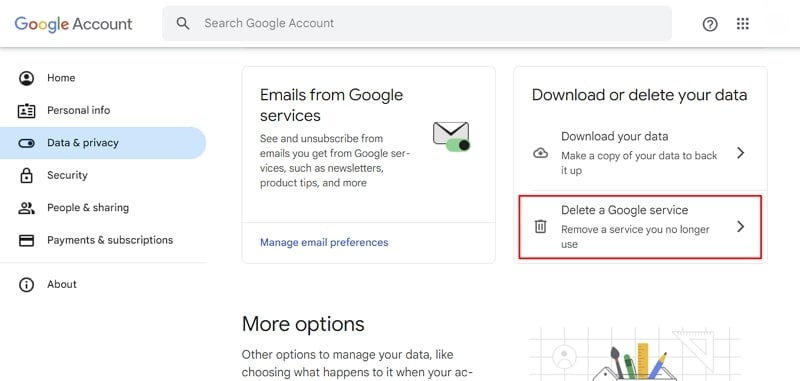
- Step 2. On the following window, scroll down and look for the “Delete a Google service” option. Accessing this would allow you to delete your Gmail account permanently.

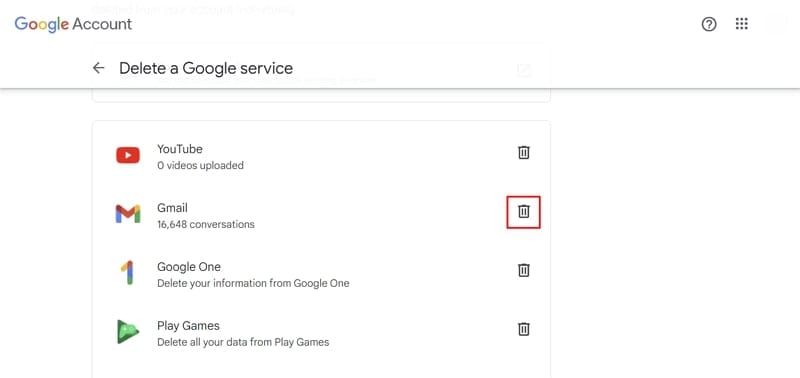
- Step 3. You will be led to a new screen where you need to provide your password credentials again. On successfully providing your password, look for the “Gmail” option on the next screen. Click the “Trash” icon to continue deleting the Gmail account.
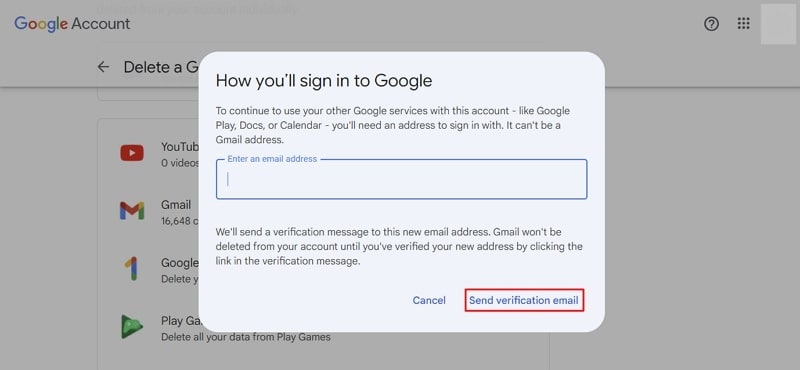
- Step 4. A new pop-up window opens, demanding another email address that can help connect to other Google services. Provide the email address and continue to click “Send verification email .” The Gmail account won’t be deleted until the user verifies the email sent to the new address.
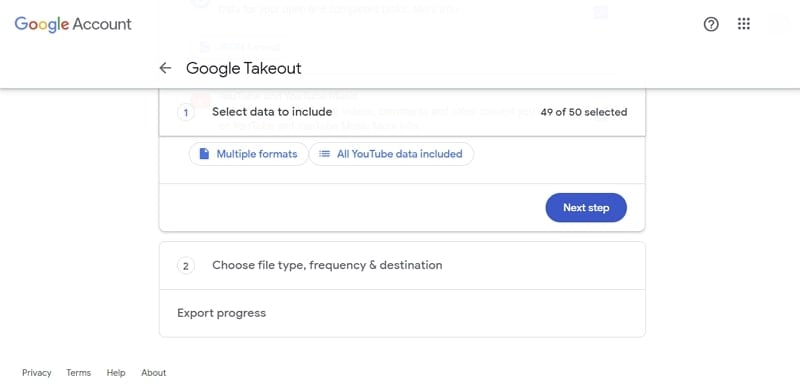
- Step 5. For those who want to save their email data, look for the “Download your data” option in the same window. This leads you to the Google Takeout window, where you need to select the data to include. After selecting the data, define the file type, frequency, and destination for exporting all important data.
Part 3. Delete Your Gmail Account From Your Smartphone: Android & iOS
If you use a smartphone device and want to delete your Gmail account from that particular device, you are at the right place. The following methods will help you understand how to delete Gmail from your Android and iOS devices:
Android Devices
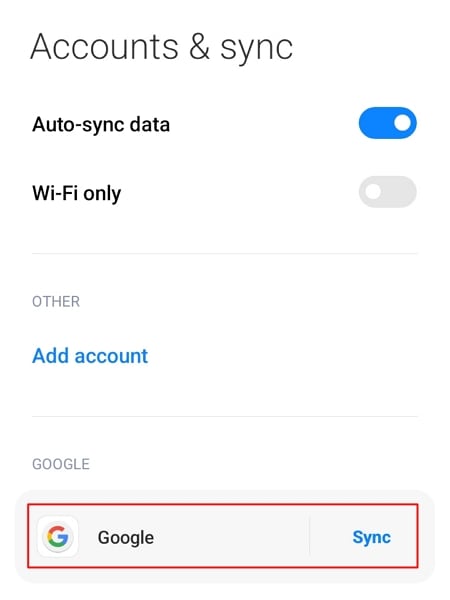
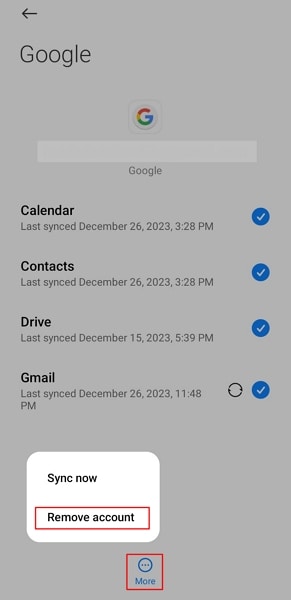
- Step 1. Look for “Settings” on your Android and continue to the “Accounts & sync” option in the list. As you proceed into the next window, look for the Google account and select it.
- Step 2. Select the “More” option at the bottom on the following screen. Choose the “Remove account” option in the pop-up menu and provide your credentials to execute the deletion of your Gmail account.
iOS Devices
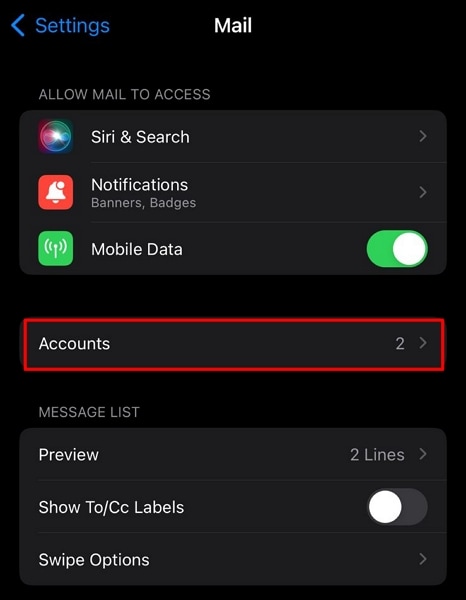
- Step 1. Open your iPhone’s “Settings” app and scroll down to the “Mail” option. You will find the “Accounts” option on the following screen, which you need to tap to proceed.
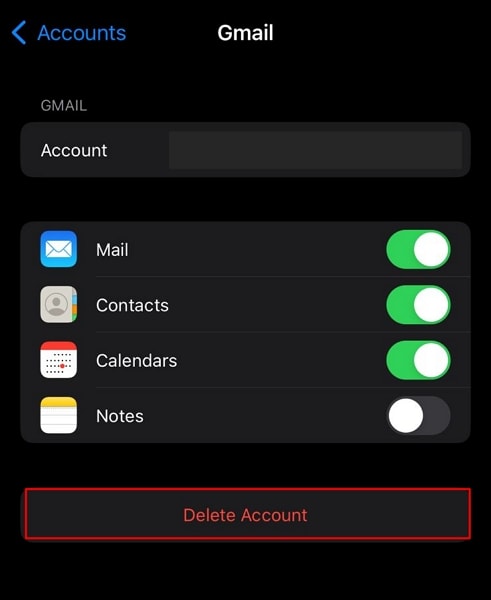
- Step 2. Discover the option of “Gmail” in the list of signed-in accounts and continue to the next screen. Select “Delete Account” to remove the account from your iOS device.
Part 4. Don’t Know Password of Device? Reset To Delete Gmail Account
What if you’ve forgotten the password to your smartphone device, and you have to delete your Gmail account permanently? In such cases, you are left with the option of accessing the Poco X6 Pro device’s Recovery Mode and factory resetting the Poco X6 Pro device, where possible. To know how it is done flawlessly, look through the steps provided next:
Android Devices
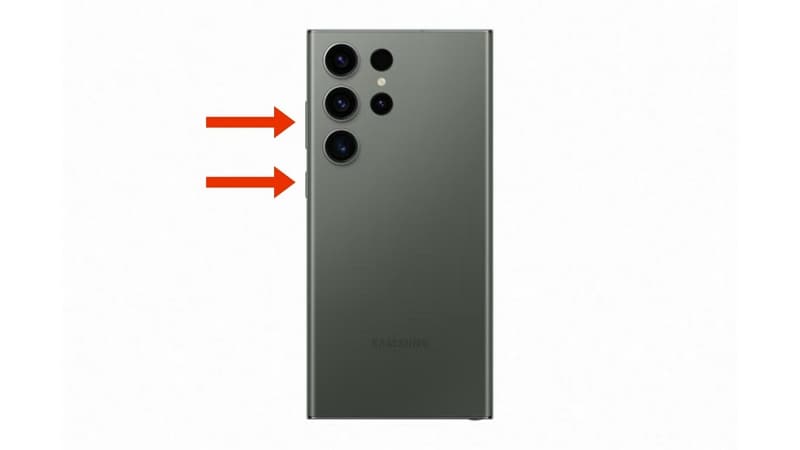
- Step 1. Those owning an Android device need to put it in Recovery Mode first. For that, use the combination of the “Power” and “Volume” keys to put the Poco X6 Pro device in Recovery Mode.
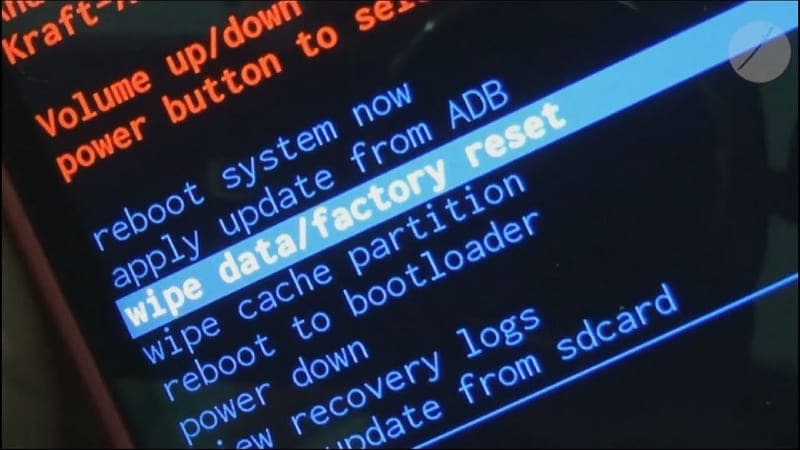
- Step 2. Once you boot into the Recovery Mode, use the Power and Volume buttons to scroll through the menu. Scroll down with the Volume buttons and select the “Wipe data/factory reset” option with the Power button.
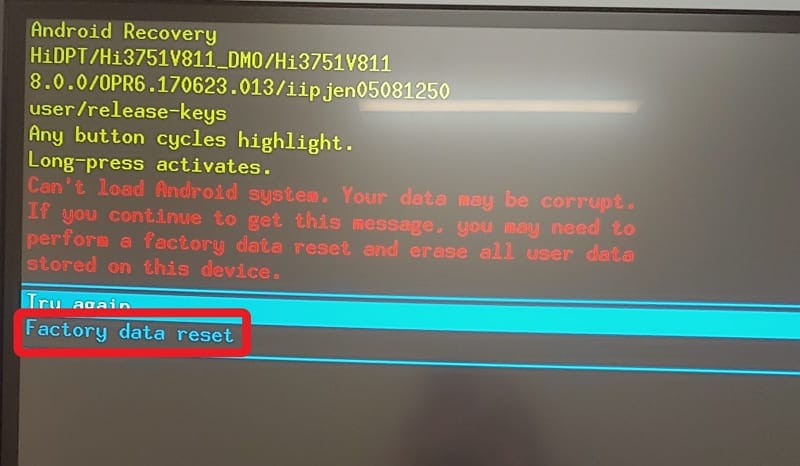
- Step 3. Select “Factory data reset” on the next screen and confirm that factory reset your Android device successfully. The device automatically gets out of Recovery Mode and starts normally after resetting.
iOS Devices
Step 1. You need to turn on Finder if you own a macOS Catalina or later device. Conversely, use iTunes if you have a macOS Mojave or earlier version or if you are using Windows. Connect your iPhone to the computer using the lightning cable and put it in Recovery Mode.
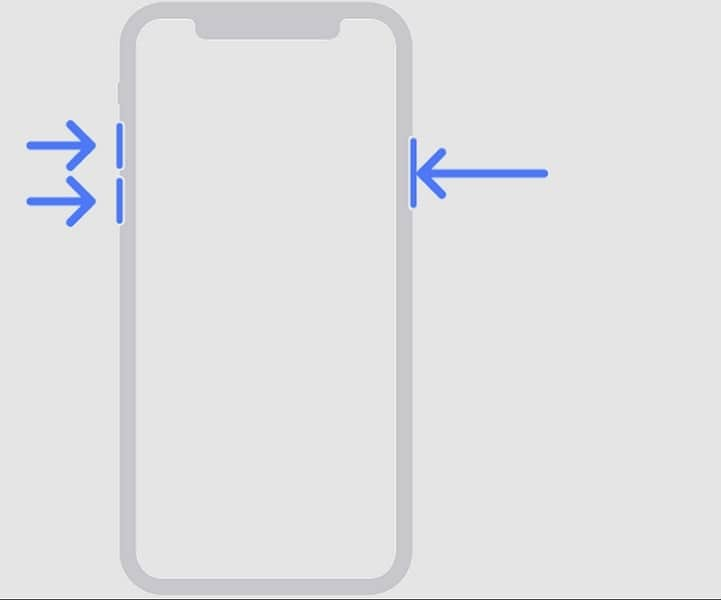
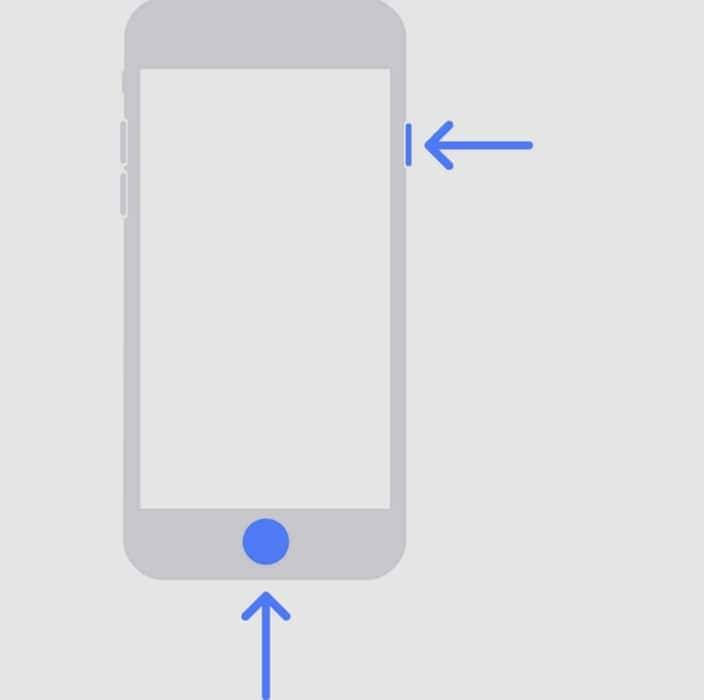
For iPhone X or Later Models: Press and release the “Volume Up” button, followed by the “Volume Down” button. Hold the “Side” button until the Recovery Mode screen appears.
- For iPhone 7 Models: Hold the “Side” and “Volume Down” button until the Recovery Mode screen appears.
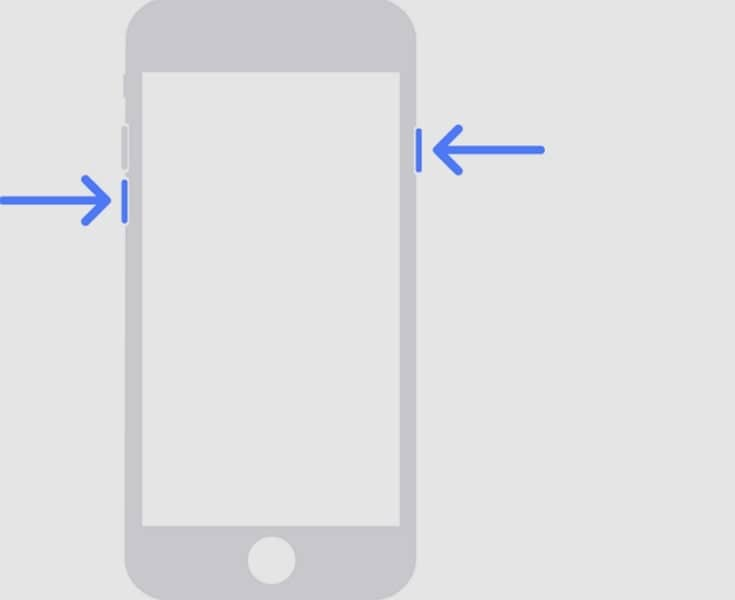
- For iPhone 6 and Earlier Models: Hold the “Side” and “Home” buttons simultaneously until the Recovery Mode screen appears.
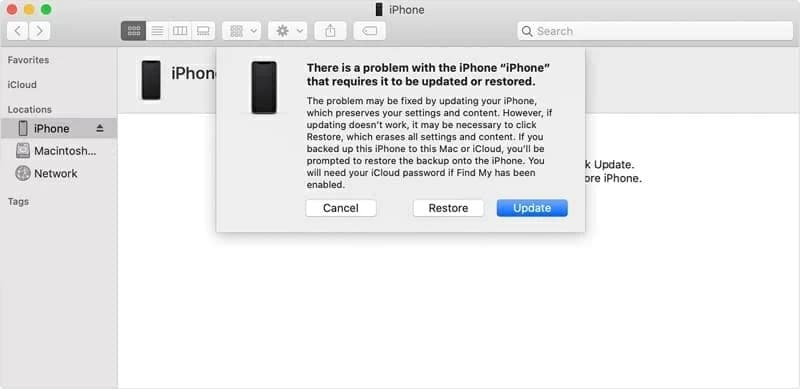
- Step 2. The device automatically gets detected on Finder/iTunes, and a pop-up appears on the screen. Click “Restore” to reset your iOS device to factory settings.
Part 5. Remove Gmail Account From Device Without Password: Using Wondershare Dr.Fone
While you seek some appropriate way to close a Gmail account from a device whose password you’ve forgotten, you might get into Wondershare Dr.Fone. This all-in-one service offers a unique Screen Unlock feature that helps you restore your device. If you have forgotten the lock screen password of your Android device, Dr.Fone – Screen Unlock (Android) makes it exceptionally easy to recover.
Key Features of Wondershare Dr.Fone
![]()
Dr.Fone - Screen Unlock (Android)
The Best UnlockJunky Alternative to Bypass FRP and Solve Your Screen Locks
- Remove all Android screen locks (PIN/pattern/fingerprints/face ID) in minutes.
- Bypass the FRP lock of Samsung without a PIN or Google account.
- Everyone can handle the lock screen without any tech knowledge.
- Provide specific removal solutions to promise good success rate.
4,008,671 people have downloaded it
Whether it is your latest Samsung or other Android smartphone, the process is easy to work with. You might look for more details about this unique tool, for which some important features are highlighted as follows:
- It removes all major types of screen locks from your Android devices.
- Provides support to the latest Android devices, along with all mainstream brands.
- You can recover your device with and without data loss, according to your discretion.
Parental Control Software
### Steps To Remove Google Account While Removing Screen LockThe following steps highlight the way to remove screen lock from your Android device, which would also cover removing the Google Account automatically:
- Step 1.Launch Screen Unlock Feature
To start with the process, launch Dr.Fone on your computer and navigate to the “Toolbox” section. Proceed to the “Screen Unlock” feature, which opens a new window. After selecting “Android” as your device type, select “Unlock Android Screen” from the available options.

- Step 2.Select Device Brand and Unlock Mechanism
As you direct into the next window, select the brand of your Android device. Continue to select “100% Remove Screen Lock” from the following window.
- Step 3. Follow the Instructions and Successfully Remove the Screen Lock
According to your selected device brand, Dr.Fone provides guidelines for entering the specific mode. Follow the on-screen instructions to start unlocking the screen of your device. If the process is successful, click “Done” to conclude using Dr.Fone – Screen Unlock.

Conclusion
This article has specifically provided you with some important details on how to delete a Gmail account with ease. The article explains everything from the methods of deleting it from the computer to removing it from the Poco X6 Pro device. Furthermore, it also serves as a guidance for those who have forgotten their device passwords. For that, they’ve provided an insight into Wondershare Dr.Fone – Screen Unlock and its unique functions.
The Ultimate Guide to Poco X6 Pro Pattern Lock Screen: Everything You Need to Know
Do you want to revamp your phone’s pattern lock screen and give it a new life? Well, you are not the only one! Lots of Android users keep looking for numerous ways to change their screen lock pattern and make it more secure. After all, if your lock screen pattern is strong, then it will certainly keep an intruder away. In today’s world, our privacy is everything and we should take every needed measure to protect it. To help you do the same, we have come up with this informative guide. Read on and learn how to set up a strong pattern lock screen on your device and what to do if you have forgotten it.
Part 1: How to set up Pattern Lock Screen on Poco X6 Pro?
Out of all the provided options for screen locks, pattern lock is mostly used due to its ease of access and added security. If you haven’t set up a screen lock pattern on your device, then we recommend you to do the same right away. Not only will it keep intruders away, it will also protect your privacy. To learn how to set up a lock screen pattern on an Android device, simply follow these steps:
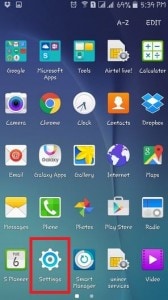
- 1. Firstly, unlock your device and go to its Settings. You can access it from the Home Screen or from its Notification Center.
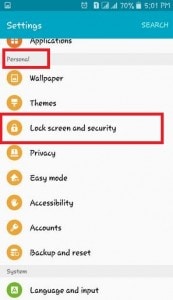
- 2. Under the personal or privacy section, you can access the “Lock Screen and Security” option.
- 3. In some versions, the option is also listed right at the top of the settings (in its quick access).
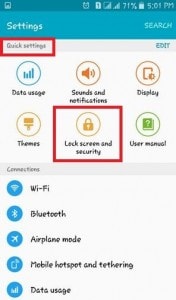
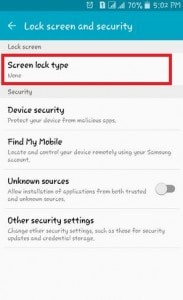
- 4. To set up a pattern lock screen, tap on the “Screen lock type” feature.
- 5. This will provide a list of all the different kinds of locks that you can apply. Ideally, it would be password, pin, pattern, swipe, or none. In “Swipe”, you can unlock a device just by swiping the screen. Whereas, in pattern, pin, or password, you would be needed to provide the respective pattern/pin/password to unlock the Poco X6 Pro device.
- 6. We recommend setting up a lock screen pattern instead. To do this, tap on the “Pattern” option.


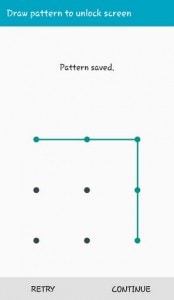
- 7. From the next screen, you can simply draw any kind of pattern of your choice. Ideally, it should join at least 4 dots on the screen. We recommend using a strong screen lock pattern to provide unmatched security to your device.
- 8. Furthermore, you need to confirm your choice and provide the same pattern once again. Make sure that you draw the same pattern here.
- 9. Additionally, the interface will ask you to provide a security pin as well. In case if you will forget your pattern, then you can access your phone by taking the assistance of this pin.


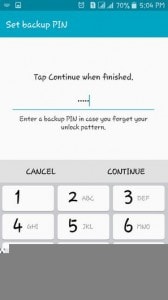
- 10. Similarly, you would be required to confirm the pin as well to finish the setup.
- 11. That’s it! By completing these steps, a screen lock pattern will be implemented on your device.
Later, you can follow the same drill to change your device’s lock screen pattern as well. Though, you would be needed to provide the existing pattern to access these features. Out of all the lock screen options, you should go with the pattern lock. Not only it is the most accessible option, it also provides fast results with an added security.
Part 2: What to do if you forget Android pattern lock?
After following the above-mentioned tutorial, you would be able to set up a pattern lock screen on your device. Since it is recommended to have a strong pattern lock, users often forget their pattern lock after implementing it. This prohibits them from using their own Android device. If you have a similar experience, then don’t worry. There are plenty of ways to unlock a device and remove its pattern lock without causing any harm to the system. Visit our informative tutorial and learn different ways to unlock or bypass the Android pattern lock screen.
Out of all the provided options, it is recommended to use Dr.Fone - Screen Unlock (Android) . It provides fast and reliable results without getting rid of your device’s content. The tool is a part of the Dr.Fone toolkit and is already compatible with all the leading Android smartphones. By following its simple click-through process, you can unlock the screen lock pattern on your device in no time. Although this tool can help you keep all data after unlocking screen passcode on your Samsung or LG phone, it will wipe all data after unlocking other Android phone including Huawei, Oneplus and so on.
Dr.Fone - Screen Unlock (Android)
Remove 4 Types of Android Screen Lock without Data Loss
- It can remove 4 screen lock types - pattern, PIN, password & fingerprints.
- Only remove the lock screen, no data loss at all.
- No tech knowledge asked, everybody can handle it.
- Work for Samsung Galaxy S/Note/Tab series, and LG G2, G3, G4, etc.
4,820,695 people have downloaded it

Part 3: Top 10 Hardest pattern lock ideas for Android
Your pattern lock is one of the most important security aspects on your device. Anyone can access your phone after decoding your pattern lock. Needless to say, if you have a simple pattern lock on your device, then it can easily be accessed by someone else. To help you set up a strong pattern lock screen, we have handpicked some of the hardest combinations. Have a look at these lock screen pattern combinations and choose the one you like the most!
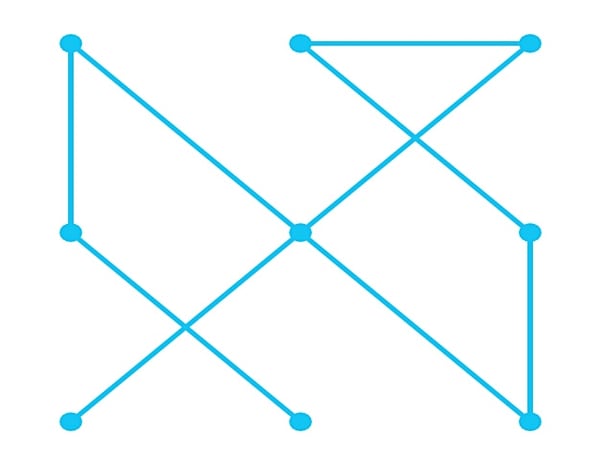
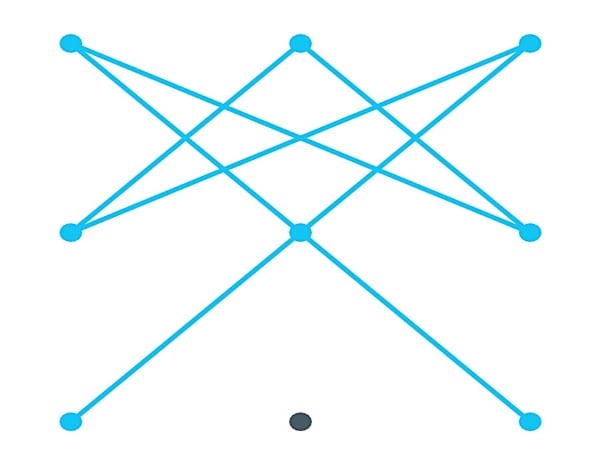
For your convenience, we have marked the dots as 1-9. This will help you know the exact sequence of the lock.
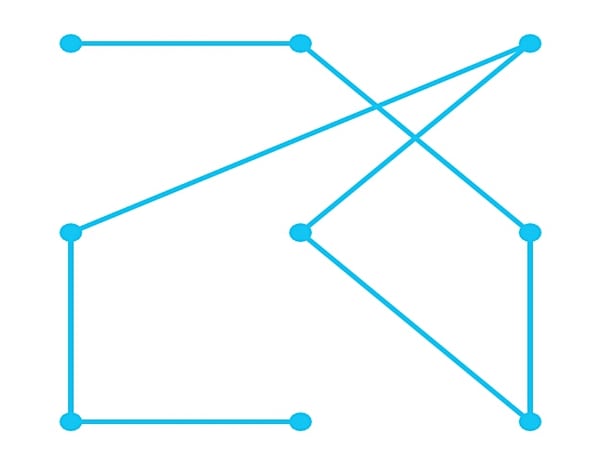
1
8 > 7 > 4 > 3 > 5 > 9 > 6 > 2 > 1
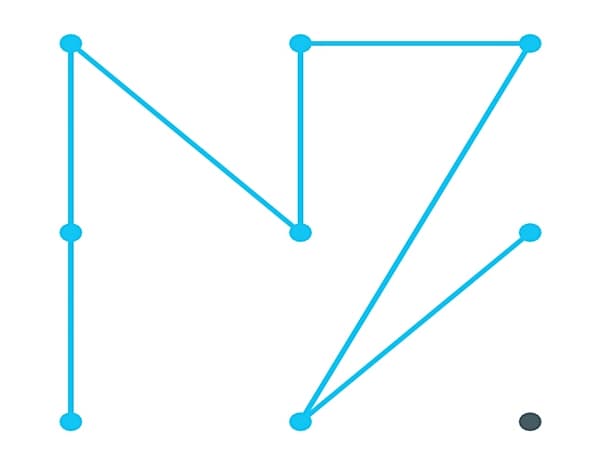
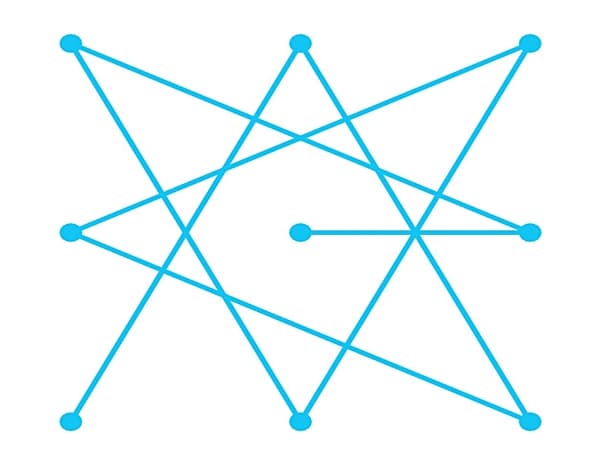
2
7 > 4 > 1 > 5 > 2 > 3 > 8 > 6
3
1 > 8 > 3 > 4 > 9

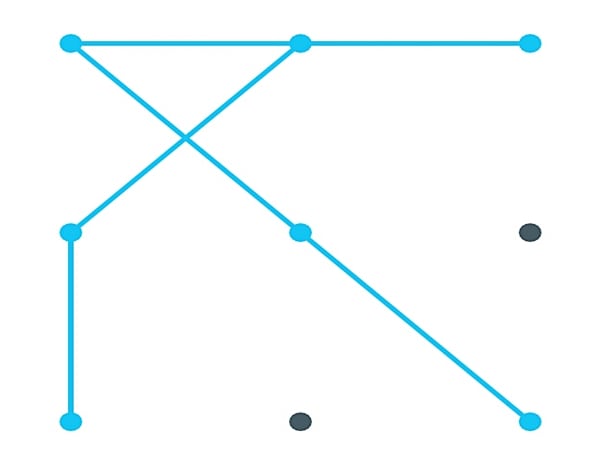
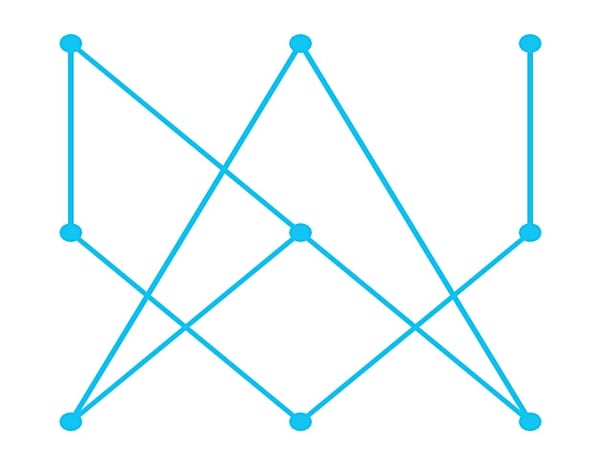
4
7 > 4 > 2 > 3 > 1 > 5 > 9
5
2 > 4 > 1 > 5 > 8 > 9 > 6 > 3 > 7

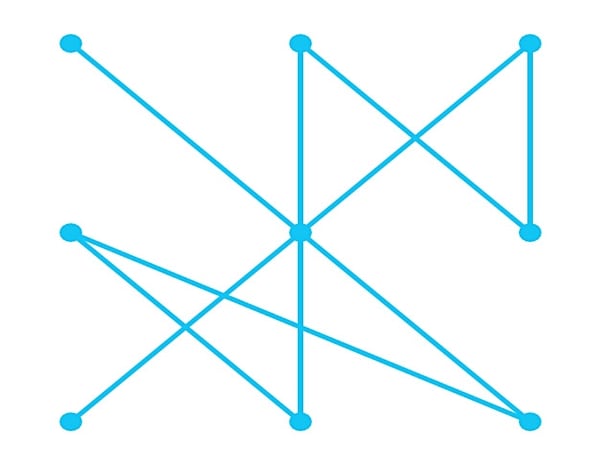
6
8 > 4 > 1 > 5 > 9 > 6 > 2 > 3 > 7
7
7 > 2 > 9 > 4 > 3 > 8 > 1 > 6 > 5
8
5 > 7 > 2 > 9 > 1 > 4 > 8 > 6 > 3
9
1 > 5 > 9 > 4 > 8 > 2 > 6 > 3 > 7
10
7 > 5 > 3 > 4 > 2 > 6 > 1 > 9
After selecting and setting up a new screen lock pattern on your device, make sure that you remember it. You can lock and unlock your phone a few times with your new pattern lock in order to memorize it. Nevertheless, if you forget your lock screen pattern, then you can take the assistance of Dr.Fone Android Pattern Lock Removal to get an instant solution.
Now when you know every essential thing about pattern lock screen on Android, you can certainly keep your device safe from any unforeseen intrusion. A strong lock screen pattern will certainly be of a great use to you. It will protect your apps, data, and device accessibility in an effortless manner. Go ahead and set up a strong and secure pattern lock screen on your device and provide an added layer of security to it.
- Title: How to Lock Apps on Poco X6 Pro to Protect Your Individual Information
- Author: Aaron
- Created at : 2024-07-15 20:25:42
- Updated at : 2024-07-16 20:25:42
- Link: https://easy-unlock-android.techidaily.com/how-to-lock-apps-on-poco-x6-pro-to-protect-your-individual-information-by-drfone-android/
- License: This work is licensed under CC BY-NC-SA 4.0.