
Full Tutorial to Bypass Your Nokia G310 Face Lock?
Full Tutorial to Bypass Your Nokia G310 Face Lock?
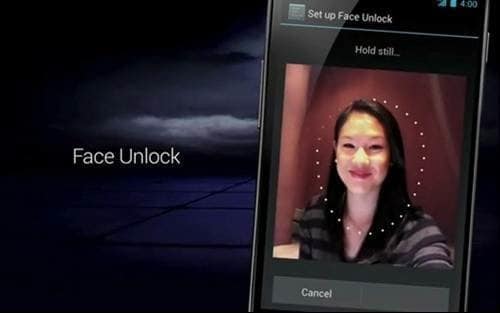
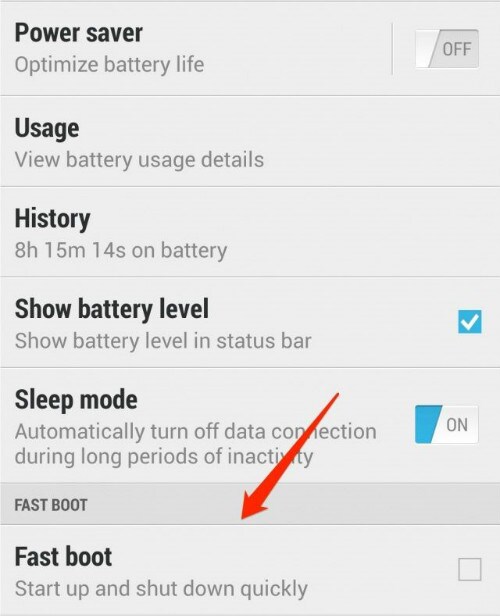
Your android phone face unlock may be buggy, or the camera may be damaged. It can’t recognize your face. When you try multiple times in such cases, it will lock your device permanently. Are you stuck with a locked phone? And you’re still confused about what just happened. Face unlock may face problems such as
- Face unlock app may be buggy
- Your face unlock settings may be unstable
- Your phone camera or face unlock sensor may be damaged
- Someone else may have registered their face without your permission
Whatever the reason, they are equally big obstacles for you to use your phone as usual; trying to unlock your device can lead to a permanently locked phone. So how do you bypass face unlock?
Follow the guide below to bypass the face unlock settings and choose the best one for yourself.
How To Bypass Android Face Lock by Ourselves?
If you want to bypass face lock by yourself, then different methods can help you. These are all tested and work well.
1. A Picture Possibly Bypasses Face Lock
You can use your photo to manipulate the face lock app. Simply use your photo to unlock the phone, which should work fine. If your phone doesn’t recognize your face from a photo, try again.
If it still doesn’t recognize your face, try a different photo or even change the camera’s lighting settings or the angles to see if that helps.
Anyway, this method is still unstable because of many uncontrollable factors. If everything fails, consider the following methods to bypass the face lock.
2. Hard Reset your phone
To get around the Android lock screen, perform a factory reset. While resetting your phone allows you to set a new password, it also erases all data from your device. This method works like a charm, but it also requires more technical knowledge. To bypass screen lock via factory reset, follow these steps.
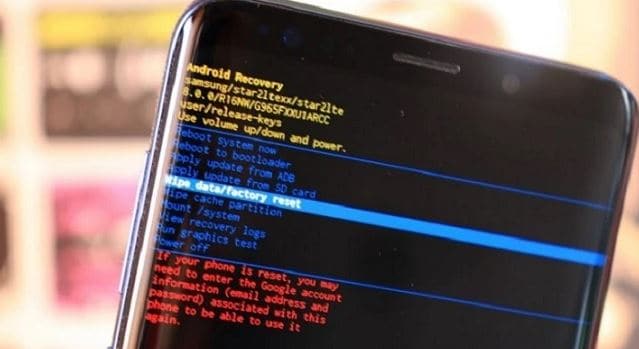
Step 1: Turn off your phone and hold the Power and Volume-down buttons simultaneously until the recovery mode screen appears. There are minor variations depending on the brand and model.
Step 2: Select the Wipe data/Factory Reset option using the volume buttons. To confirm the option, press the Power button.
Step 3: Choose Yes > Delete All User Data, then press the power button to continue. When the process is complete, turn on your phone.
So, before facing such awkward cases, like data loss, we suggest you have a backup habit of keeping your data safe.
3. Google Find My Device
Google Find My Device is a service that lets you remotely lock, track, and wipe data from stolen or lost phones. With a Google account and the password, it won’t be complicated to remove any locks on your phone. You can bypass the Android lock screen by following the steps below:
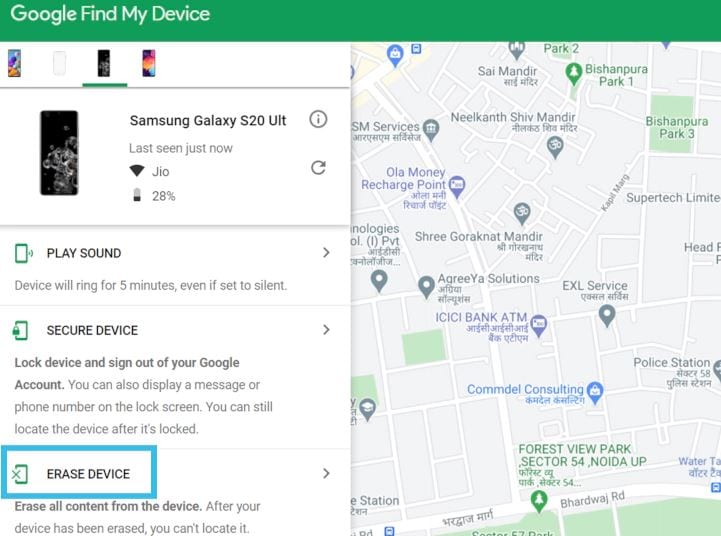
Step 1: Navigate to Find My Device and sign in with your Google account.
Step 2: Your phone receives a notification.
Step 3: Select Erase Device, confirm, and click Erase as a warning pops up on the screen.
Step 4: The factory reset process on your phone begins. When it’s finished, choose My Google Account instead of using your phone as if it were brand new.
Just like the hard reset, after using Google Find My Device, all your data and settings will be erased. Please make everything well prepared before you decide to unlock your device.
Easiest Way to Unlock Your Android Face Recognition Using Dr.Fone-Screen unlock
The methods mentioned above may be hard for you, and you don’t know any technical skills. If you are looking for an easy tool that can face unlocking for you, then Dr.Fone - Screen Unlock is all you need.
Dr.Fone by Wondershare has many useful tools, and Screen Unlock is one of them. It is the easiest and safest method to bypass the Android face lock. It is safe, secure, and easy to use.
The following guide explains how to use Dr.Fone-Screen unlock to bypass the Android face lock.
Step 1: Install and open Dr.Fone on your computer
Step 2: Run Dr.Fone on your PC and select “Screen Unlock” from the tools

Step 3: Select Unlock Android Screen
Please select” Unlock Android Screen” for the rest process.

Step 4: Select device model
Please click the button fitting your phone.

When arriving at this page, we have a lot of options to unlock your device screen for most phone brands, like Samsung, Nokia, LG, OPPO, etc.

Step 5: Enter into Recovery Mode
Here are examples of Samsung phones via its Recovery Mode to unlock your Android device screen.
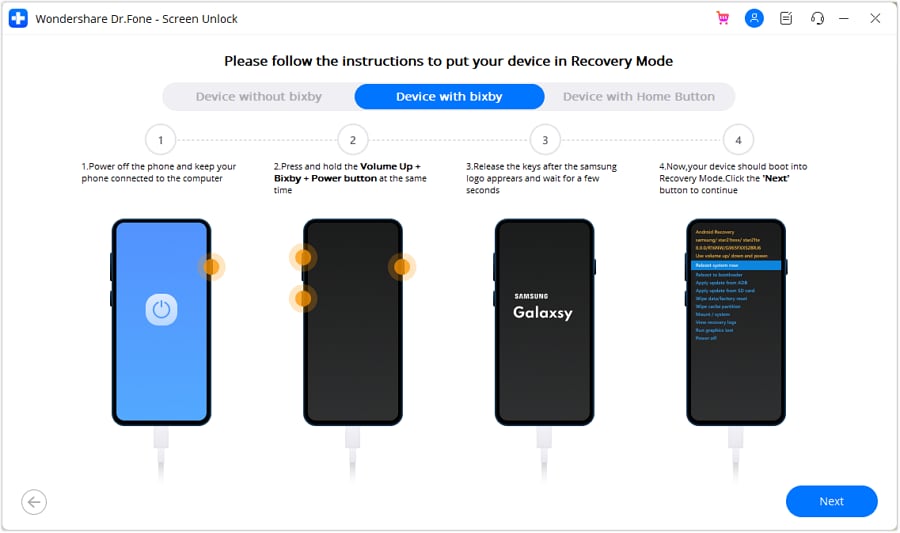
(Recovery Mode When the Samsung phone with Bixby)

(Recovery Mode When the Samsung phone without Bixby)
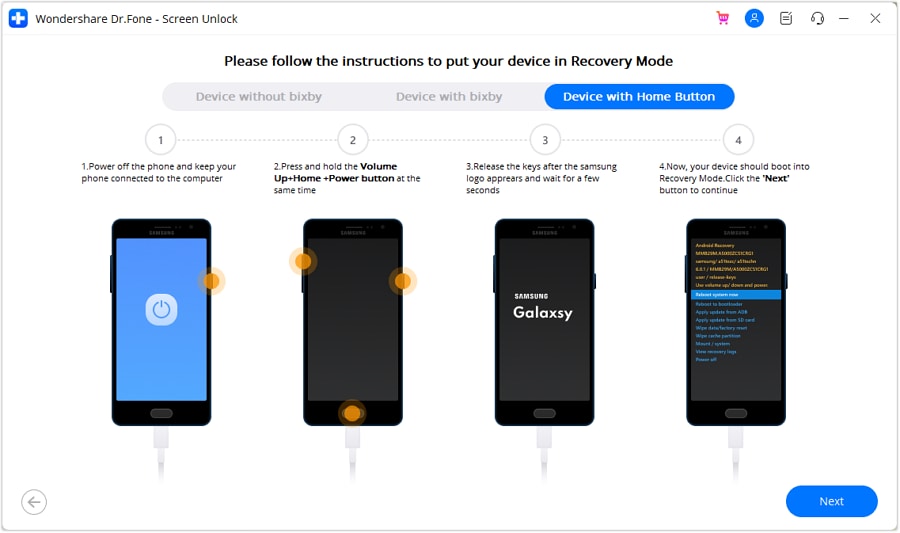
(Recovery Mode When the Samsung phone with Home button)
Step 6: Instructions to Wipe Cache Partition
This step in Recovery Mode is the most important to unlock your screen. Please click the buttons as instruction.
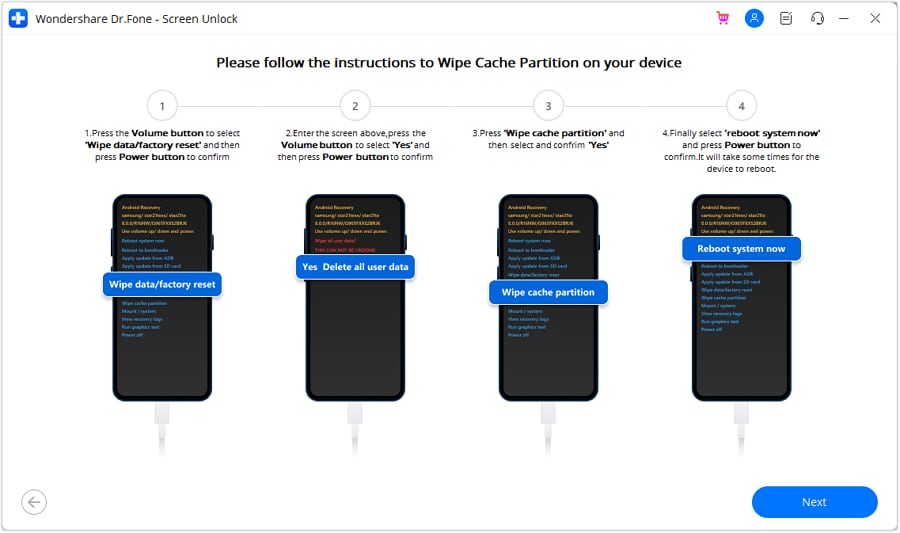
Now you can see your device is unlocked successfully

Conclusion
There are various methods to bypass Android face lock, but Dr.Fone-Screen Unlock is the easiest and safest method. Dr.Fone offers Screen Unlock and many other handy tools to help you recover, remove and unlock your Android phone without geeky knowledge. Dr.Fone-Screen Unlock is a step-by-step process, and you do not need to do anything; Dr.Fone will do all you want to do on your phone!
Unlocking the Power of Smart Lock: A Beginner’s Guide for Nokia G310 Users
Google constantly comes up with features to simplify the way users interact and complete tasks on the Android platform. One of the most important features that techies loved to debate about was the Smart Lock Android, a secure password manager functioning in sync with a Google account on the Android phone.
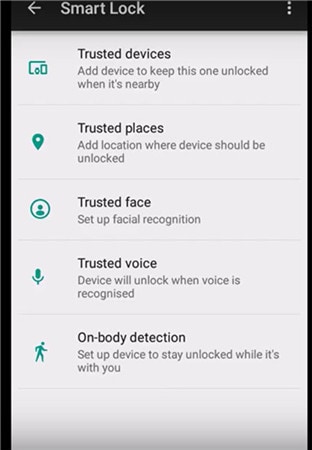
Part 1: What is Android Smart Lock?
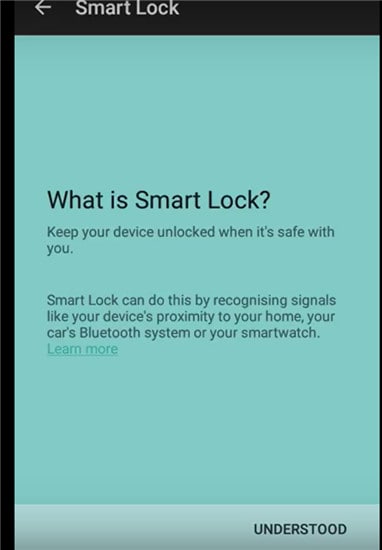
Android Lollipop added a feature called Smart Lock, and the feature was devised as a smart tool to prevent the Android phone from locking once it was initially unlocked. In other words, the feature overrides an Android phone’s Lock Screen feature, thereby saving users the need to enter passwords every time the Nokia G310 device locks.
If you’re at home, it’s likely your android phone is locked out if you haven’t accessed at for some time. Smart Locks solves the problem in many ways. It allows you to allocate trusted places. Once you within range of the trusted places, your phone won’t lock. Trusted devices come next. Smart Lock is assigned to Bluetooth and Android NFC unlock devices.
Finally, trusted face unlocking is the ultimate face recognition system that unlocks your Android device as soon as you look at it across the front-facing camera. A face unlock first introduced with Android Jelly Bean and has been significantly improved in later versions.
Turning On Smart Lock
The feature is enabled by first accessing settings. For example, in a Samsung Galaxy S6:
Tap on Settings, which is the gear symbol.
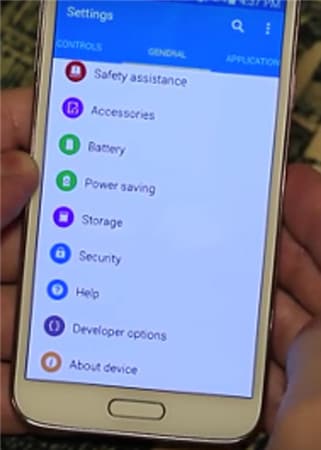
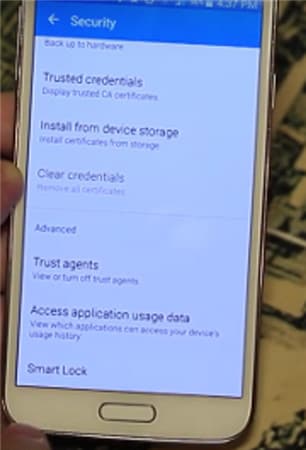
- • Click on Personal and tap on Security.
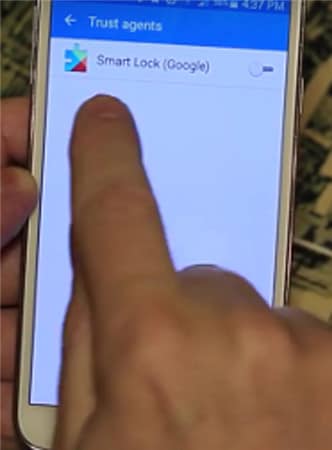
- • Go to Advanced and tap on Trust agents and make sure Smart Lock is turned on.
- • Under Screen Security tap Smart Lock.
- • Here, you need to enter your Screen Lock. If you haven’t done so, set up a password and PIN by following the on-screen prompts. The screen Lock is needed every time you have to change the Smart Lock settings.
Within Smart Lock, there are three options for setting the system. You can set up trusted devices, trusted face, and trusted places individually, combining two or all three at the same time. You can choose just one trusted face, but you have the option to set up as many trusted devices and trusted places as needed.
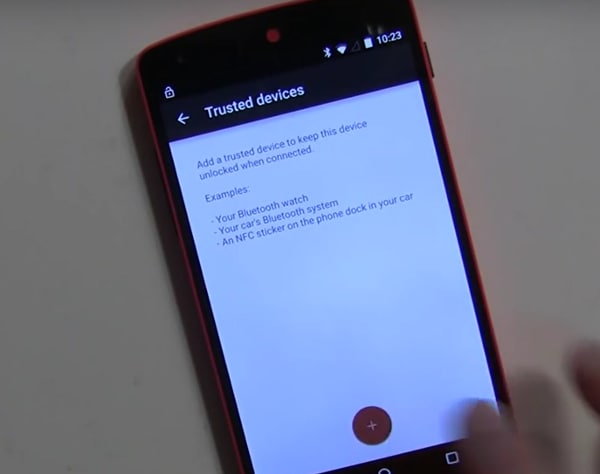
Part 2: Turn On Smart Lock For Android with Trusted Devices
You can decide on a trusted device to be paired with Smart Lock Android.
For example, you can set up a Smart Lock for Bluetooth in your Android Bluetooth settings. It can also be done for Android NFC unlock devices. Examples include the Bluetooth system in your car, NFC unlocks, android sticker on the car’s phone dock, or Bluetooth in your watch.
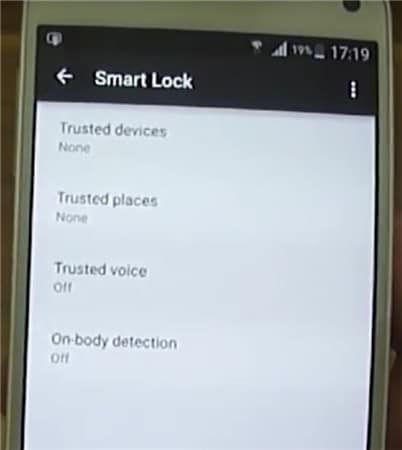
- • Go to Settings.
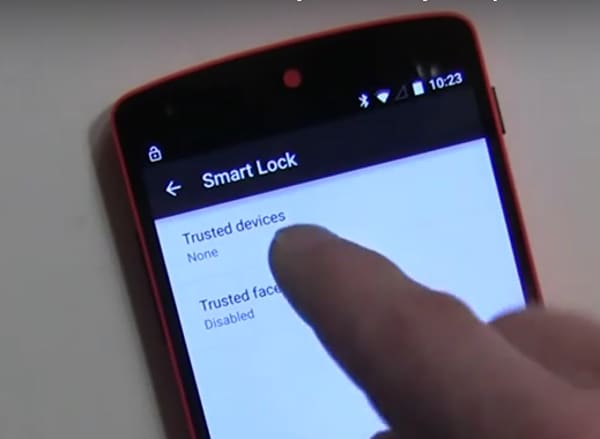
- • Tap on Security and then Smart Lock.
- • Existing paired options are listed under Trusted Devices.
- • Initially, trusted devices will show None.
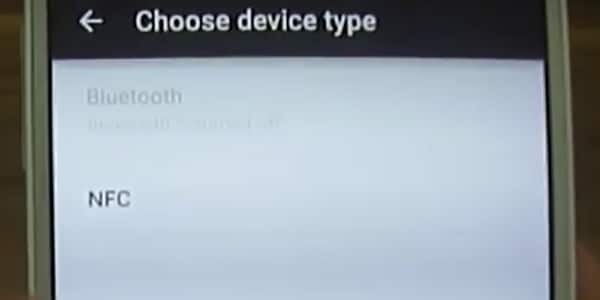
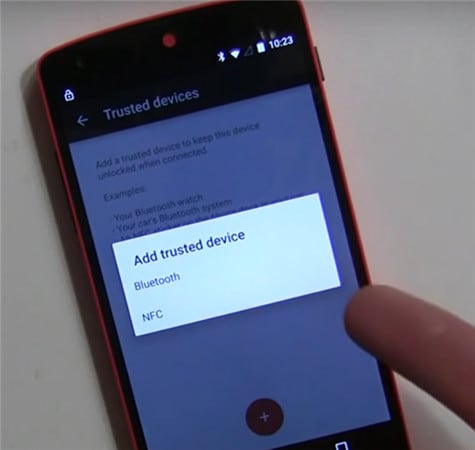
Tap on Add Trusted Devices.
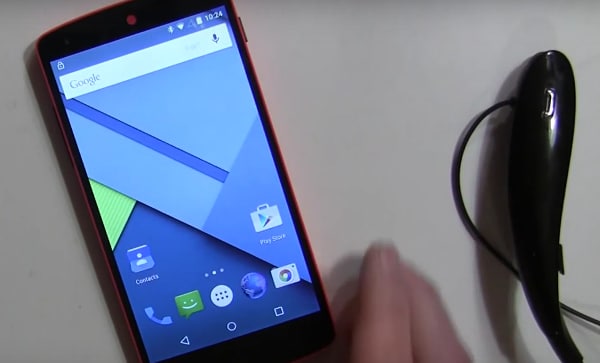
The next screen is the Choose Device Type.

Since you have already paired Bluetooth, it will ask you to choose the Nokia G310 device from the list.
- • As an example, let’s take the case of LG HBS800. It may show Not connected until you add it.
- • It will show up under Trusted devices in the Smart Lock menu.
- • When you turn the added device on, Smart Lock now unlocks the Android mobile.
Similarly, other Bluetooth and NFC unlock android supported gadgets can be added under the list of Trusted Devices.
Part 3: Turn On Smart Lock For Android With Trusted Locations
You can also add locations or addresses to Smart Lock Trusted Locations, and the phone unlocks automatically as soon as you arrive at the desired location. For example, you can set up your home or work address under Trusted Locations.
Check current settings first.

On a new Android phone, visit Settings>Personal.
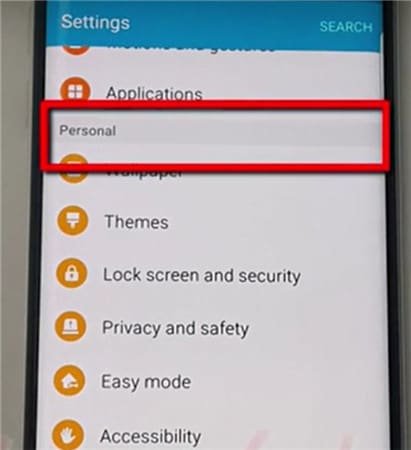
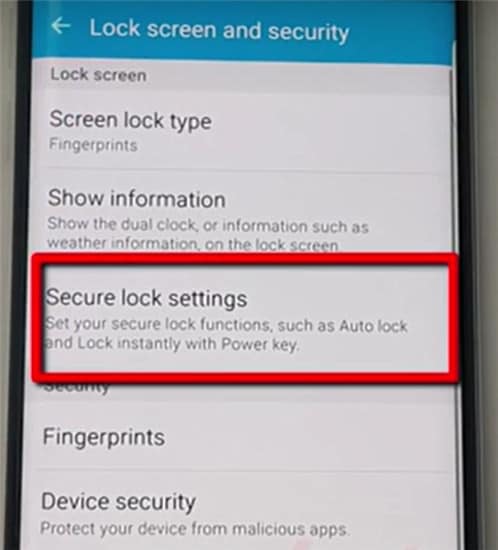
Then Lock Screen and Security.
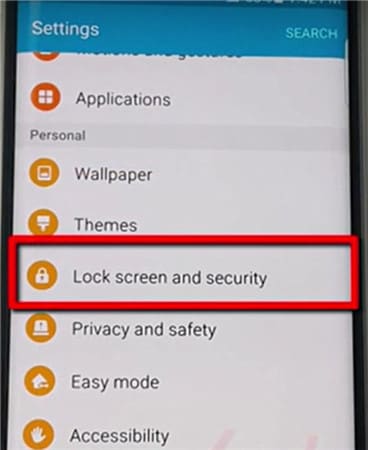
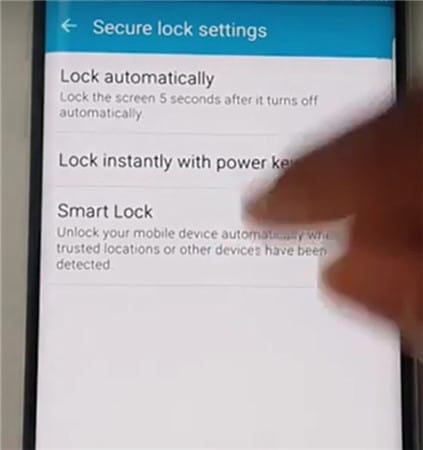
Then Secure Lock Settings.
Tap Smart Lock.
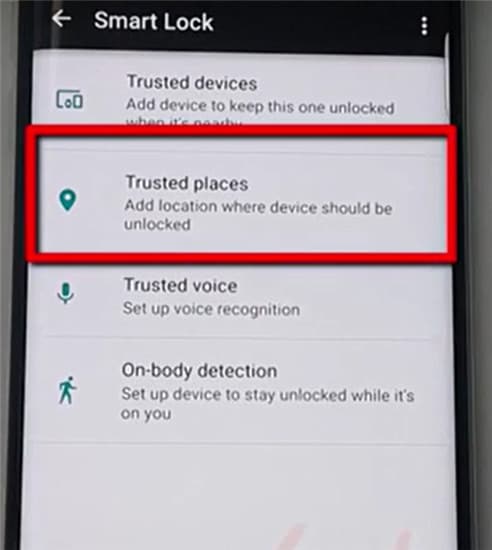
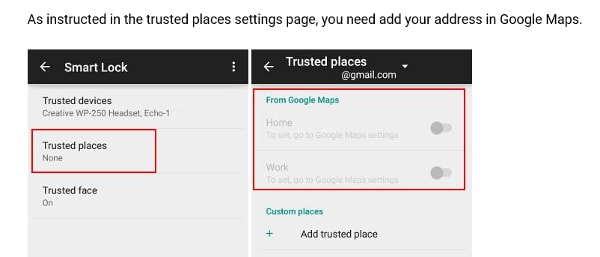
Tap on Trusted Places.
Tap on Add Trusted Places
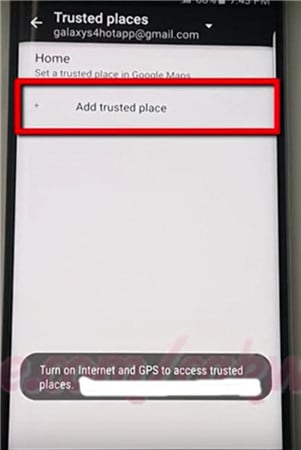
- • Initiate the Google Maps app on the Android phone. Make sure the Internet and GPS are on.
- • Pick a place.
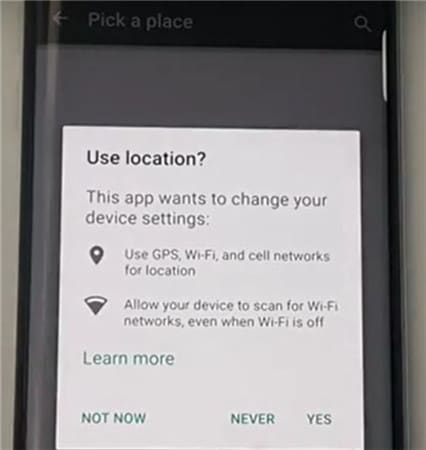
- • Click on Settings.
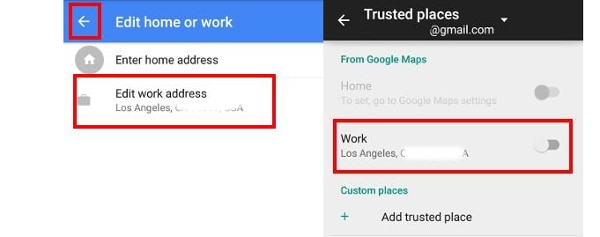
- • Click on Edit home or work. You can now add or edit the required addresses.
- • As an example, click on the Enter work address.
- • You now have the option to type in the address or use the address listed on Google Maps as the required work address.
- • A successful addition is listed and can be edited under the Edit work address.
- • Close the Google Maps app.
- • The work address is automatically propagated and configured with Smart Lock settings.
- • Go back to Settings> Security> Smart Lock> Trusted Places.
- • The work address you added is now listed under Work.
- • However, it is not yet configured as a Smart Lock option. Tap the location once, and it is enabled.
- • The switch along the address to the right turns blue, indicating it is enabled.
- • The work address is now listed under Trusted places for Work.
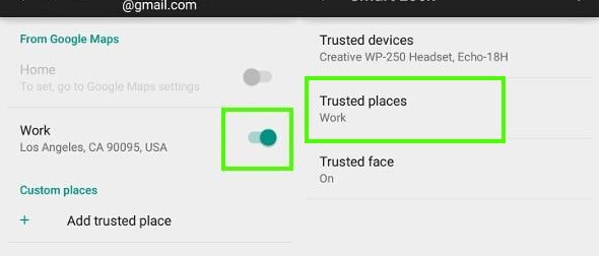
- • The phone is now configured for the work address and will unlock whenever you are at the location.
- • Since it works on Google Maps, the feature works through an Internet connection.
Part 4: Turn On Smart Lock For Android With Trusted Face
The feature recognizes your face and then unlocks the Nokia G310 device. Once you set up the Nokia G310 device to recognize your face as a trusted face, it will unlock the Nokia G310 device as soon as it recognizes you.
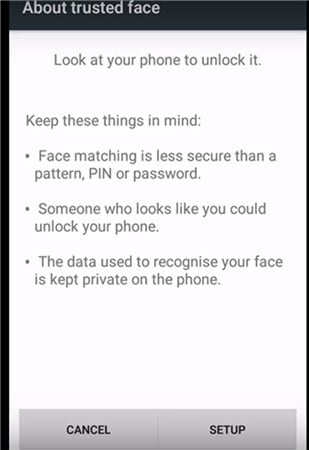
PRECAUTION: At best, this can be the first level of security, as one who resembles you to some extent can unlock the Nokia G310 device. Photographs are not stored in the system. The device does hold necessary data to recognize your face, and the security level is determined by how good the Nokia G310 device is configured. The data is not accessed by any app or loaded onto a Google server for backup.
Setting Up Trusted Face
- • Go to Smart Lock and tap Trusted Face.
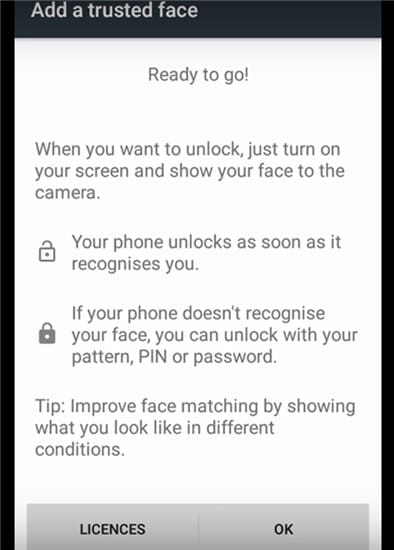
- • Tap on Setup. Follow on-screen instructions.
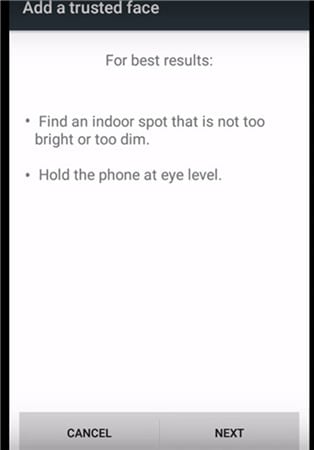
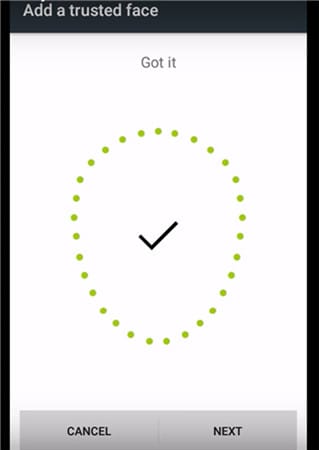
The device begins to gather data about your face. The trusted face icon appears. As a backup, in case Smart Lock does not recognize your face, use the manual system by applying the PIN or password to unlock the Nokia G310 device.
In case Trusted Face is not required, tap on reset Trusted Face appearing under the Trusted Face menu. Tap on Reset to reset the option.
How To Improve Facial Recognition In Your Bluetooth and Android NFC Unlock Devices
- • If you feel facial recognition is not up to the mark, go to Smart Lock and tap on a Trusted face.
- • Tap on Improve face matching.
- • Tap on Next and follow instructions on the screen to complete the task.
Smart Lock Android is a great feature and is only going to improve on time. With added security measures being introduced by Google for Bluetooth and NFC unlock android devices, including configuration to Google maps and Gmail, the feature may be one of the most important features to overcome constant blocking of devices even in protected places.
Video on How to Remove Android Lock Screen Without Data Loss
How to Unlock Nokia G310 Bootloader Easily
Do you want to unleash the true power of your smart phone? Do you wish to have complete control over your smart phone? If yes, well, here is the answer; unlock bootloader. For people who are already into the tricks of hacking and rooting smart phones, might be aware of this. But still, there are exciting new developments. Bootloader is a code existing in all operating systems which usually comes pre-locked. So, it is important, if you wish to have a custom ROM installed on the Nokia G310 device, or if you wish to have other controls like installing applications which are incompatible, to have the Nokia G310 device bootloader unlocked. But going through with the process of unlocking bootloader and rooting the Nokia G310 device will not help and rather might break the warranty of the Nokia G310 device. This definitely calls for a diligent watch on how to unlock HTC bootloader. So, it is imperative as a user to know the process of HTC bootloader unlock. This article serves you with some ways you could follow to unleash the true power of your HTC device. Here’s how you can do it.
Part 1: Why We Want to Unlock HTC Bootloader
For people with HTC device, unlocking bootloader would mean complete authority over the smart phone and you have all the power to control the HTC device by all means. Since, bootloader usually comes pre-locked, unlocking the bootloader is the initial step if you would like to have a custom ROM installed in your device. There are various advantages of HTC unlock starting from gaining rights of control to installing latest custom ROMs in the phone and installing incompatible applications. Moreover, HTC unlock bootloader could boost the Nokia G310 device speed and battery life and also help in making complete backups of the Nokia G310 device. You could also have controls to remove bloatware from the HTC device. So, all in all, while there could be certain side effects, if not done properly, there are various advantages of unlocking HTC bootloader. If the process is carried out properly, the Android device could be the perfect smart phone you would like to have.
Part 2: How to Unlock Nokia G310 Bootloader
Nokia G310 is the flagship device of HTC by all means. With a world of features and offerings, Nokia G310 truly is a beast. While the phone is very powerful without any modifications, the true potential is yet to be seen and that can only be done if the bootloader is unlocked. So, to have a complete control over the Nokia G310 device, it is important to unlock the bootloader and the process has to be carried out diligently. One of the initial things that needs to be ensured is that the Nokia G310 device is fully charged or atleast 80% mark. Make sure you have the fastboot drivers for the Nokia G310 device configured on the windows machine and the Android SDK. Here are some of the steps which can be followed to unlock bootloader.
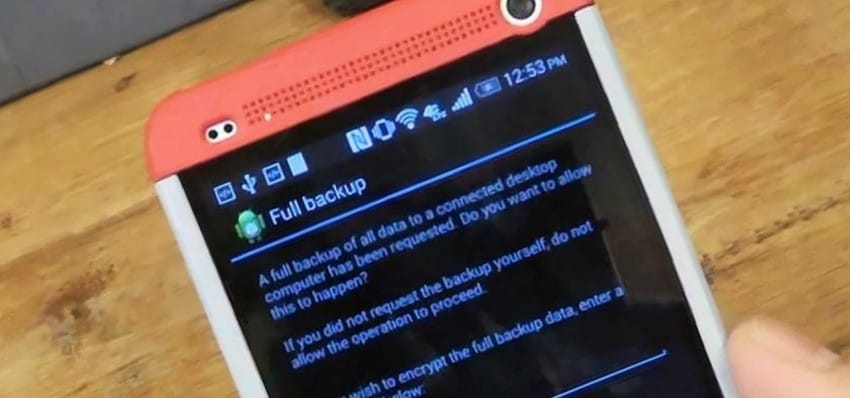
Step 1: It is always very important to keep the phone data backed up and more so when you are planning to unlock the bootloader.
As one of the initial measures, backup the Nokia G310 device completely as bootloader unlocking process will wipe all the data off. So, backup all the data like photos, contacts, multimedia files, documents, etc.
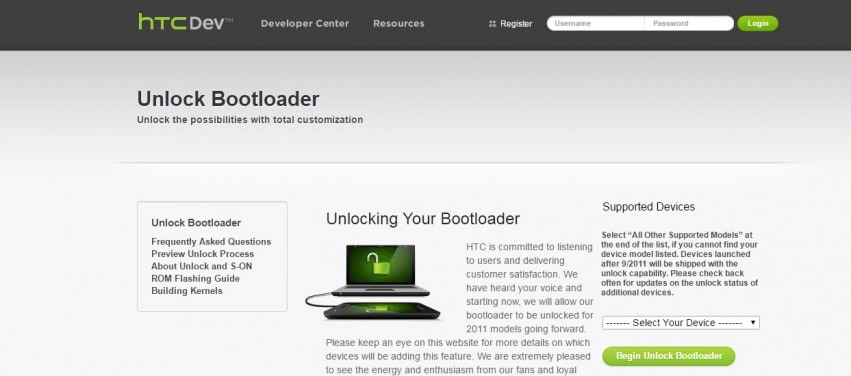
Step 2: Go to htcdev.com/bootloader. Ensure that you are registered with HTC and once the sign up is done, log in to HTC dev.
Now, ensure that HTC Sync Manager is installed on the PC.
Step 3: From the bootloader page, select your device using the drop down option as shown in the picture below.
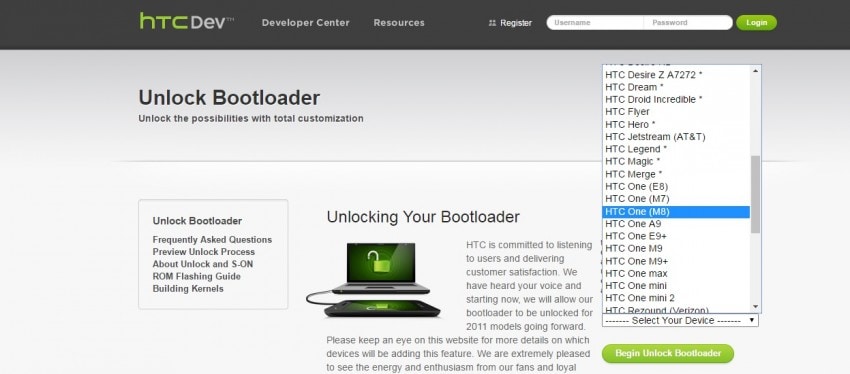
After selecting the Nokia G310 device, click on “Begin Unlock Bootloader”, and then confirm all the dialogue boxes which come your way on screen.
Step 4: Now, you will be presented with four steps to put the Nokia G310 device in bootloader mode. Disconnect the Nokia G310 device from the PC and turn the Nokia G310 device off completely. Press the volume down button along with the power button to switch the Nokia G310 device on in bootloader mode.
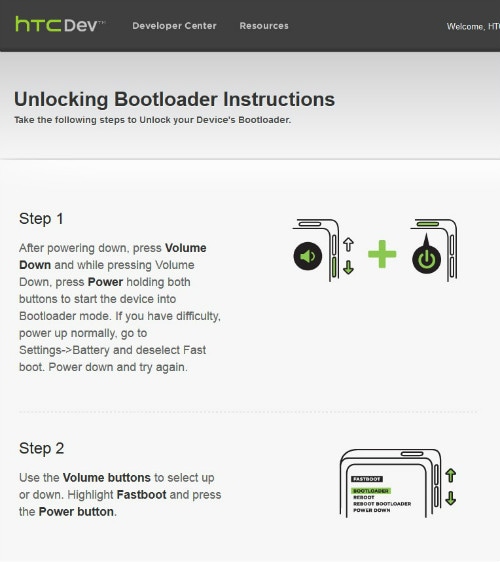
Step 5: Use the volume keys of the Nokia G310 device to select Fastboot option along with pressing power button to confirm, after the Nokia G310 device is in bootloader mode. Now, connect the Nokia G310 device to the computer using a USB cable.
Step 6: Go to Fastboot folder on the PC and holding down the shift key, click on any empty space followed by a click on “Open command window here”.
Step 7: In the command prompt window, type “fastboot devices” and press enter. Nokia G310 will show up in the command prompt.
Note: The drivers have to be installed correctly to see the Nokia G310 device in the command prompt. So, if the Nokia G310 device does not show up, reinstall HTC Sync Manager and try again after restarting the computer.
Step 8: On HTC Dev’s website third page, click on “proceed to Step 9”. Follow the steps listed and then click on submit. The unlock token code for the Nokia G310 device will be mailed by HTC. Download the token and name it “Unlock_code.bin” and place the token in the fastboot folder.
Step 9: Now, in the command prompt window, type the following:
fastboot flash unlocktoken Unlock_code.bin
Step 10: On the Nokia G310 , one message will appear asking if you want to unlock the Nokia G310 device bootloader.
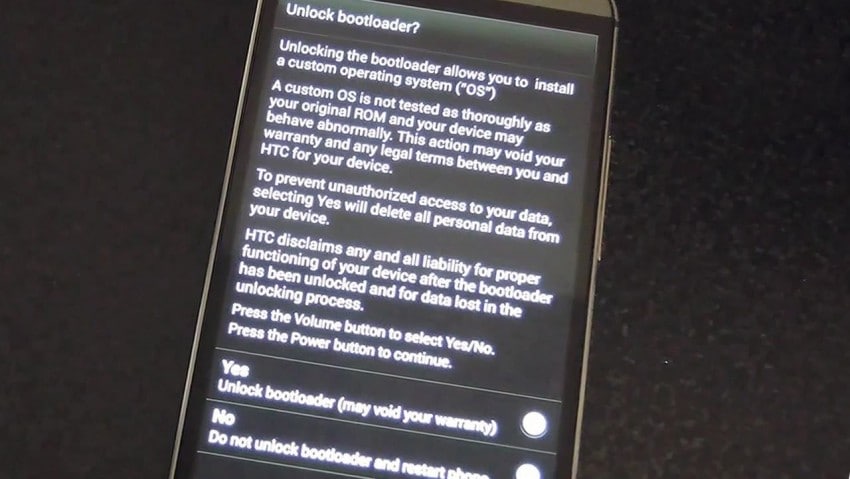
Use volume keys to select and power button to confirm. Once this is done, the Nokia G310 device will restart once and it’s done. The device is now bootloader unlocked.
Also read:
- [New] 2024 Approved Webcam Innovations for Enhanced Connectivity
- [New] Breakthrough Techniques for Effective MacScreenscreencasting
- [New] Tips for Constructing Inspirational Day-to-Day Visual Narratives
- [Updated] In 2024, Monetized Critique Videos The Truth Unveiled
- [Updated] Ultimate Playbook Navigating YouTube Etiquette for 2024
- Fortnite Sound Problems? Here's How You Can Repair Your Microphone
- How To Change Realme 12 5G Lock Screen Clock in Seconds
- How To Fix HP Laptop Screen Flickering Or Blinking Issues
- How To Unlock a Nubia Easily?
- How to Unlock Realme Phone without PIN
- In 2024, How Can We Unlock Our Realme Phone Screen?
- In 2024, How To Enable USB Debugging on a Locked Nokia C02 Phone
- In 2024, How To Enable USB Debugging on a Locked Realme C67 4G Phone
- In 2024, How to Unlock Realme GT Neo 5 SE Bootloader Easily
- Is your Xiaomi Redmi A2+ working too slow? Heres how you can hard reset it | Dr.fone
- Machine Prediction or Stardust Insights for the Future?
- Mastering Lock Screen Settings How to Enable and Disable on Realme GT Neo 5 SE
- Quick Fixes for Why Is My Vivo V30 Pro Black and White | Dr.fone
- Top 10 Password Cracking Tools For Realme C67 4G
- Title: Full Tutorial to Bypass Your Nokia G310 Face Lock?
- Author: Aaron
- Created at : 2024-12-21 16:39:17
- Updated at : 2024-12-28 16:00:52
- Link: https://easy-unlock-android.techidaily.com/full-tutorial-to-bypass-your-nokia-g310-face-lock-by-drfone-android/
- License: This work is licensed under CC BY-NC-SA 4.0.