
A Perfect Guide To Remove or Disable Google Smart Lock On Nokia C12
A Perfect Guide To Remove or Disable Google Smart Lock On Nokia C12
Google services are pivotal in enhancing user experience and securing personal data. Among these services, Google Smart Lock stands out for its ingenious features. These are integrated into Android devices, simplifying access and bolstering security. However, there are instances where users seek to disable or remove Google Smart Lock.
This article goes through the details of Google Smart Lock and its significance. It offers a solution to address unexpected screen lock scenarios on Android devices.

Part 1. Understanding Google Smart Lock and How It Works?
Want to know what is Google Smart Lock? Google Smart Lock serves as a multi-purpose tool within the Google ecosystem. It is designed to streamline security measures and password management access across platforms. At its core, Google Smart Lock operates as a feature that manages passwords. Google Smart Lock aims to enhance authentication processes. Primarily, it operates across Android devices and computers.
It offers a unified approach to security, ensuring you don’t have to remember all the passwords. Google Smart Lock securely stores and manages passwords for websites and apps. It enables users to access these services without repeatedly entering login details. When you visit a familiar website or app, Google Smart Lock fills in the login credentials. It automatically provides the login ID and password, maintaining effortless access.
Part 2. Recognizing Some Top Features of Google Smart Lock
Google Smart Lock’s password management has revolutionized how users handle and secure their login credentials. It remains a cornerstone when handling Android devices and computer systems. The following are several notable features that significantly enhance user convenience and security:
1. Password Autofill
Google Smart Lock simplifies the login process across apps and websites. It does that by automatically filling in saved credentials. This eliminates the need for users to remember and manually input passwords.
2. Cross-Platform Synchronization
It synchronizes saved passwords across multiple devices using the same Google account. This ensures smooth access to credentials on Android devices and computers.
3. Secure Storage
Passwords stored within Google Smart Lock are encrypted and securely stored in the user’s Google account. This maintains confidentiality and safeguards sensitive login information.
4. Effortless Password Generation
It allows the creation of strong and unique passwords when signing up for new accounts. That enhances overall account security and allows users to have strong passwords.
These features significantly ease the burden of password management and enhance user security. Yet, Google Smart Lock does have limitations that prompt some users to consider removing it.
Part 3. Why Is It Essential To Remove Google Smart Lock?
Despite its array of benefits, there are times when users consider removing or disabling Google Smart Lock. Described below are these limitations to better grasp why users might choose to Google Smart Lock turn off:
1. Privacy Concerns
Some users focus on privacy and feel uncomfortable with Google Smart Lock’s access to their passwords. The reason behind this is how easily anyone can access the saved password. All they need to do is access “Manage Passwords” in Google Chrome, and all their passwords will be open. This leads them to opt for more private password management options.

2. Glitches and Technical Issues
Technical glitches in the functioning of Google Smart Lock can be frustrating. This is especially prominent when managing passwords with similar usernames across different websites. The same can happen when using similar passwords for different websites or apps. Users experiencing such issues can seek to remove it to restore regular operations.
3. No Updates
You should be aware that Google Smart Lock for Passwords has been deprecated. This indicates it no longer receives updates or support from Google. Developers are advised to opt for Google’s One Tap Sign-in feature as an alternative by Google. It provides a more efficient and secure method for signing in to apps and websites.
4. Preference for Third-Party Tools
Certain users might have a preference for specialized third-party password management tools. They can go for solutions that offer a wider array of features. Many users might want to find options better aligned with their specific needs. This prompts them to disable Google Smart Lock.
Part 4. Understanding Some Effective Ways To Disable or Remove Google Smart Lock
If you want to disable Google Smart Lock on your devices, it is a relatively easy thing to do. Several ways are available to disable or remove Google Smart Lock from devices. These approaches cater to users’ diverse needs and preferences. Here is how to turn off Google Smart Lock:
Way 1. Disabling Google Smart Lock on Your Android
To deactivate Google Smart Lock on your Android device, you can use Chrome. Google Chrome is the main hub for storing all your login credentials for websites and apps. This provides the quickest way to disable Google Smart Lock. To disable Google Smart Lock from the Chrome app on your Android device, follow these steps:
- Step 1. Begin by opening the Google Chrome app on your Android device. Then, tap the “three dots” icon from the top right corner and press “Settings.”

- Step 2. Within the Settings, choose “Passwords,” and on the following screen, look for the “Save passwords” and “Auto Sign-in” options. Toggle off both options to disable the Google Smart Lock feature from your Android.

Way 2. Removing Google Smart Lock From Android Settings
Google Smart Lock enables users to keep their phones unlocked under specific, pre-approved, and secure conditions. This simplifies device usage by eliminating the need to input passwords or security codes. The basic working of this aspect of Google Smart Lock, now known as “Extend Unlock,” is divided into three parts.
The first one is on-body detection, which keeps the Nokia C12 device unlocked when it’s carried or held by the user. The other two are “Trusted Places” and “Trusted Devices.” Users can set specific locations, like home or work, as “Trusted Places.” When the Nokia C12 device is within these locations, it remains unlocked and accessible. Smart Lock integrates biometric authentication methods to unlock devices.
As helpful as it is in managing access to your Android device, privacy concerns can cause users to disable this lock. The following are the steps you can take to disable Google Smart Lock/Extend Unlock via Android settings:
- Step 1. Access “Settings” on your Android device and scroll down to tap “Passwords & security.” Here, press the option labeled as “Privacy.”
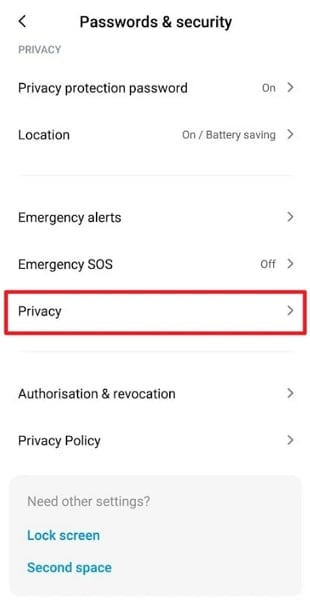
- Step 2. On the following screen, head to the “Trust agents” option and toggle off the “Smart Lock (Google)” option to disable the feature on your device.

Way 3. Disabling Google Smart Lock From Chrome
While you can manage this feature on Android devices, it is also available on Google Chrome on your computer. To disable Google Smart Lock from Google Chrome on your computer or laptop, you can follow these steps:
- Step 1. On your computer, access Google Chrome and click the “three dots” near the top right corner. From the context menu, choose “Settings” and tap “Autofill and passwords” from the left side.

- Step 2. Now, click “Google Password Manager” on the ensuing window, and choose “Settings” from the left side. Toggle off “Offer to save passwords” and “Sign in automatically” to disable Google Smart Lock.

Part 5. Forgot Google Smart Lock From Android Device? Recover Using Wondershare Dr.Fone
Disabling the Google Smart Lock can have a side effect, which is the danger of forgetting an important password. One of these important passwords is the screen lock on your Android device. These scenarios could involve forgetting the Nokia C12 device’s PIN, pattern, or password. This could be essential for unlocking the phone or accessing its functionalities. It can lead to being locked out of the Nokia C12 device, hindering normal operations.
In such instances, regaining access becomes crucial. Wondershare Dr.Fone offers a robust solution in these cases. This software specializes in unlocking Android devices when users forget their device passcodes. It offers a swift solution to eliminate Android lock screens within 5 minutes. If you own a Samsung or LG device, you can unlock it without data loss.
Notable Features of Wondershare Dr.Fone
- This tool bypasses the Android FRP lock without necessitating a PIN or Google account.
- It broadens its ability to unlock well-known Android brands like Samsung, Huawei, and LG.
- Additionally, its intuitive interface guarantees that no technical know-how is required.
Step-by-Step Guide To Unlock Android Smartphone via Wondershare Dr.Fone
Dr.Fone makes the process of unlocking an Android device a breeze. Here’s a step-by-step guide to recover an Android device using Wondershare Dr.Fone:
- Step 1. Unlocking an Android Device Using Wondershare Dr.Fone
To begin, install the most recent edition of Wondershare Dr.Fone and connect your Android device using a USB cable. Access the “Toolbox” menu and locate the “Screen Unlock” tool upon successful connection. Once opened, choose the “Android” option when prompted. Next, select “Unlock Android Screen” from the available options.

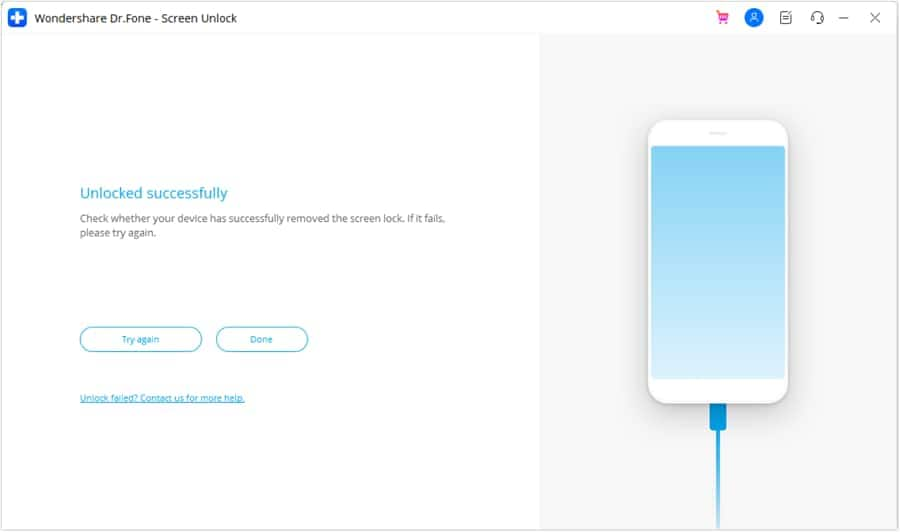
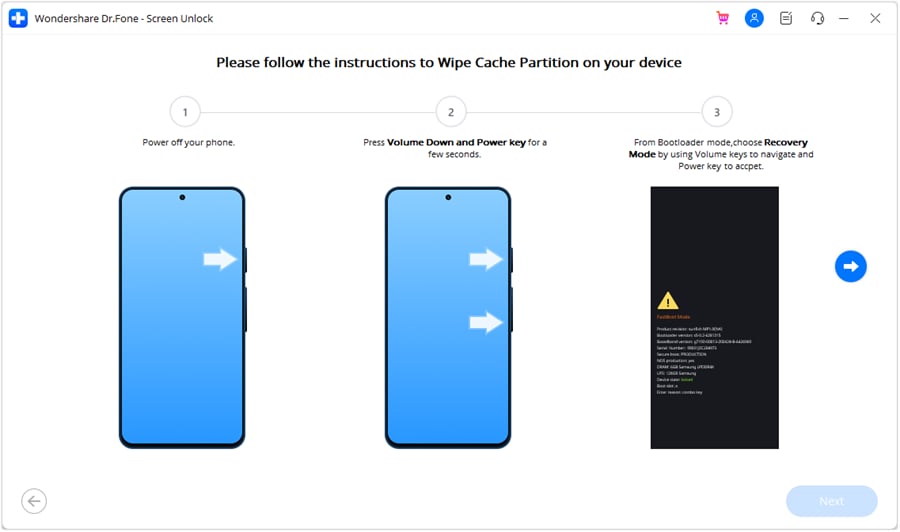
- Step 2. Device Brand Selection and Screen Unlock Initiation
Select your device brand and “100% Remove Screen Lock.” Selecting the Nokia C12 device brand initiates access to the designated mode. It will trigger Dr.Fone to commence unlocking the Android screen. Note that entering specific modes varies depending on the Nokia C12 device brand. Upon successfully unlocking your Android device screen, tap “Done.”
Tips: Forget your device password and can’t get access to it? No worries as Dr.Fone is here to help you. Download it and start a seamless unlock experience!
Conclusion
This comprehensive guide describes the significance of Google Smart Lock. It explains its features and various methods to disable it from Android devices and Chrome. Exploring scenarios of forgotten passcodes highlighted the critical need for a reliable solution. Wondershare Dr.Fone emerges as a savior in such situations. It offers a secure means to regain access when locked out of your device.
A Complete Guide To OEM Unlocking on Nokia C12
Android, known worldwide as a major player in phone operating systems, stands out for its flexibility and open-source nature. This allows users to customize their devices extensively. However, despite this openness, certain features and capabilities can still be locked or restricted, either by Google or the Nokia C12 device manufacturer.
For those looking to truly unleash the full potential of their Android device, an OEM unlock is an essential step. This article will delve into the process of OEM unlocking on Android, guiding you through its benefits and how to safely perform it.
OEM lock might sound like technical jargon to many. However, it’s a key concept for those who wish to dive deeper into Android customization. OEM stands for Original Equipment Manufacturer. Unlocking in this context refers to removing restrictions made by the manufacturer on the Nokia C12 device.
This process allows you to gain deeper access to the Nokia C12 device’s software. Thus, OEM unlocking is often required for customizing or modifying the system at a more advanced level.
Why Enable OEM Unlock?
The primary reason to enable OEM unlocking is to gain the ability to root your device or install custom firmware, also known as ROMs. Rooting is the Android equivalent of jailbreaking. It allows users to access and modify the Nokia C12 device’s software at the deepest level.
This can enable the installation of apps and software that require more permissions than what is typically available. On the other hand, custom ROMs can change your device’s interface. They can also add features not available in the stock version of Android.
Pros and Cons of OEM Unlocking
Here are some great things you can get when you allow OEM unlock.
- The most significant advantage is the ability to customize your device far beyond what’s possible with standard settings.
- Root access. It allows for rooting the phone enabling advanced features and apps.
- Custom ROMs. Users can install different versions of Android or entirely new operating systems.
On the other hand, here are some cons that you must consider before performing the process on your phone:
- Security risks. Root access can make your device more vulnerable to malware and hacking.
- Void warranty. OEM unlocking often voids the manufacturer’s warranty.
- Potential for bricking. Incorrect procedures can render the Nokia C12 device unusable, known as ‘bricking’.
It’s crucial to understand that OEM unlocking is not without its risks. It does open the door to several customizations and tweaks. However, it can also compromise the security of your device. There’s always a chance of bricking your phone, especially if the unlocking process isn’t followed correctly or an unstable custom ROM is installed.
Additionally, most manufacturers will void your warranty once you unlock the bootloader. This leaves you without support in case something goes wrong. So, in the next sections, you’ll be guided through the steps of OEM unlocking. You’ll also learn how to do it safely, ensuring you make the most out of your Android device.
Part 2: How To Enable OEM Unlock on Your Android Phone
Enabling OEM unlock can feel like stepping into uncharted territory. Still, it’s relatively straightforward if you follow the right steps. Before you start, it’s important to remember that the exact process can vary slightly depending on your device’s brand and model. However, the general steps are usually similar across most Android devices.
- Step 1: Before proceeding, ensure you back up all important data. Enabling OEM unlock may require a factory reset, which erases all data on the Nokia C12 device.
- Step 2: Go to your phone’s Settings > About Phone. Then, tap on the Build number seven times. You should see a message that says you’re now a developer.
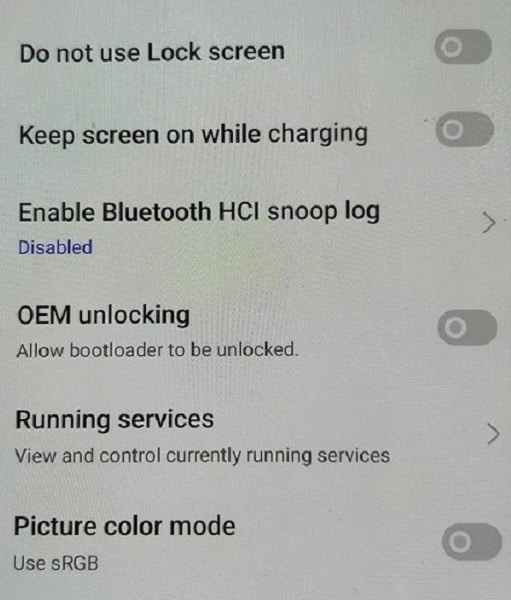
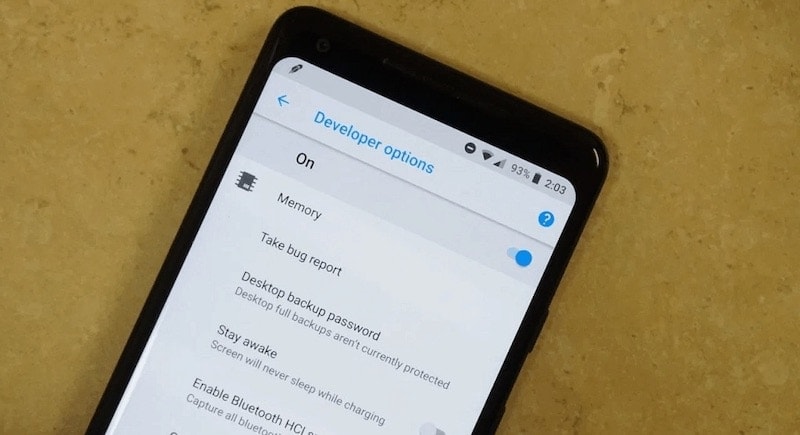
- Step 3: Find and select Developer options on Settings. Then, tap OEM unlocking. You might need to enter a PIN or password.
Here are some common links where you might find the needed PIN or password:
After these steps, your device’s bootloader is now unlocked, and you can proceed with rooting or installing custom ROMs. Remember that this is a significant change to your device’s system, and it should be done cautiously and ideally only if you’re comfortable with potential risks.
Part 3: What Can You Do After OEM Unlock?
Unlocking your phone’s OEM opens up a world of possibilities. It allows you to customize your device beyond what’s available in its factory settings. This newfound freedom, however, comes with its own set of responsibilities and risks. Here’s what you can do after having your phone OEM unlocked.

Root Your Device
Rooting is akin to having the master key to your device’s software. It allows you to gain superuser access, enabling modifications and access to system files that were previously restricted. With rooting, you can:
- Remove pre-installed apps or bloatware.
- Customize system settings and UI elements.
- Enhance performance or battery life through underclocking or overclocking the CPU.
Flash a Custom ROM
A custom ROM is a new operating system you can install on your device. This is one of the most popular reasons for OEM unlocking. Custom ROMs offer:
- The latest Android updates, even for older devices, are no longer supported by manufacturers.
- New features and customization options that aren’t available in the stock ROM.
- Potential performance improvements and unique user interfaces.
Enjoy High Customization
With an OEM unlocked device, the sky’s the limit regarding customization. You can:
- Install custom kernels for better performance and battery life.
- Use powerful apps that require root access for advanced device management.
- Customize everything from the boot animation to the layout of your UI.
However, it’s crucial to proceed with caution. Rooting and installing custom ROMs can void your warranty and, if not done correctly, can turn your device into an expensive paperweight (a state often referred to as “bricking”). Always use reliable sources for your custom ROMs and root-access apps.
Bonus: How To Unlock Your Android Screen When You Forgot Password
Forgetting the password to your Android phone can be a stressful experience. It locks you out of your device. It cuts your access to personal data, contacts, and essential apps. However, aside from OEM unlocking, learning the skill of screen unlocking is incredibly useful in such situations. It’s not just about regaining access. It’s about harnessing control over your device during forgetfulness or emergency.
Wondershare Dr. Fone’s Screen Unlock (Android) will save you in these situations. It’s designed to unlock your phone without requiring a factory reset. It saves your data from being erased. This feature supports unlocking patterns, PINs, passwords, and fingerprints, offering a comprehensive solution for regaining access to your device.
![]()
Dr.Fone - Screen Unlock (Android)
The Best UnlockJunky Alternative to Bypass FRP and Solve Your Screen Locks
- Remove all Android screen locks (PIN/pattern/fingerprints/face ID) in minutes.
- Bypass the FRP lock of Samsung without a PIN or Google account.
- Everyone can handle the lock screen without any tech knowledge.
- Provide specific removal solutions to promise good success rate.
4,008,671 people have downloaded it

How To Perform Screen Unlock With Dr.Fone
The process is straightforward. It involves connecting your device to a computer and running the Dr.Fone software. Then, you’ll follow simple on-screen instructions. Learn how to do those below:
- Step 1: Go to Toolbox > Screen Unlock. Connect your Android device with your PC.

- Step 2: Select Android on this page.

- Step 3: Select Unlock Android Screen.
- Step 4: Select your device brand.

- Step 5: Click Remove without Data Loss.

- Step 6: After confirming device details, type “000000” to execute the operation.

- Step 7: Follow the on-screen instructions for putting your device into download mode. Then, wait for the process to finish.

- Step 8: Once complete, click Done. If your device still isn’t accessible, click Try again.

Conclusion
In wrapping up, you’ve explored the ins and outs of “what is OEM unlock” in the Android world. It’s a key to opening up a trove of customizability on your Android device. It lets you tweak and tailor your phone to your heart’s content. But remember, with great power comes great responsibility.
Diving into OEM
Pattern Locks Are Unsafe: Secure Your Nokia C12 Phone Now with These Tips
Pattern locks have been available for about as long as people can remember, and they have been hugely popular with people thanks to how easy it is to simply swipe your screen and unlock your smartphone, as against, say, keying in the 4-digit PIN/ 6-digit PIN. However, pattern locks are easy to crack, and today, we bring you all you want to know about pattern locks and how to create a hard pattern lock. Further to this, we also tell you how to move beyond pattern locks and what to do in case you forgot the hard pattern lock you just set and are unable to unlock your smartphone.
Part 1: What You Need to Know About Pattern Locks
Pattern lock is an Android-only feature that makes it easy for users to have a modicum of security on their smartphones. Most users do not prefer using and remembering a PIN to unlock the smartphone. Creating a pattern makes it easier, somehow.
There is a 9-point grid on which you swipe your finger from point to point, in any direction, and when you take your finger off, that pattern you swiped becomes the key to unlock your smartphone.
Pattern locks were exceedingly common only a few years ago, and they are not recommended for use any longer due to concerns (mentioned later in the article).
1.1: Popularity and Usage
Old habits die hard, or so they say, right? That’s because it is true. We are creatures of habit, and pattern locks have been around for a long, long time. We are accustomed to pattern locks. So, even with even easier technologies such as fingerprint recognition and face recognition, we tend to gravitate towards the familiar old pattern lock.
The only thing is, there is a reason why pattern locks are no longer the preferred option to use for unlocking your smartphones. As it happens, that reason is security, and it can be very easy for humans to take a swipe (pardon the pun) at your pattern lock. And guess what? The research conducted suggests that they would get it right with an unsettling accuracy.
1.2: Advantages and Drawbacks
With on-the-go lifestyles, our smartphones have become indispensable and contain some of the most sensitive aspects of our lives – IDs, credit and debit cards in digital wallets, photo and video memories, business documents – you name it, the smartphones have it, on the go. This has opened our lives up to the public at large, and if someone steals our smartphone or, best case, finds it, the only barrier preventing them from being privy to all that wealth of our sensitive information is that screen lock – the pattern lock that we set on our smartphones. That’s it – the single pattern lock stands between malicious actors and our data. You might be beginning to realize just how crazy this is.
Advantages of Pattern Locks
There are two advantages to using pattern locks. One, they are better than nothing. Two, they are easy to use. And that’s about it. There is no third advantage to pattern locks. We might think we set a hard pattern lock that nobody could guess, but, as research proves, we might be thinking too low of human prowess.
Disadvantages of Pattern Locks
Security, or rather, the lack of it, is the lone disadvantage of using a pattern lock. What good is a pattern lock that can be easily deciphered? Sure, they are easy to use, and they are better than not having anything, but would you really want to protect your life’s data with something that could be, as researchers found out, breached in under 5 attempts? We don’t think you do!
The research found that 64% of test subjects who were shown videos of people unlocking their phones could correctly guess a 6-point pattern lock, that too after viewing the video only once! That number shot up to 80% if they were allowed to see the video again. That is simply astounding and a nightmare for security. When it comes to PINs, only 11% could guess a 6-digit PIN after viewing the unlocking video once, and that number shot up to 27% when they could see the video two times.
Part 2: How To Create a Hard Pattern Lock (Including Remembering Complex Patterns)
Now, if you must continue using a pattern lock, let’s help you know how to create a hard pattern lock that would not be as easy to decipher as easy pattern locks. For that, you should know how people use pattern locks, the kind of pattern locks they create, and the ones that are the most commonly used pattern locks. That way, you can avoid those fallacies and create a hard pattern lock for your smartphone.
2.1: The Pattern Locks People Use Most Commonly
Marte Loge, an M.Sc. Computer Science student, gave a presentation on pattern locks at DEFCON 23 and made a bold claim. She said, “Tell me who you are, and I will tell you your lock pattern.”
She presented the following statistics to support her claim:
- - In her research, she found that 77% of people started with one of the 4 corners when creating a pattern lock.
- - 44% of people started with the top-left dot and 15% with the top-right, while the bottom-left was preferred by 14% of her test subjects.
- - People set 5-point pattern locks on average, and most users were content with a 4-point pattern.
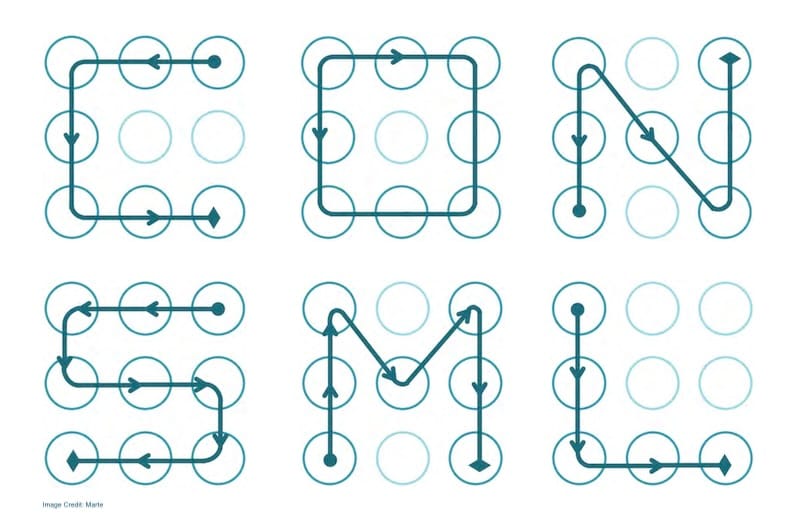
These are some of the most common pattern locks people create:
- - patterns in the shapes of alphabets,
- - patterns in the shapes of numerals,
- - patterns in any other simple shape, such as square, triangle, star, etc.
To understand how this is a security nightmare, the possible combinations for a 4-point pattern are a measly 1624, whereas by adding just 1 more point to the pattern and creating a 5-point pattern, the number of possible combinations becomes 7152, an increase of 5528 combinations. In stark contrast, creating a 9-point pattern would give you over 140,000 possible combinations!
2.2: How to Create a Hard Pattern Lock
Knowing what most people do when creating a pattern lock, it becomes easy to avoid those mistakes and instead create a hard pattern lock for oneself.
- - Do not start creating a pattern lock from any of the 4 corners of the grid.
- - Never use your first initial as your pattern lock.
- - Never use the shape of a numeral as your pattern lock.
- - Use all 9 points on the grid to create your pattern lock, and contrary to popular belief, you can go over the connecting lines several times, creating a hard pattern lock that would not be as easy for people to decipher!
Parental Control Software
## Part 3: Going Beyond Pattern LocksYou might think that now that you have set a hard pattern lock, you are good to go. Hardly. Technology has evolved, so have methods to break into your device.
Step 1: Set a 6-digit PIN
The minimum you should do today is set a 6-digit PIN to unlock your phone. Consider this a necessary investment into the safety of your data residing on your smartphone.
Step 2: Use Fingerprint Recognition (or Face Recognition on Apple Devices)
All modern smartphones released over the last decade have come with fingerprint recognition. Using fingerprint recognition requires you to set a 6-digit PIN and then set a fingerprint to unlock your device. You can set additional fingerprints, too.
This way, your device is the most secure it can be today. In case your fingerprint is not recognized for any reason, the phone falls back on the 6-digit PIN that you can enter and unlock your phone.
While face recognition is available on both Android and Apple devices, it is truly secure only on Apple devices. This is why Apple iPhones released after the iPhone X in 2017 have come only with Face ID. They fall back on a minimum 6-digit PIN (called Passcode in Apple world) to unlock in case the face does not get recognized in the first attempt.
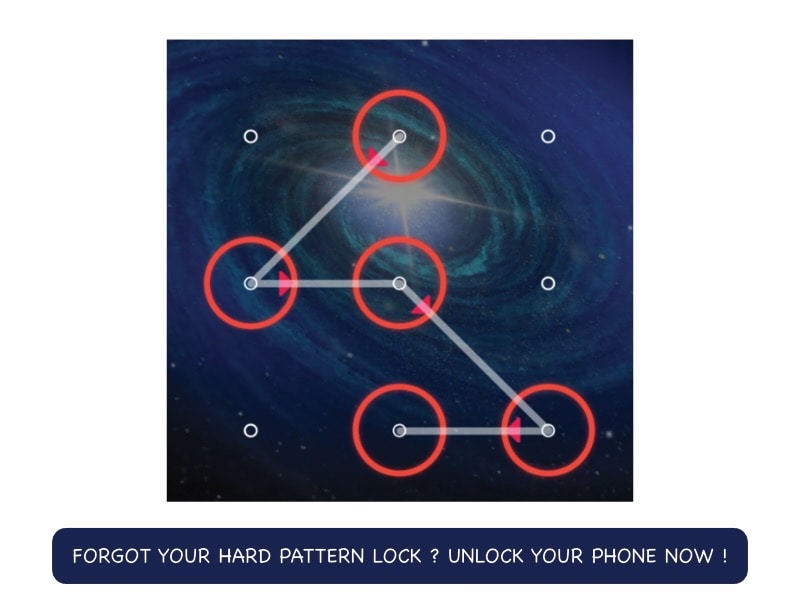
## Part 4: How To Unlock Phone If Hard Pattern Lock ForgottenJust in case you set a hard pattern lock and promptly forgot that abstruse pattern you just set, we have a tool for you to quickly unlock your phone in case of a forgotten hard pattern lock: Wondershare Dr.Fone - Screen Unlock.
![]()
Dr.Fone - Screen Unlock (Android)
Remove the Hard Pattern Lock on Your Nokia C12 If You Forgot!
- Remove all Android screen locks (PIN/pattern/fingerprints/face ID) in minutes.
- Bypass the FRP lock of Samsung without a PIN or Google account.
- Everyone can handle the lock screen without any tech knowledge.
- Provide specific removal solutions to promise good success rate.
4,008,671 people have downloaded it
Download the latest version of Dr.Fone from the Wondershare website and launch the app.
Step 1: Click Android under Toolbox > Screen Unlock.
Step 2: Click Unlock Android Screen.
Step 3: Select your device manufacturer.
Step 4: Prepare your device to unlock the screen.
When the greyed Next button becomes available, click it and wait for your device to be unlocked.
All data on the Nokia C12 device is wiped under this method. Select Samsung phones may be unlocked without data loss. Check this list for devices that may be unlocked without data loss.
Closing Words
Whether it is an easy pattern lock or a hard pattern lock, the fact is that pattern locks are antiquated and a security nightmare. A minimum 6-digit PIN must be used, and using fingerprint recognition is the preferred way to go for Android devices. Using fingerprint recognition will require that users create a 6-digit PIN. On Apple devices launched after 2017, there is Face ID, Apple’s marketing term for face recognition. If you did indeed still set a hard pattern lock, only to promptly forget it, use Wondershare Dr.Fone – Screen Unlock (Android) to seamlessly unlock your phone right now.
- Title: A Perfect Guide To Remove or Disable Google Smart Lock On Nokia C12
- Author: Aaron
- Created at : 2024-07-15 19:12:25
- Updated at : 2024-07-16 19:12:25
- Link: https://easy-unlock-android.techidaily.com/a-perfect-guide-to-remove-or-disable-google-smart-lock-on-nokia-c12-by-drfone-android/
- License: This work is licensed under CC BY-NC-SA 4.0.